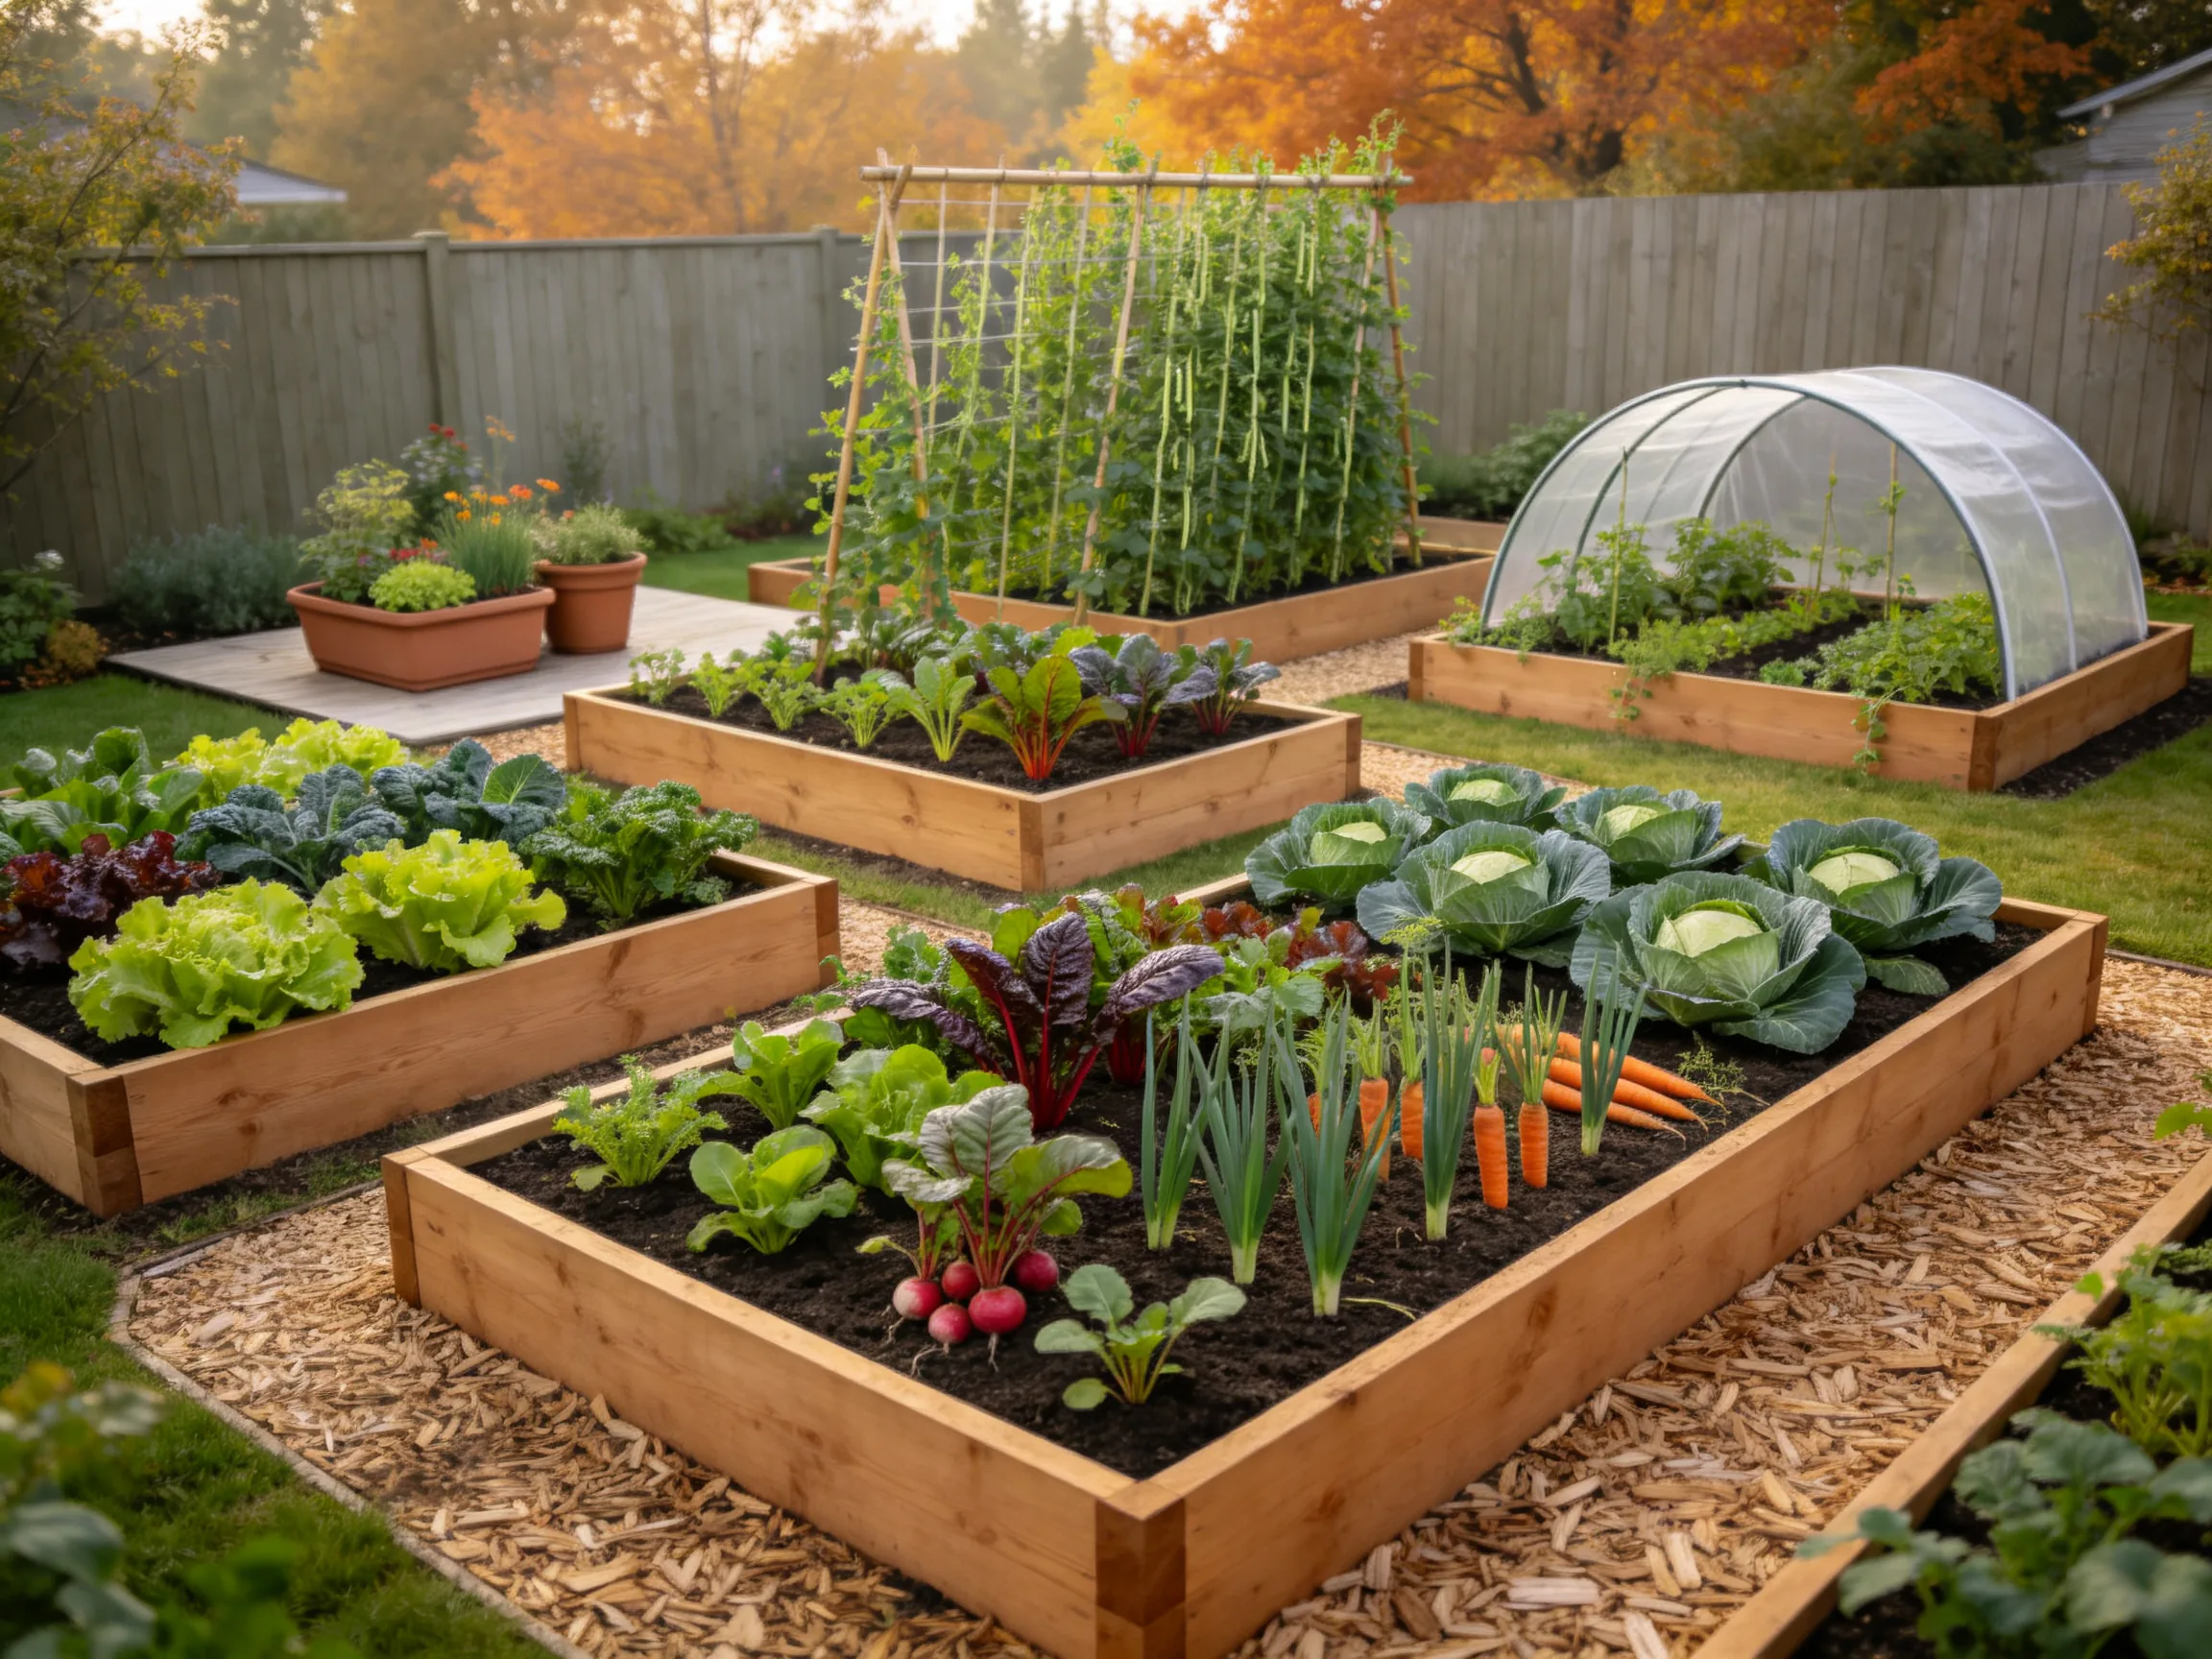
A productive fall vegetable garden layout makes the most of shortening days by matching crop height, maturity time, and cold tolerance to the available space. Before planting, check your local average first-frost date and compare it with each seed packet’s days to maturity, allowing extra time because growth slows as daylight decreases. These layouts can be adapted for compact raised beds, patios, side yards, and other limited growing areas.
1. Four-by-Four Square-Foot Salad Bed
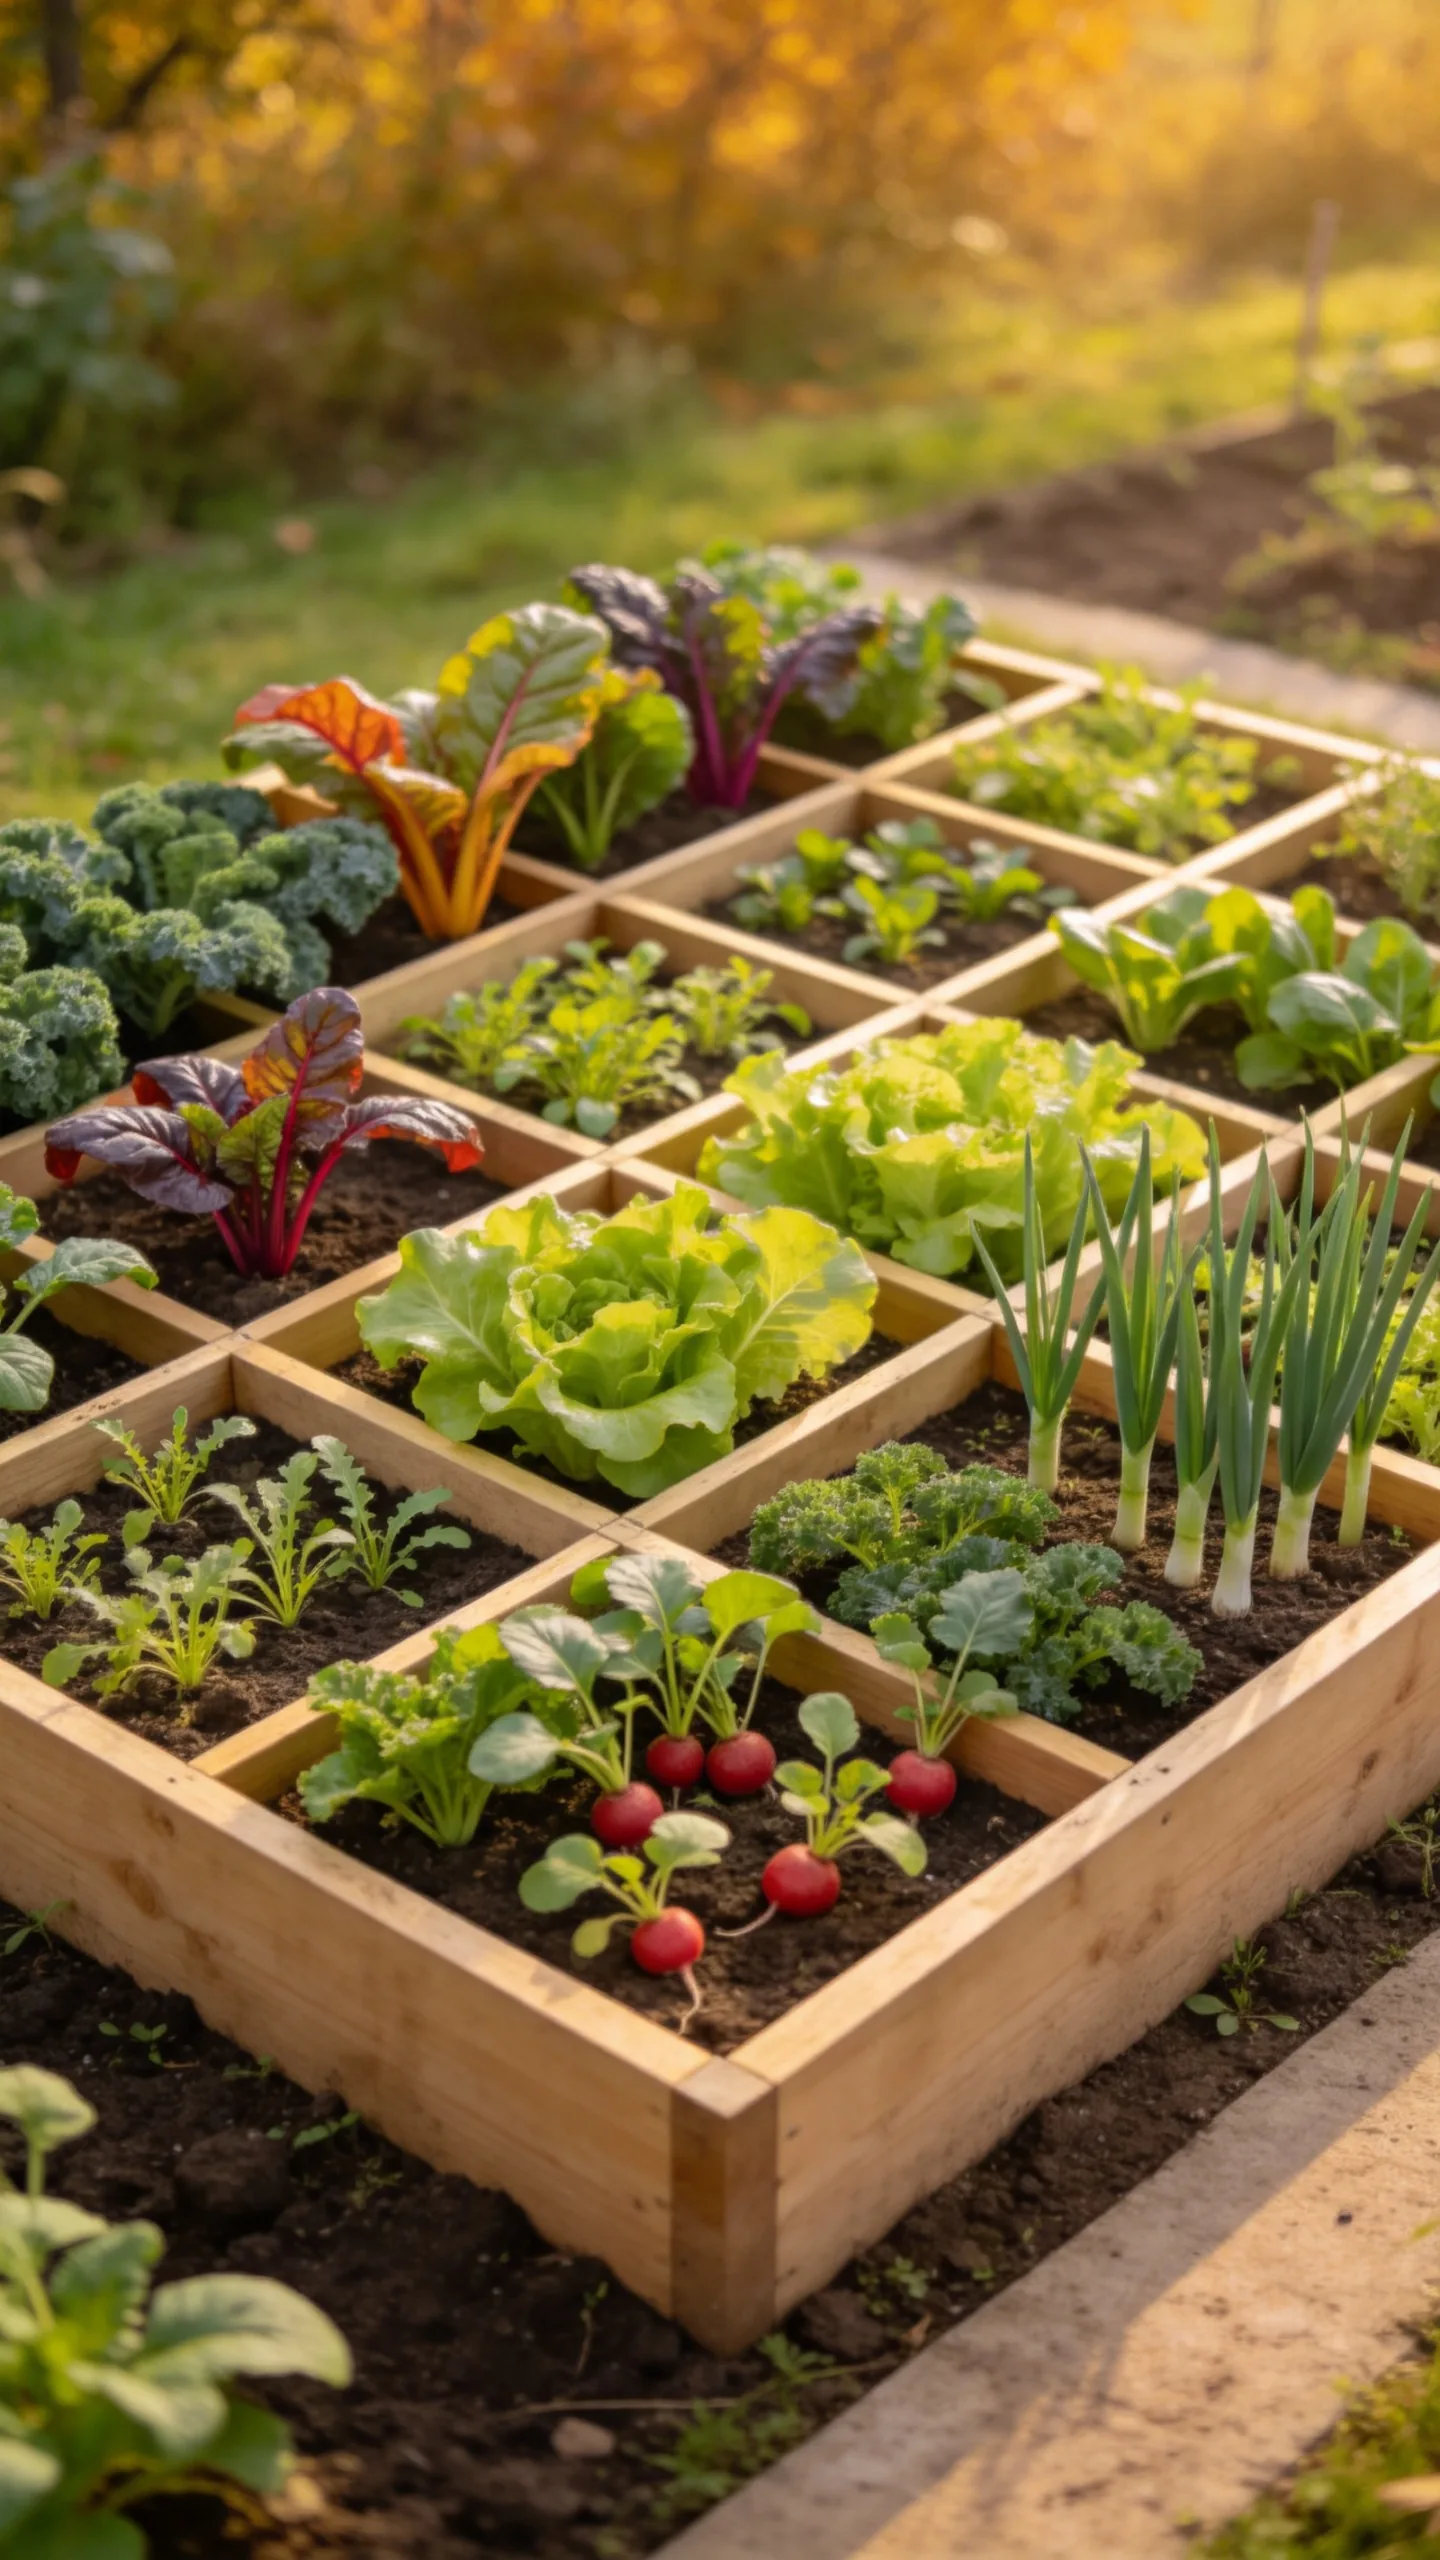
Divide a 4-by-4-foot raised bed into sixteen 12-inch squares using thin wood strips or garden twine. Plant compact salad crops such as leaf lettuce, spinach, arugula, radishes, baby kale, and scallions in separate squares. Follow the seed packet for spacing rather than placing only one plant in every square; small roots and leafy greens can usually grow more densely than full-size brassicas.
Place taller plants, including kale or Swiss chard, along the north side so they do not shade low-growing lettuce. Reserve the southern squares for quick crops such as radishes and arugula. When one square is harvested, loosen the top inch of soil and sow another cold-tolerant crop if enough growing time remains.
2. Four-by-Eight Bed With Three Height Zones
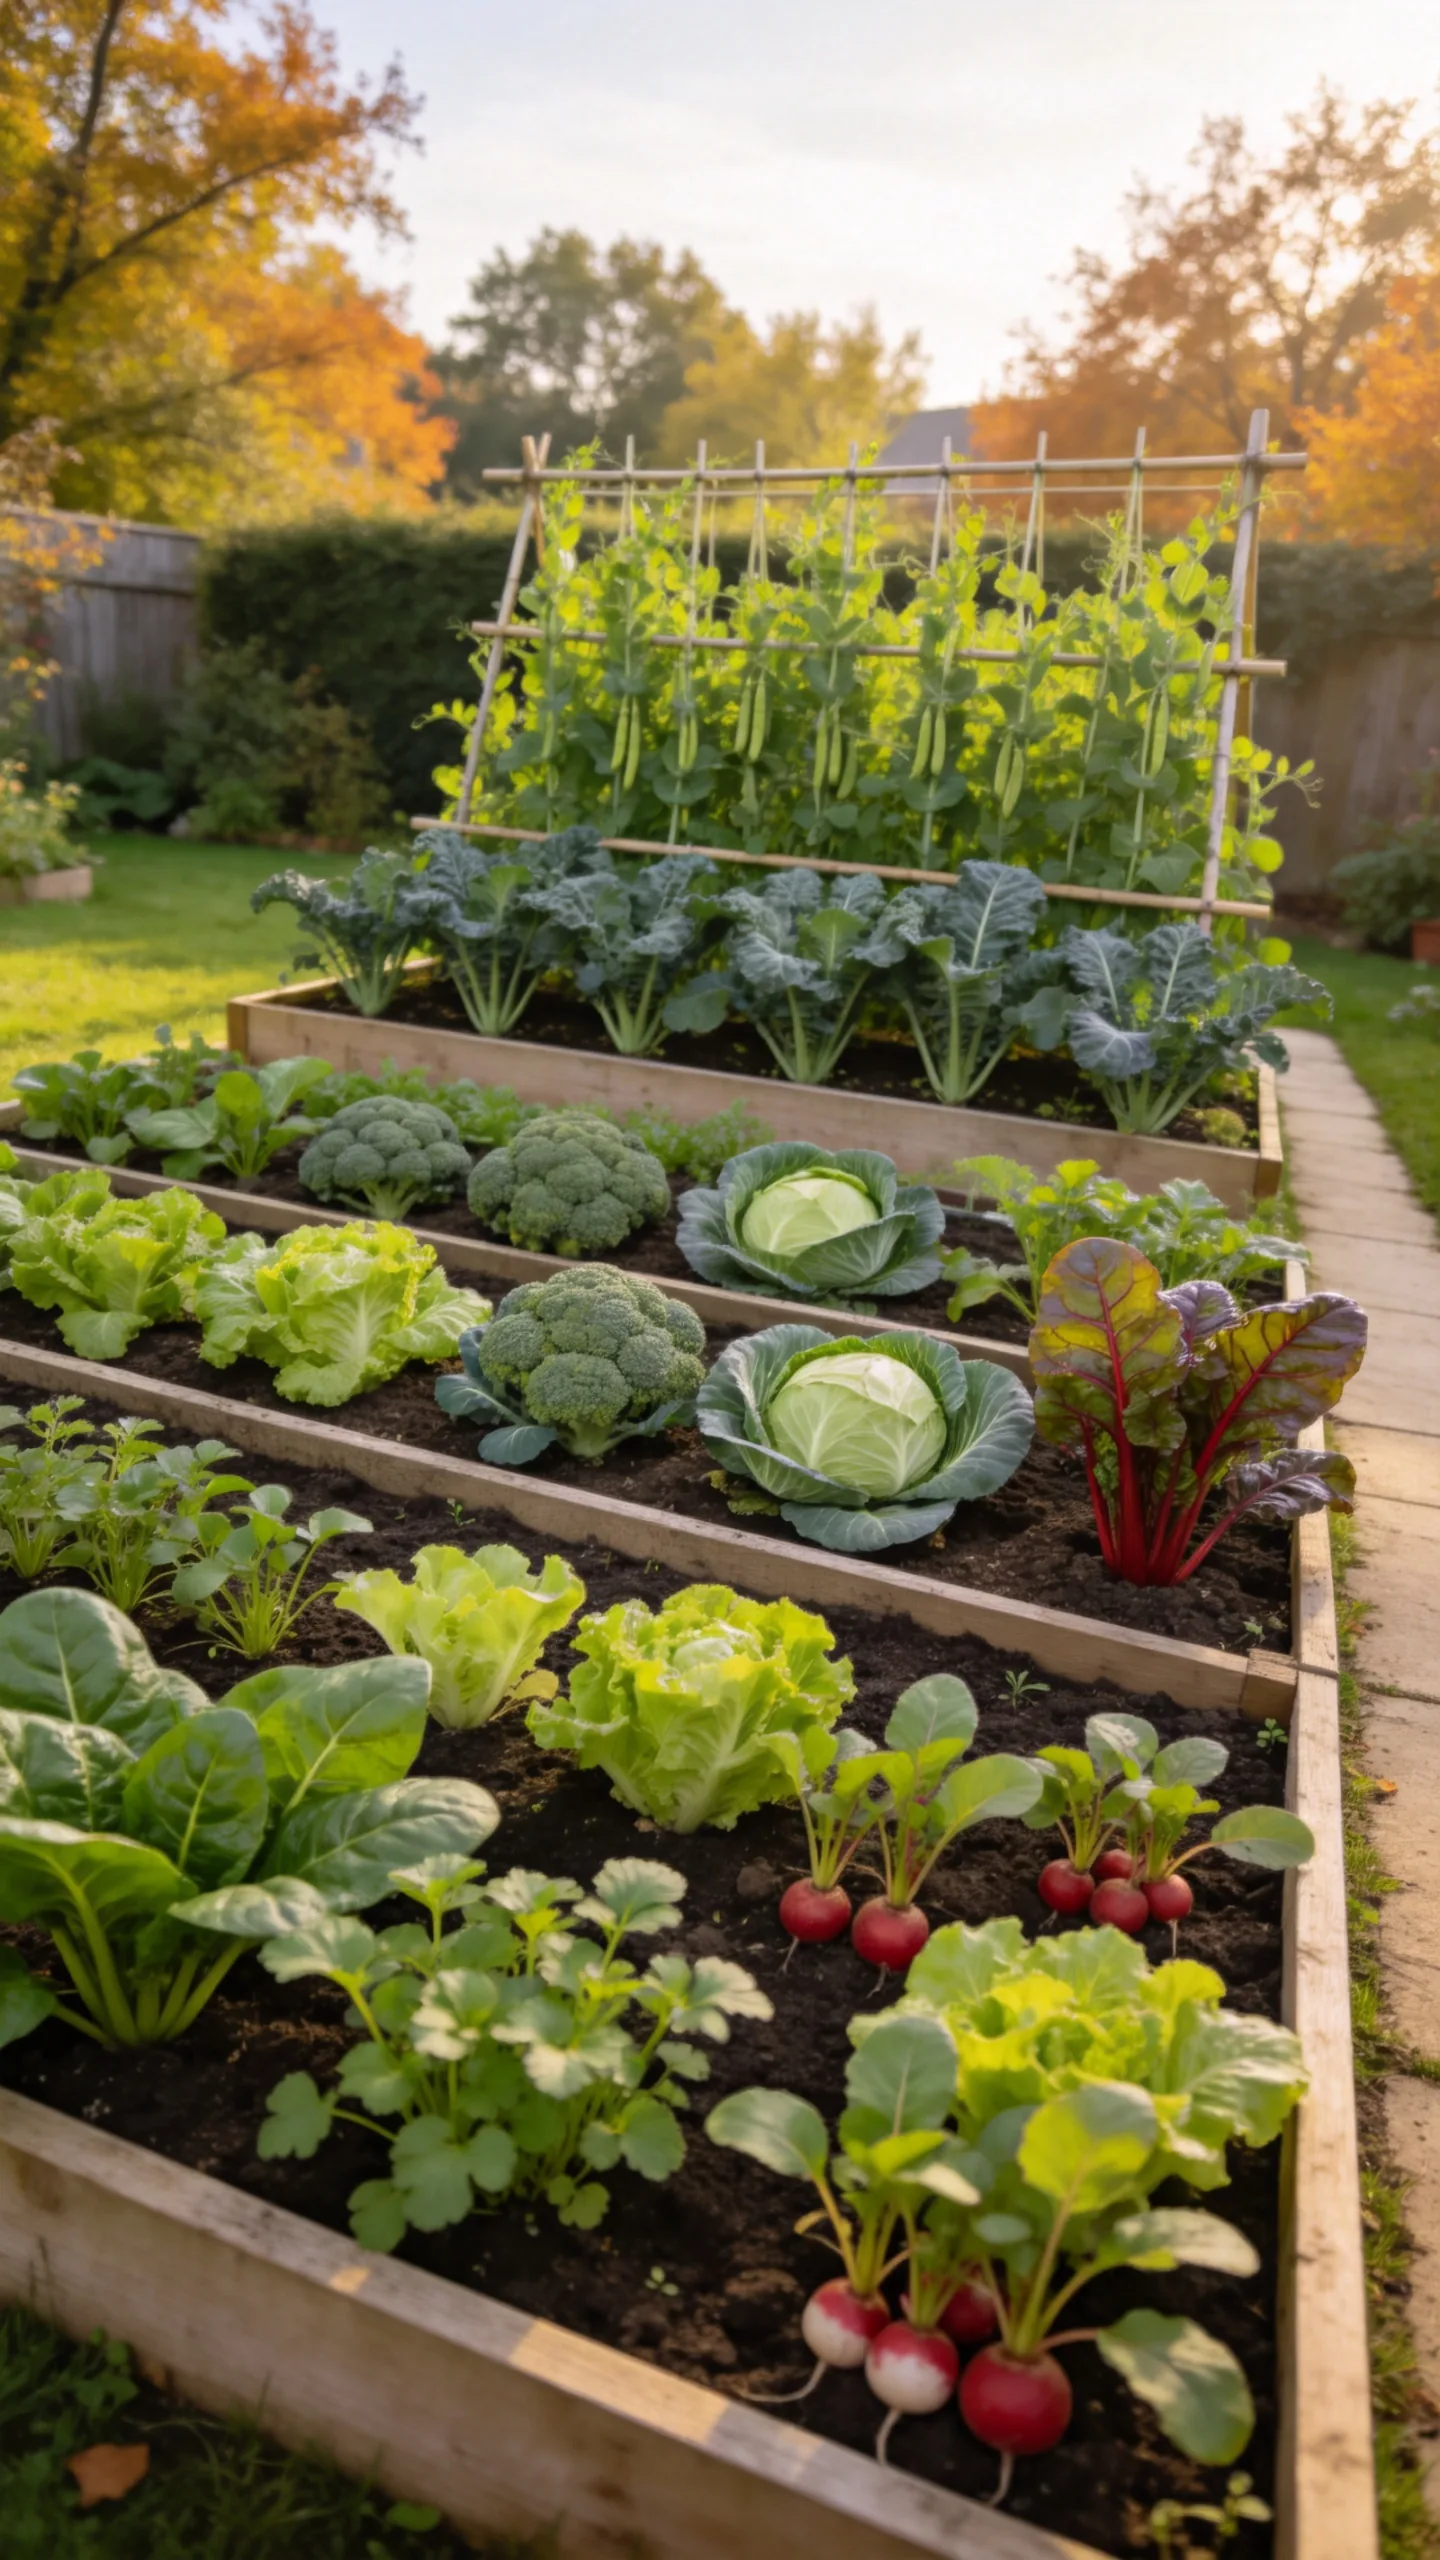
Organize a 4-by-8-foot raised bed into three long planting bands based on mature crop height. Use the north band for trellised peas or tall kale, the center for compact broccoli, cabbage, or Swiss chard, and the south band for spinach, mâche, radishes, and lettuce.
This arrangement keeps large leaves from blocking valuable fall sunlight. Leave enough room between brassicas for their mature spread, which may range from roughly 12 to 24 inches depending on the variety. If the bed is accessible from only one side, keep its width closer to 30 inches so every crop can be reached without stepping on the soil.
3. Succession-Sown Salad Strip Layout
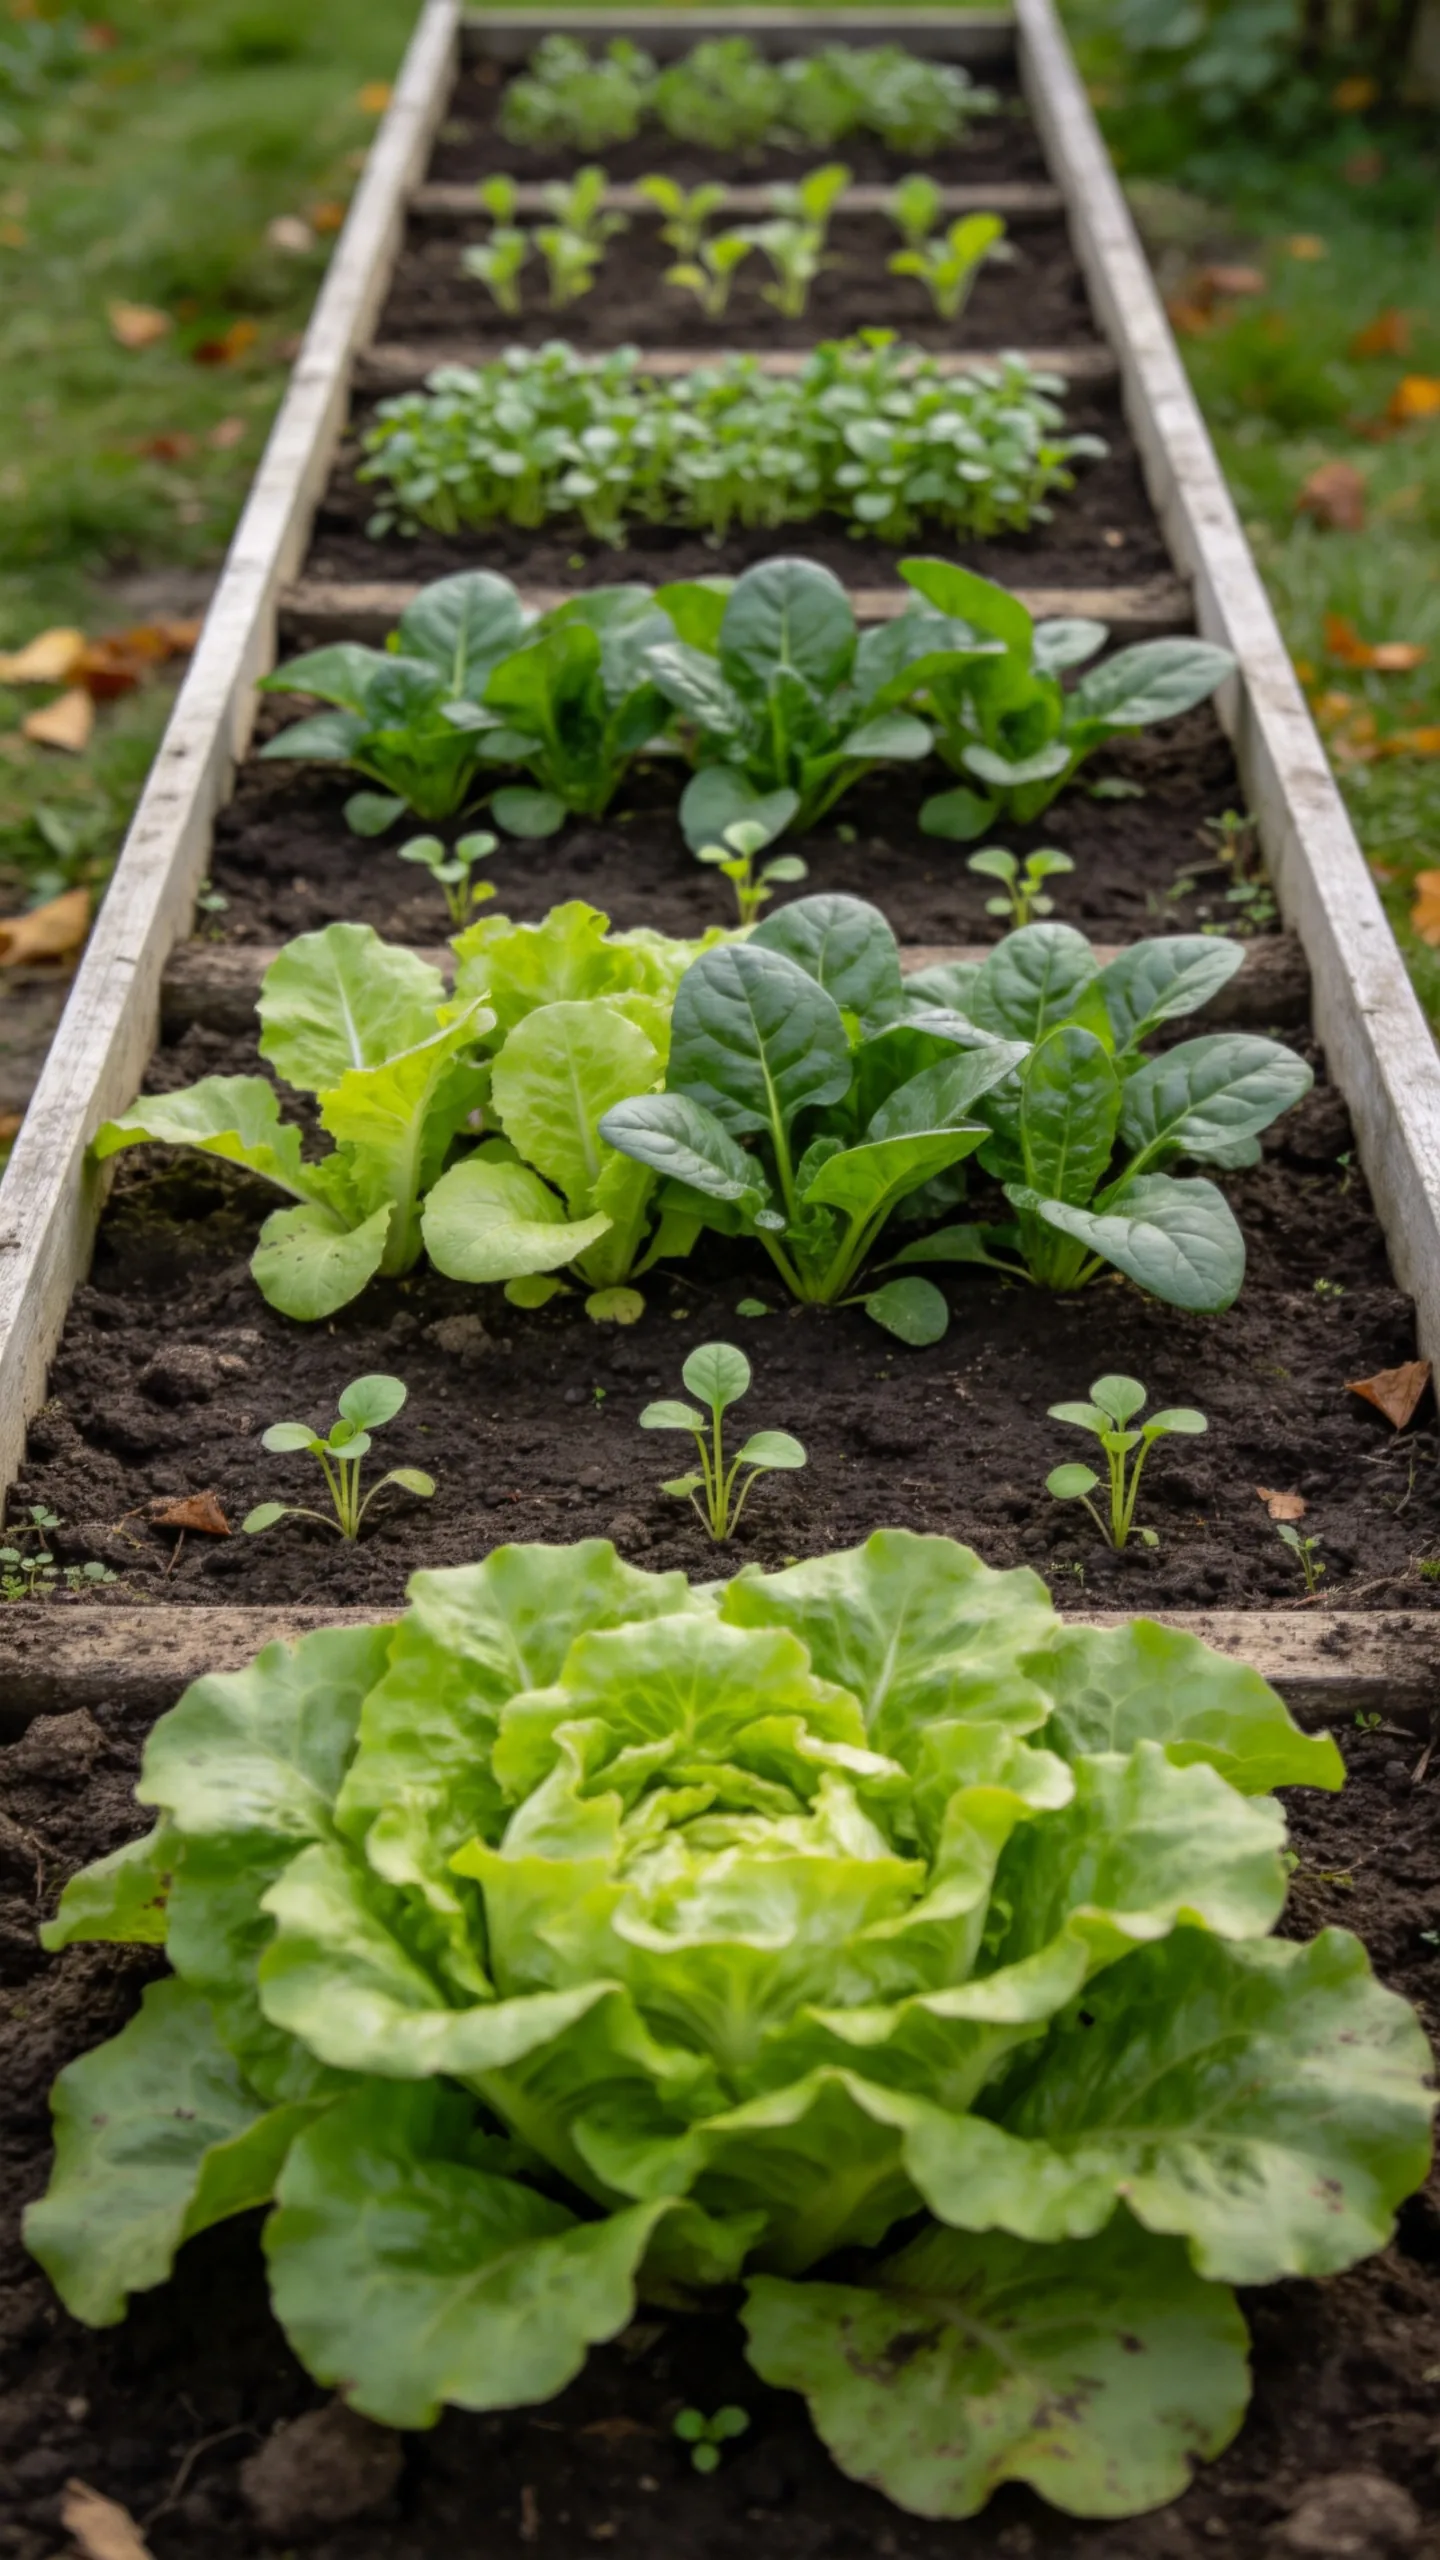
Turn a narrow raised bed into several short planting strips running across its width. Sow one strip of spinach or loose-leaf lettuce, wait seven to fourteen days, and then sow the next strip. Continue until the bed is filled or the weather becomes too cool for reliable germination.
Staggered sowing prevents the entire crop from reaching harvest at once. Label each strip with its planting date, and choose fast-maturing varieties when frost is approaching. In cold regions, use the final strips for especially hardy greens such as mâche, claytonia, or spinach, which may overwinter under protection even if active growth pauses.
4. Trellised Pea-and-Greens Fence Bed
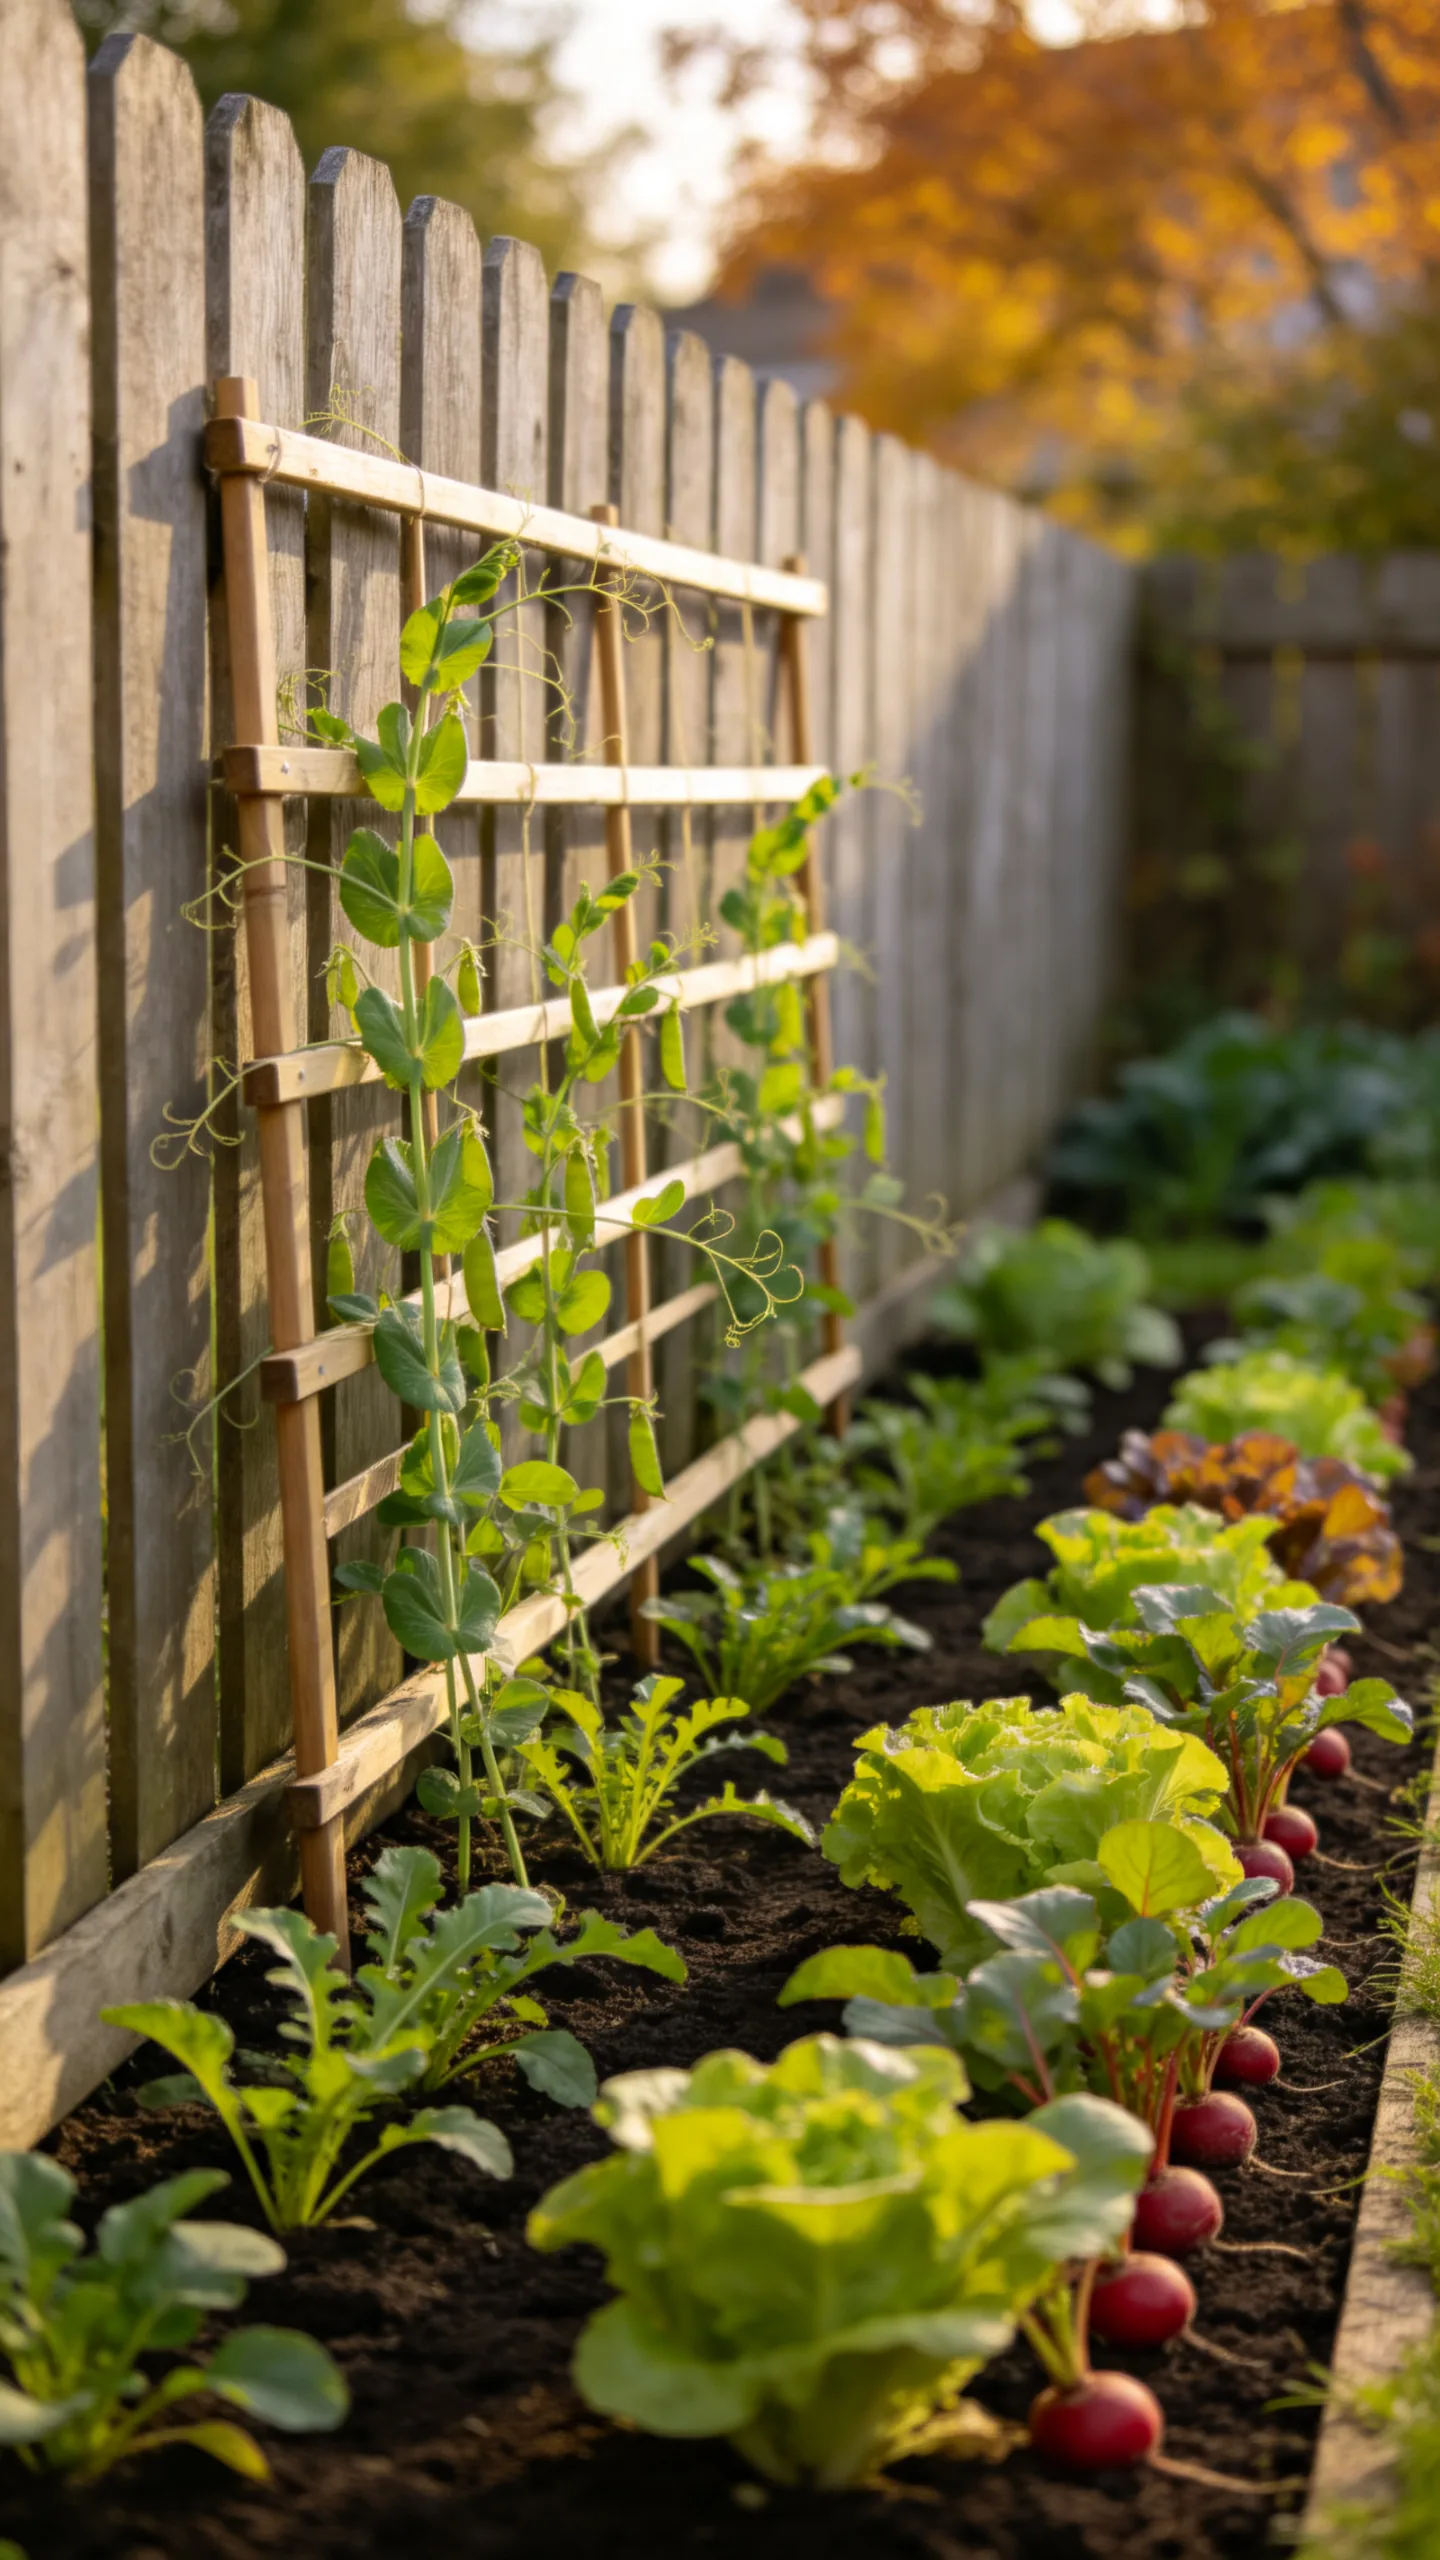
Install a sturdy trellis along the north or west edge of a narrow bed beside a fence. Sow dwarf or cold-tolerant peas at the base, checking whether your selected variety can mature before hard freezes. Plant arugula, spinach, lettuce, or radishes in the open strip in front of the trellis.
The vertical support lets pea vines use overhead space rather than sprawling across the bed. Keep the trellis a few inches away from a solid fence to improve airflow, and avoid placing it where it will cast shade over the entire garden. In climates with very short autumns, use this same layout for overwintering peas only if they are locally recommended.
5. Brassica Corners With Quick-Crop Fillers
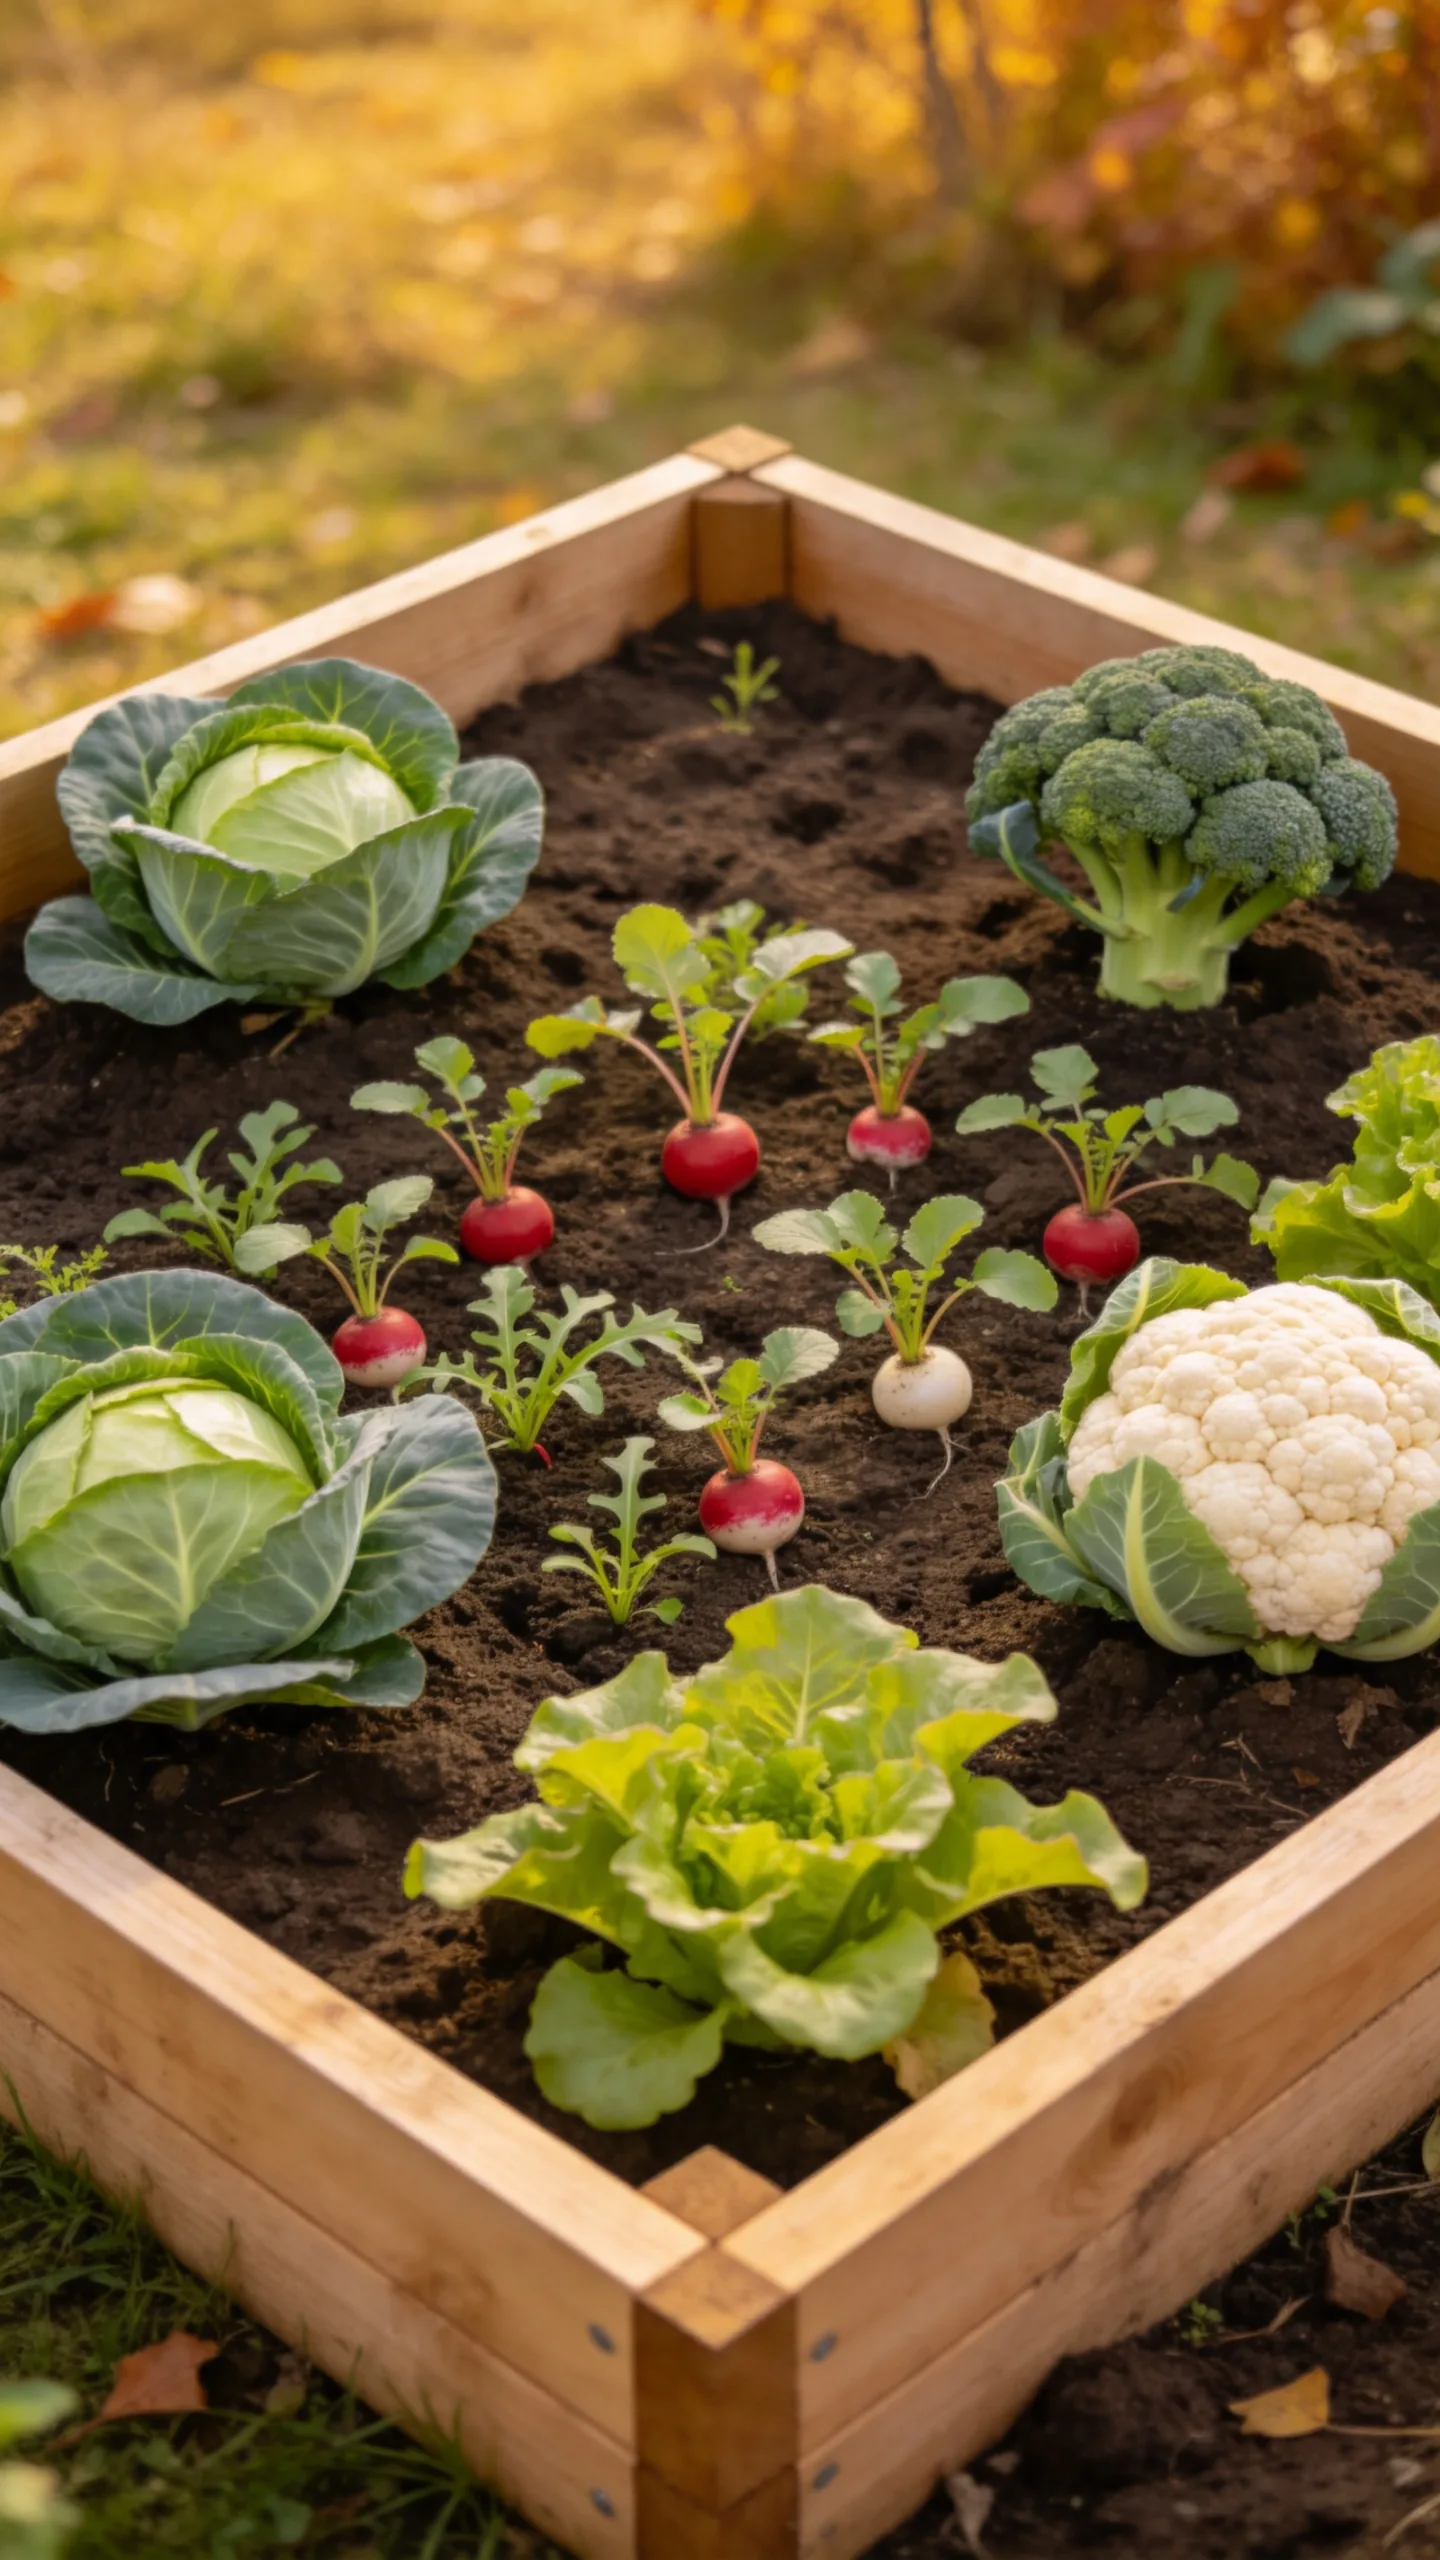
Place one compact cabbage, broccoli, cauliflower, or collard transplant near each corner of a 4-by-4-foot bed. Use the center and gaps between plants for fast crops such as radishes, baby turnips, arugula, or leaf lettuce.
The filler crops can be harvested before the brassicas reach full size, giving the larger plants room to spread later. Start with transplants when the fall season is too short for direct-sown brassicas to mature. Inspect the undersides of leaves regularly for caterpillars, and water at soil level to reduce moisture lingering on crowded foliage.
6. Root-Vegetable Ribbon Bed
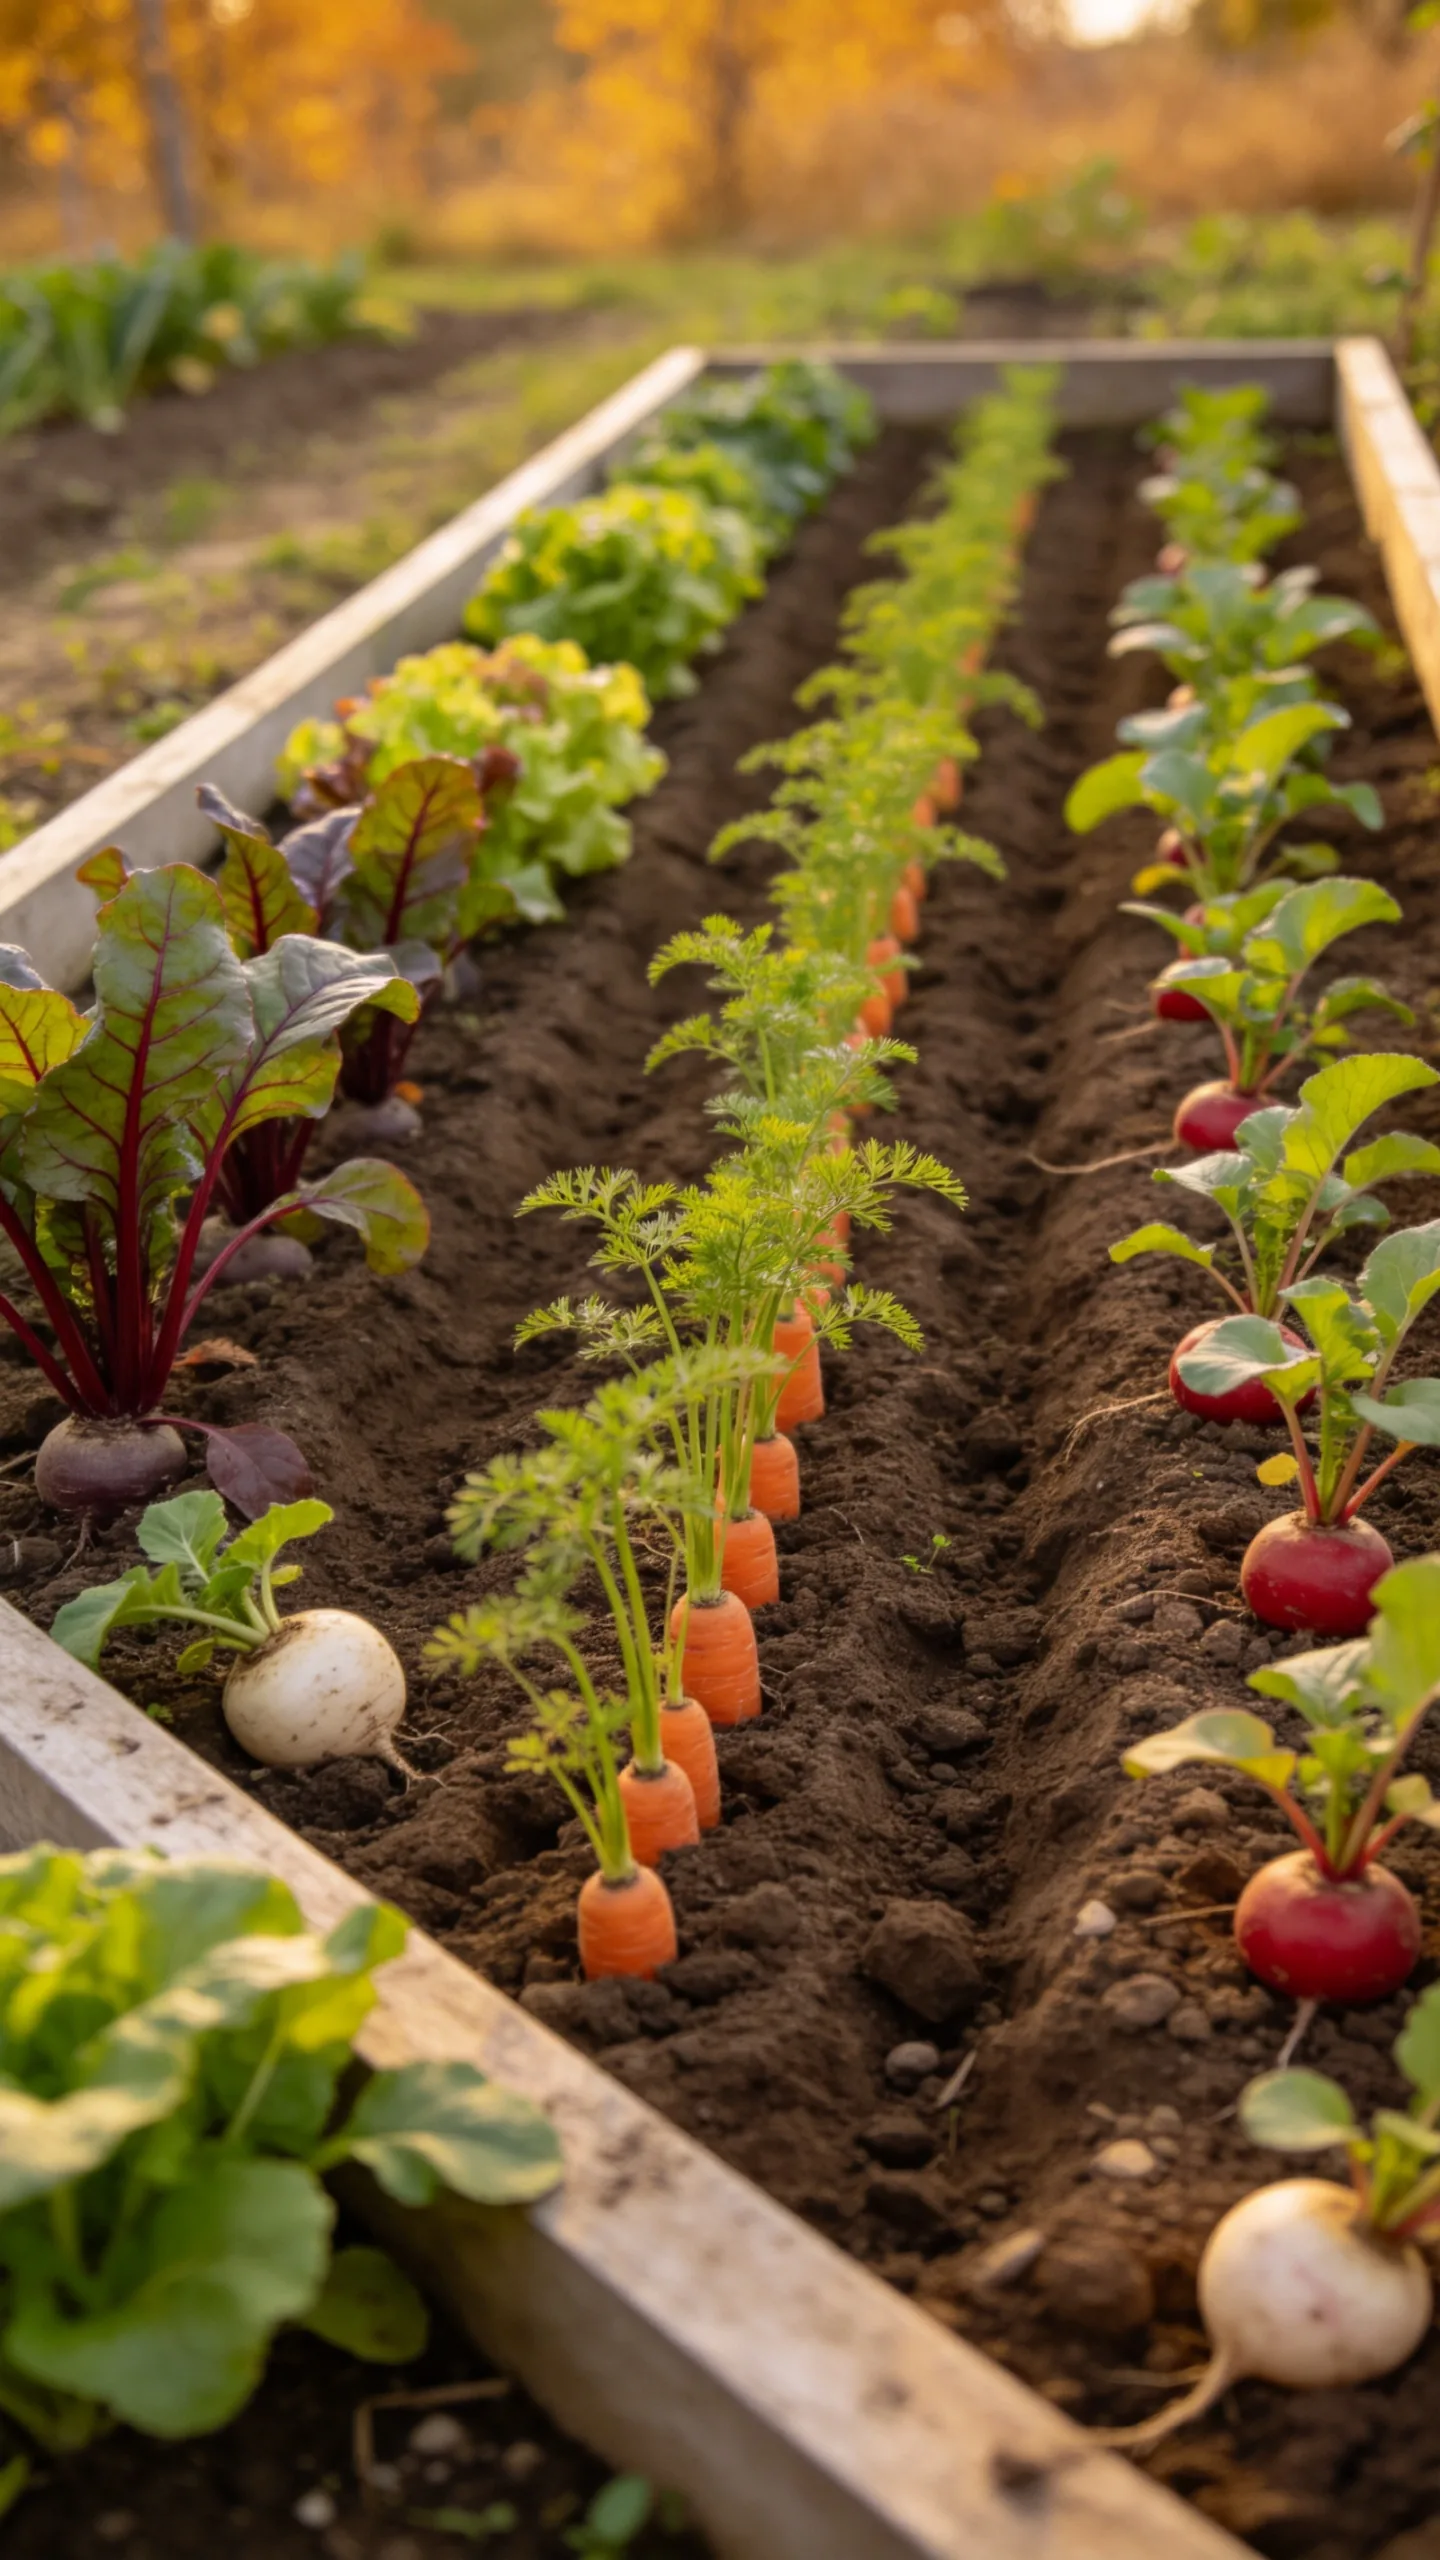
Create parallel rows of carrots, beets, radishes, and small turnips in a bed at least 12 inches deep. Run the rows across a narrow bed so thinning, weeding, and harvesting can be done from the edge. Place the fastest radishes in one or two outer rows and the slower carrots toward the center.
Remove stones and break up compacted soil before sowing because roots develop best in a loose, well-drained growing medium. Keep the seedbed consistently moist during germination with a fine spray or drip line. In heavy soil, choose round carrots, baby beets, and salad turnips rather than long-rooted varieties.
7. Cut-and-Come-Again Greens Carpet
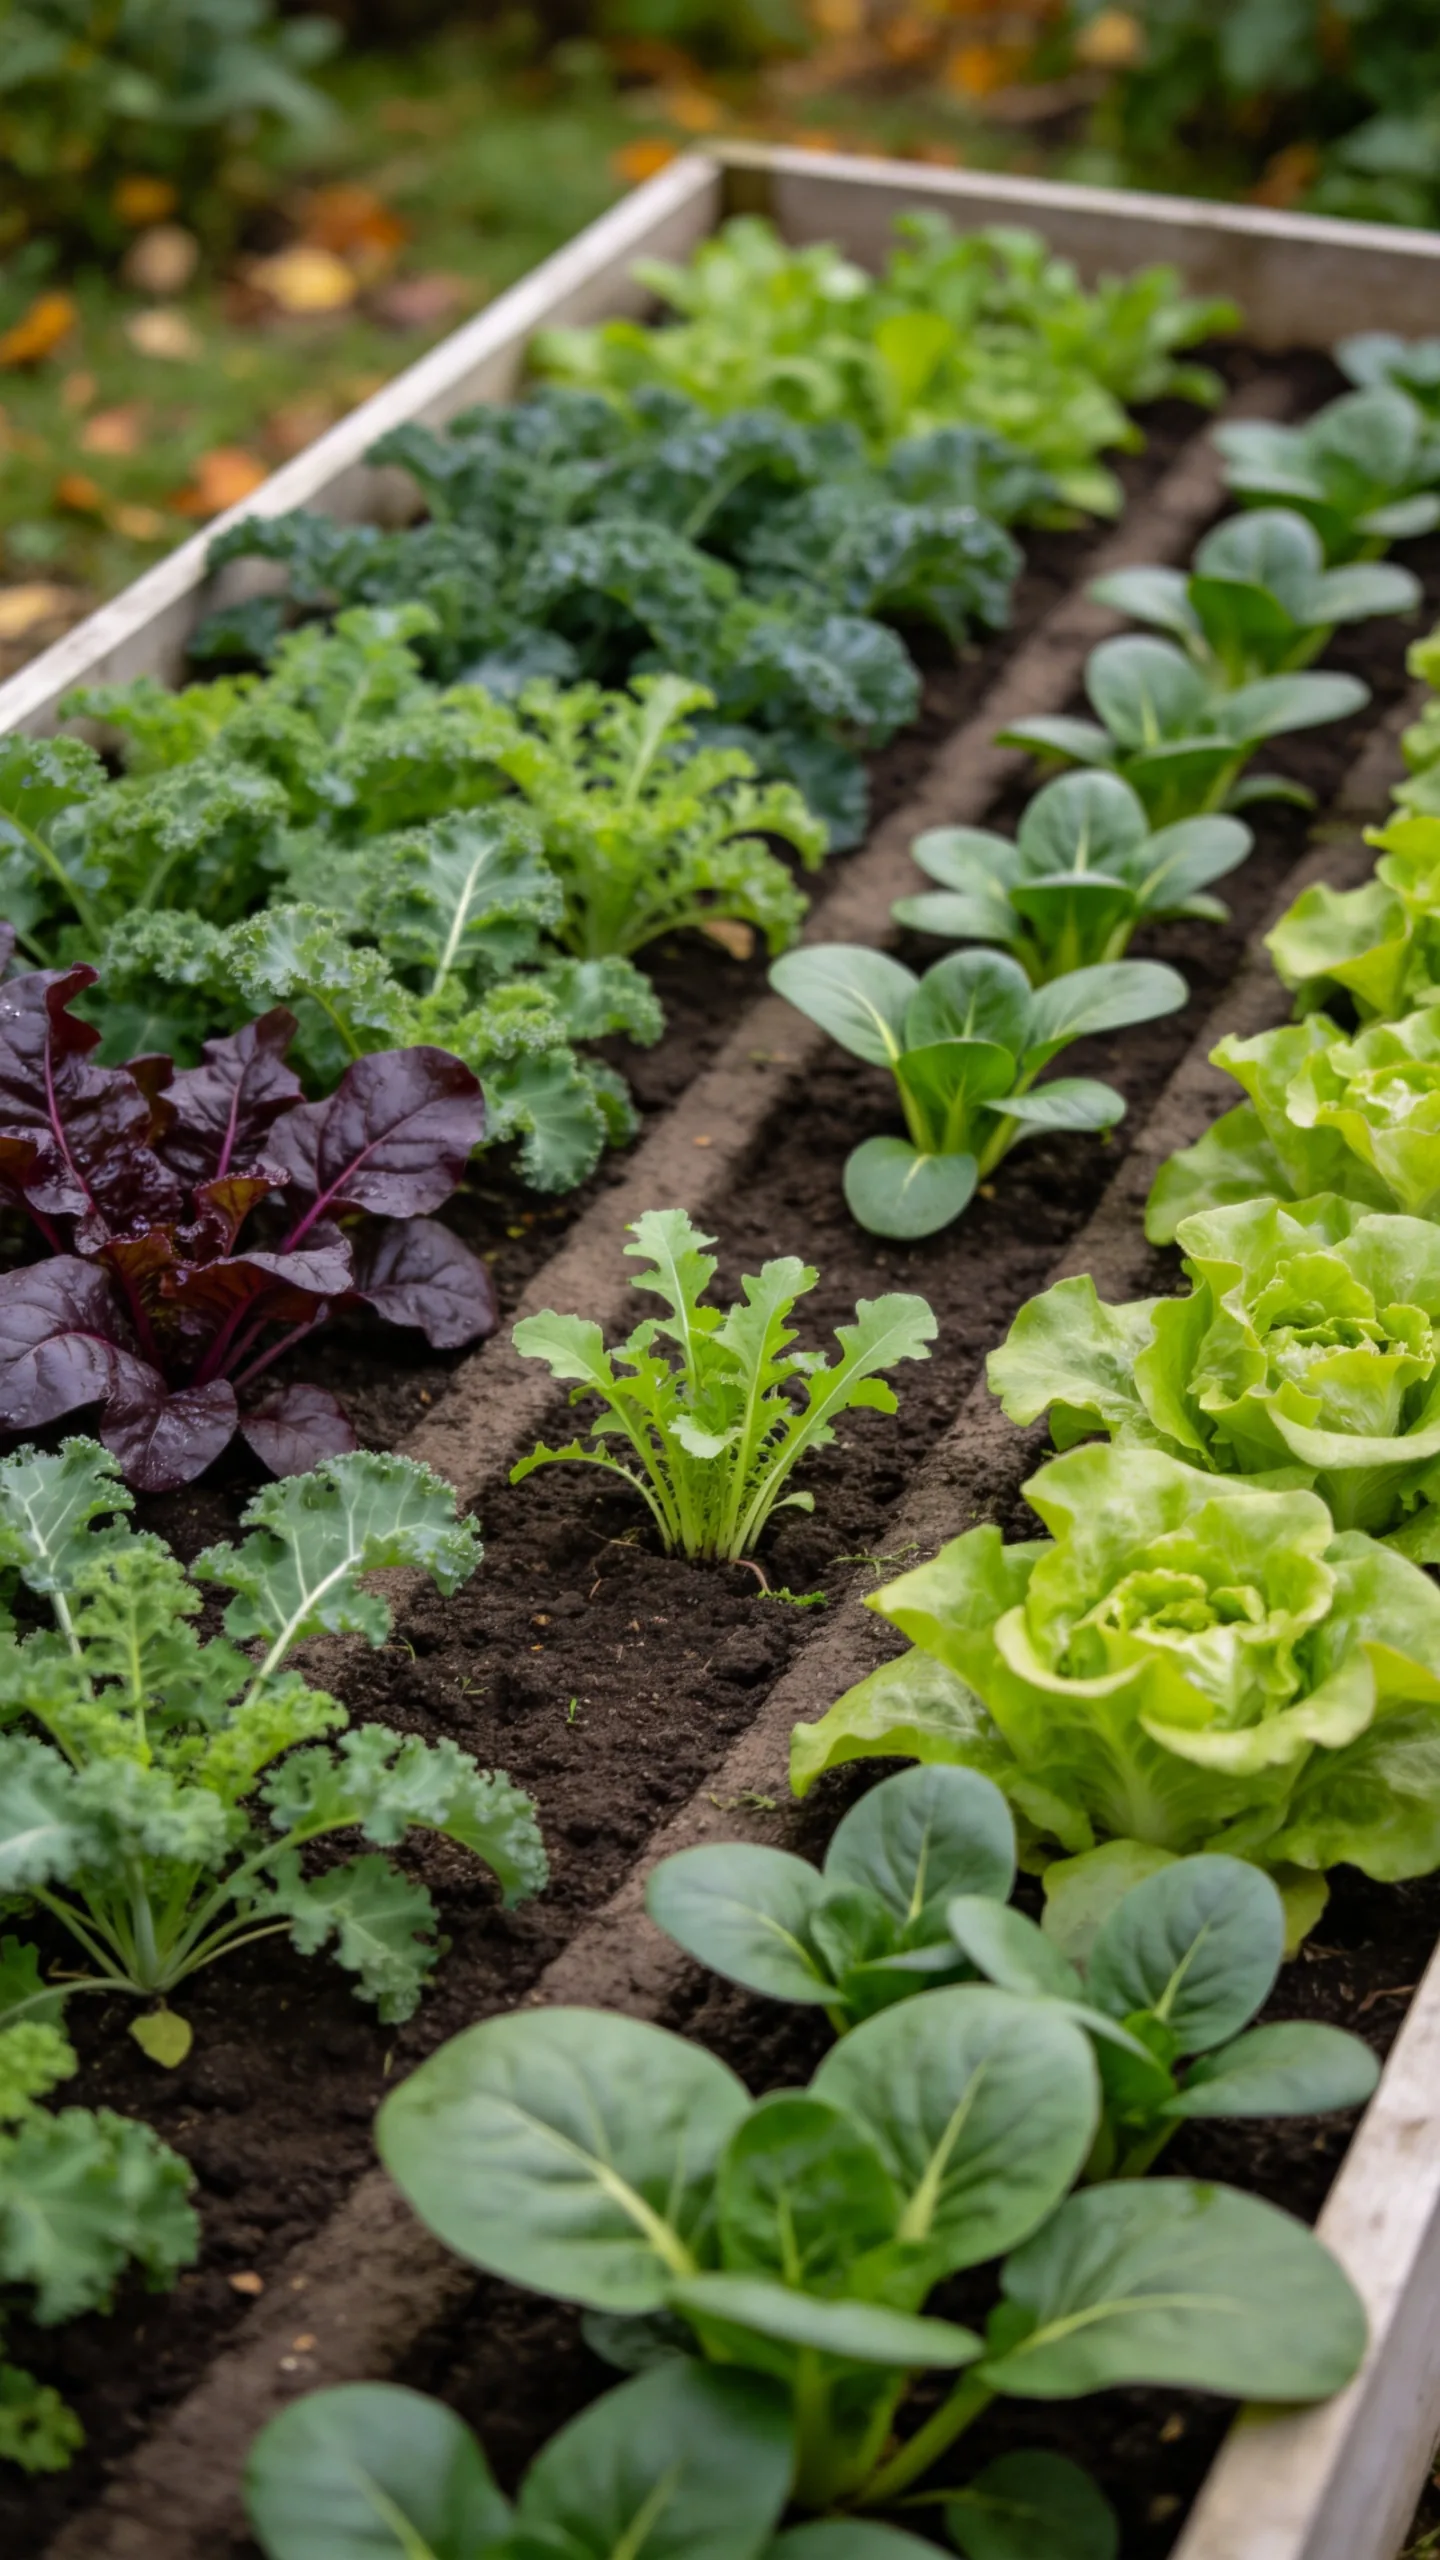
Fill a shallow raised bed with blocks of baby kale, mustard greens, mizuna, tatsoi, spinach, and loose-leaf lettuce. Sow each crop in a broad band rather than a single row, leaving a narrow hand-width gap between varieties for harvesting.
Cut the outer leaves or shear baby greens above the growing point so plants can produce another flush. This dense layout covers bare soil and provides repeated small harvests without requiring large plants. Thin congested patches promptly and maintain airflow, especially during damp fall weather when leaf diseases can spread more easily.
8. U-Shaped Raised-Bed Layout
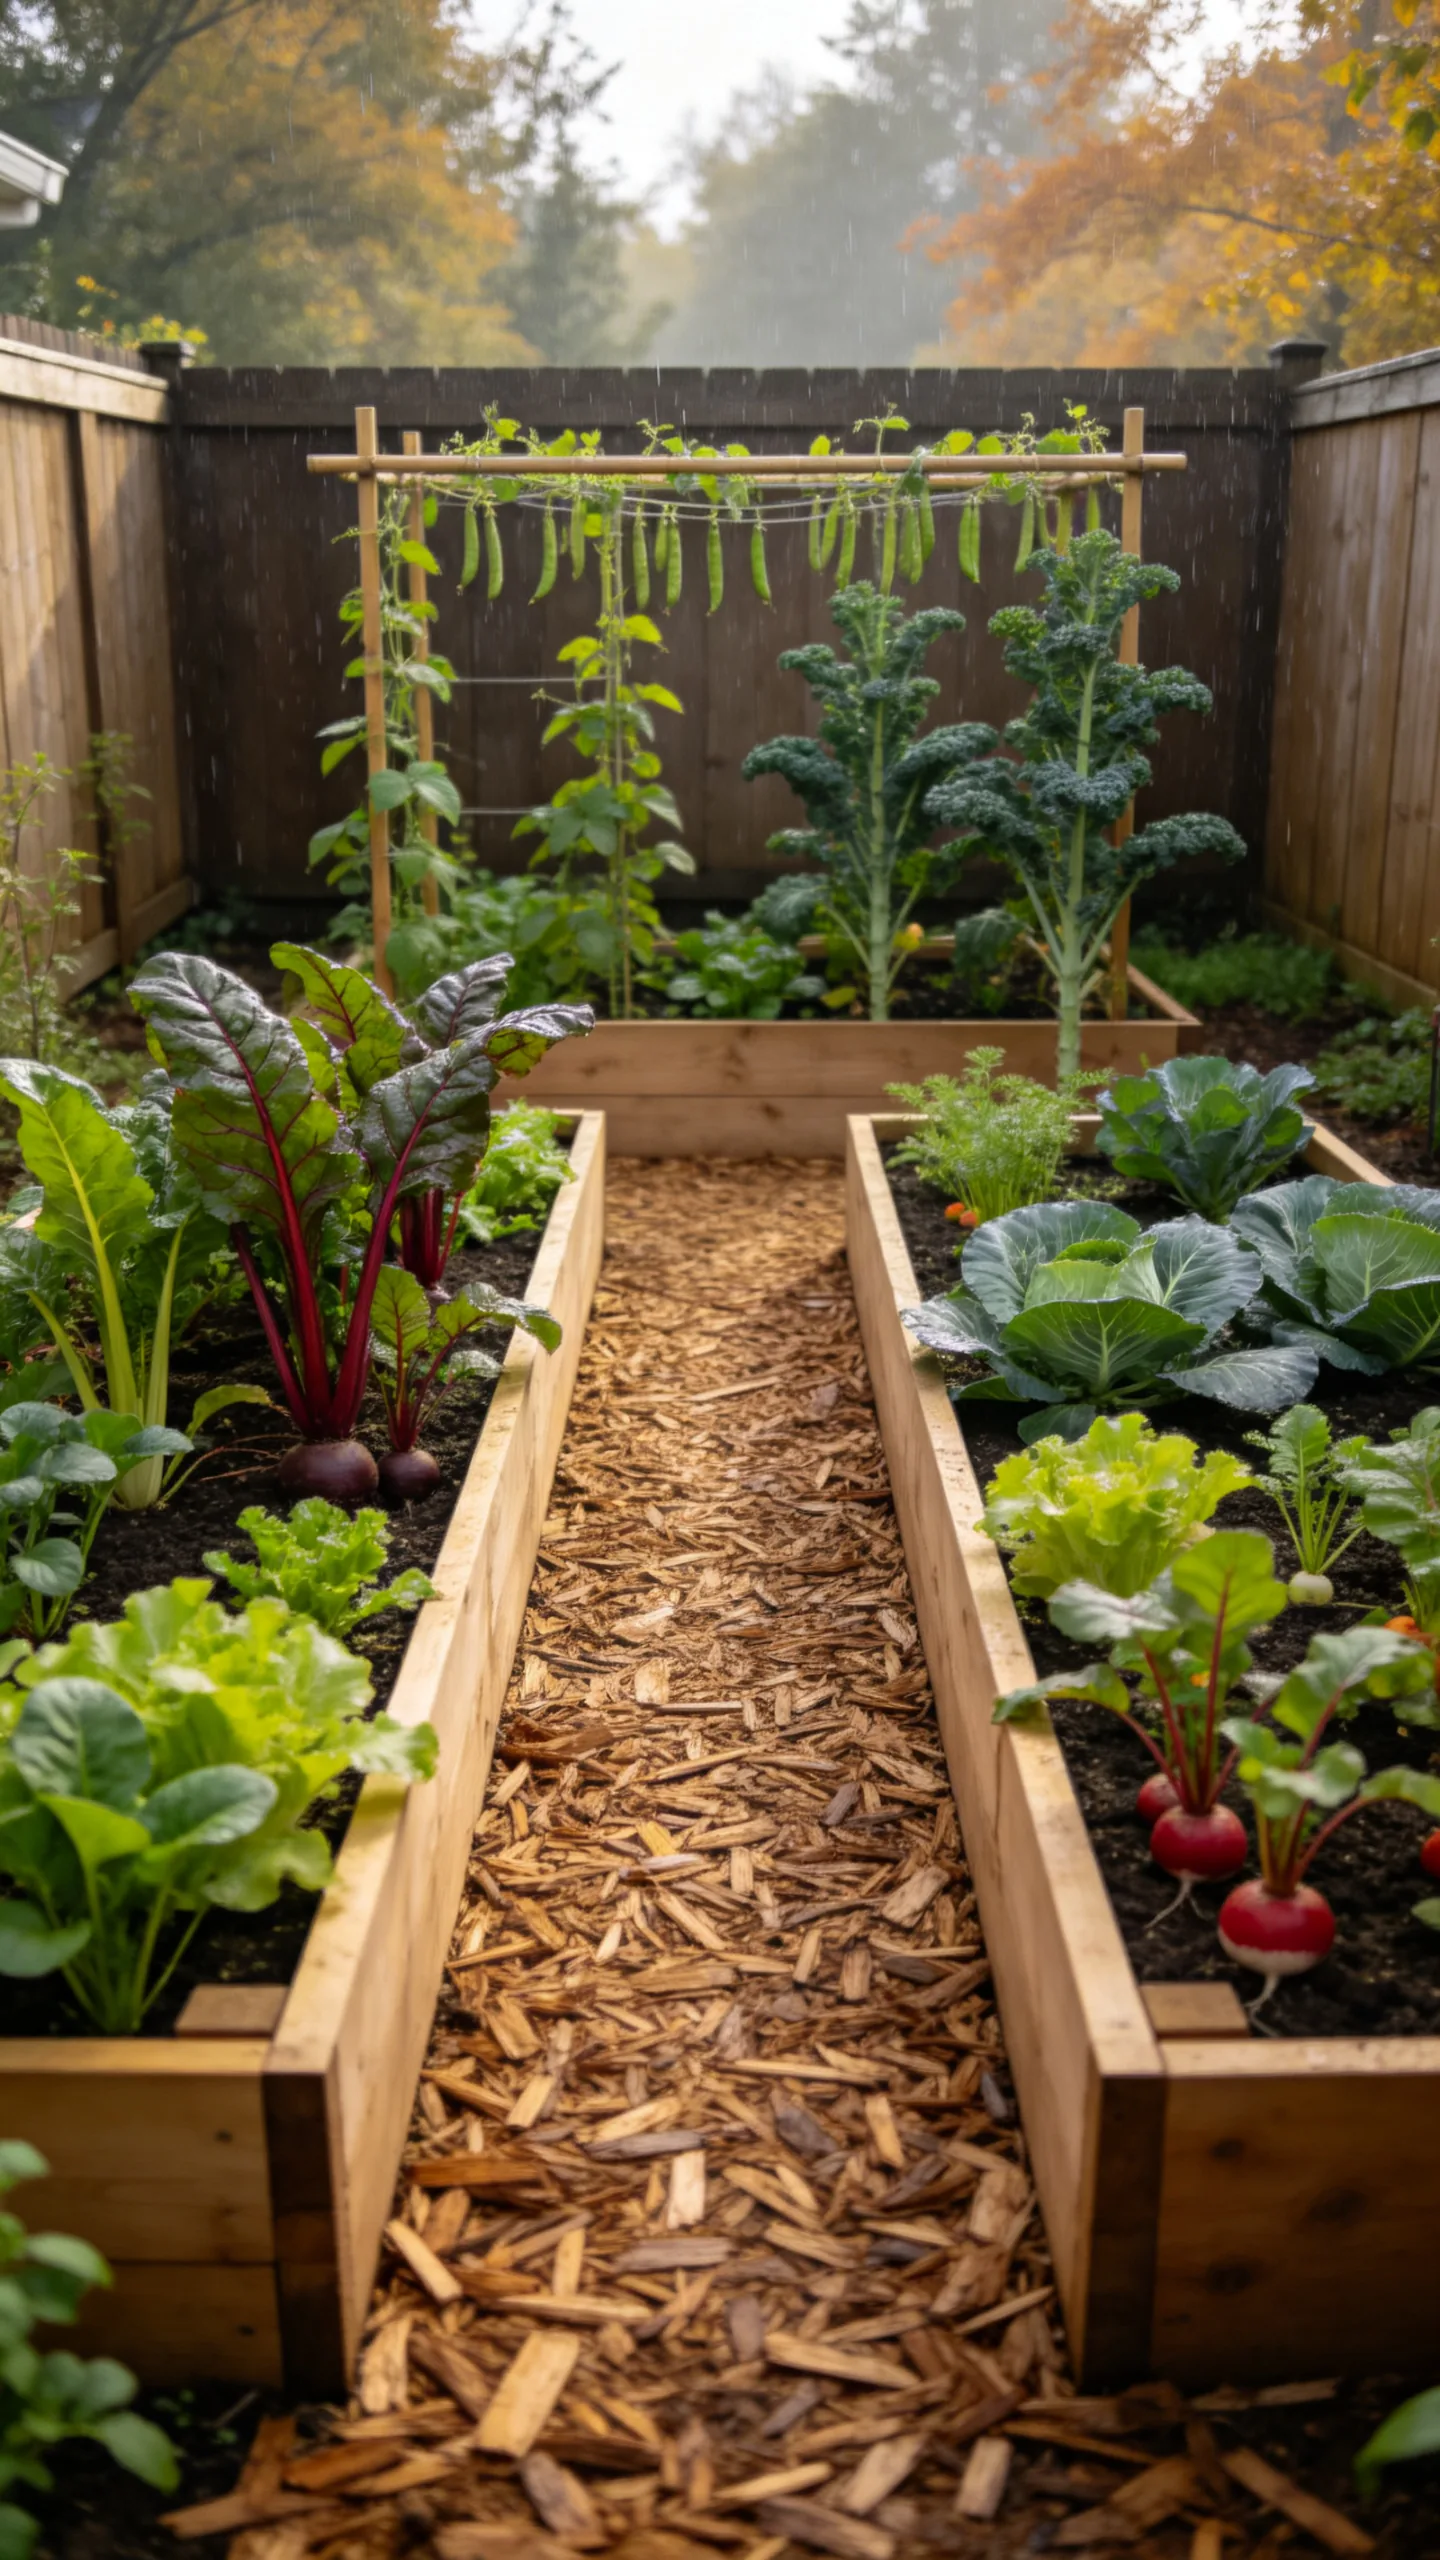
Arrange three narrow raised beds in a U shape, leaving a central path at least 30 inches wide. Put tall crops and a trellis across the closed northern end, medium-height vegetables along the two side beds, and low greens near the open southern entrance.
A U-shaped arrangement creates substantial planting edge while keeping every section within easy reach. Cover the path with wood chips, gravel, or pavers to prevent muddy access during autumn rain. Confirm that the inside corners are reachable before building; beds about 24 to 30 inches wide are often easier to tend than deep, wide boxes.
9. Cold-Frame Greens Bed
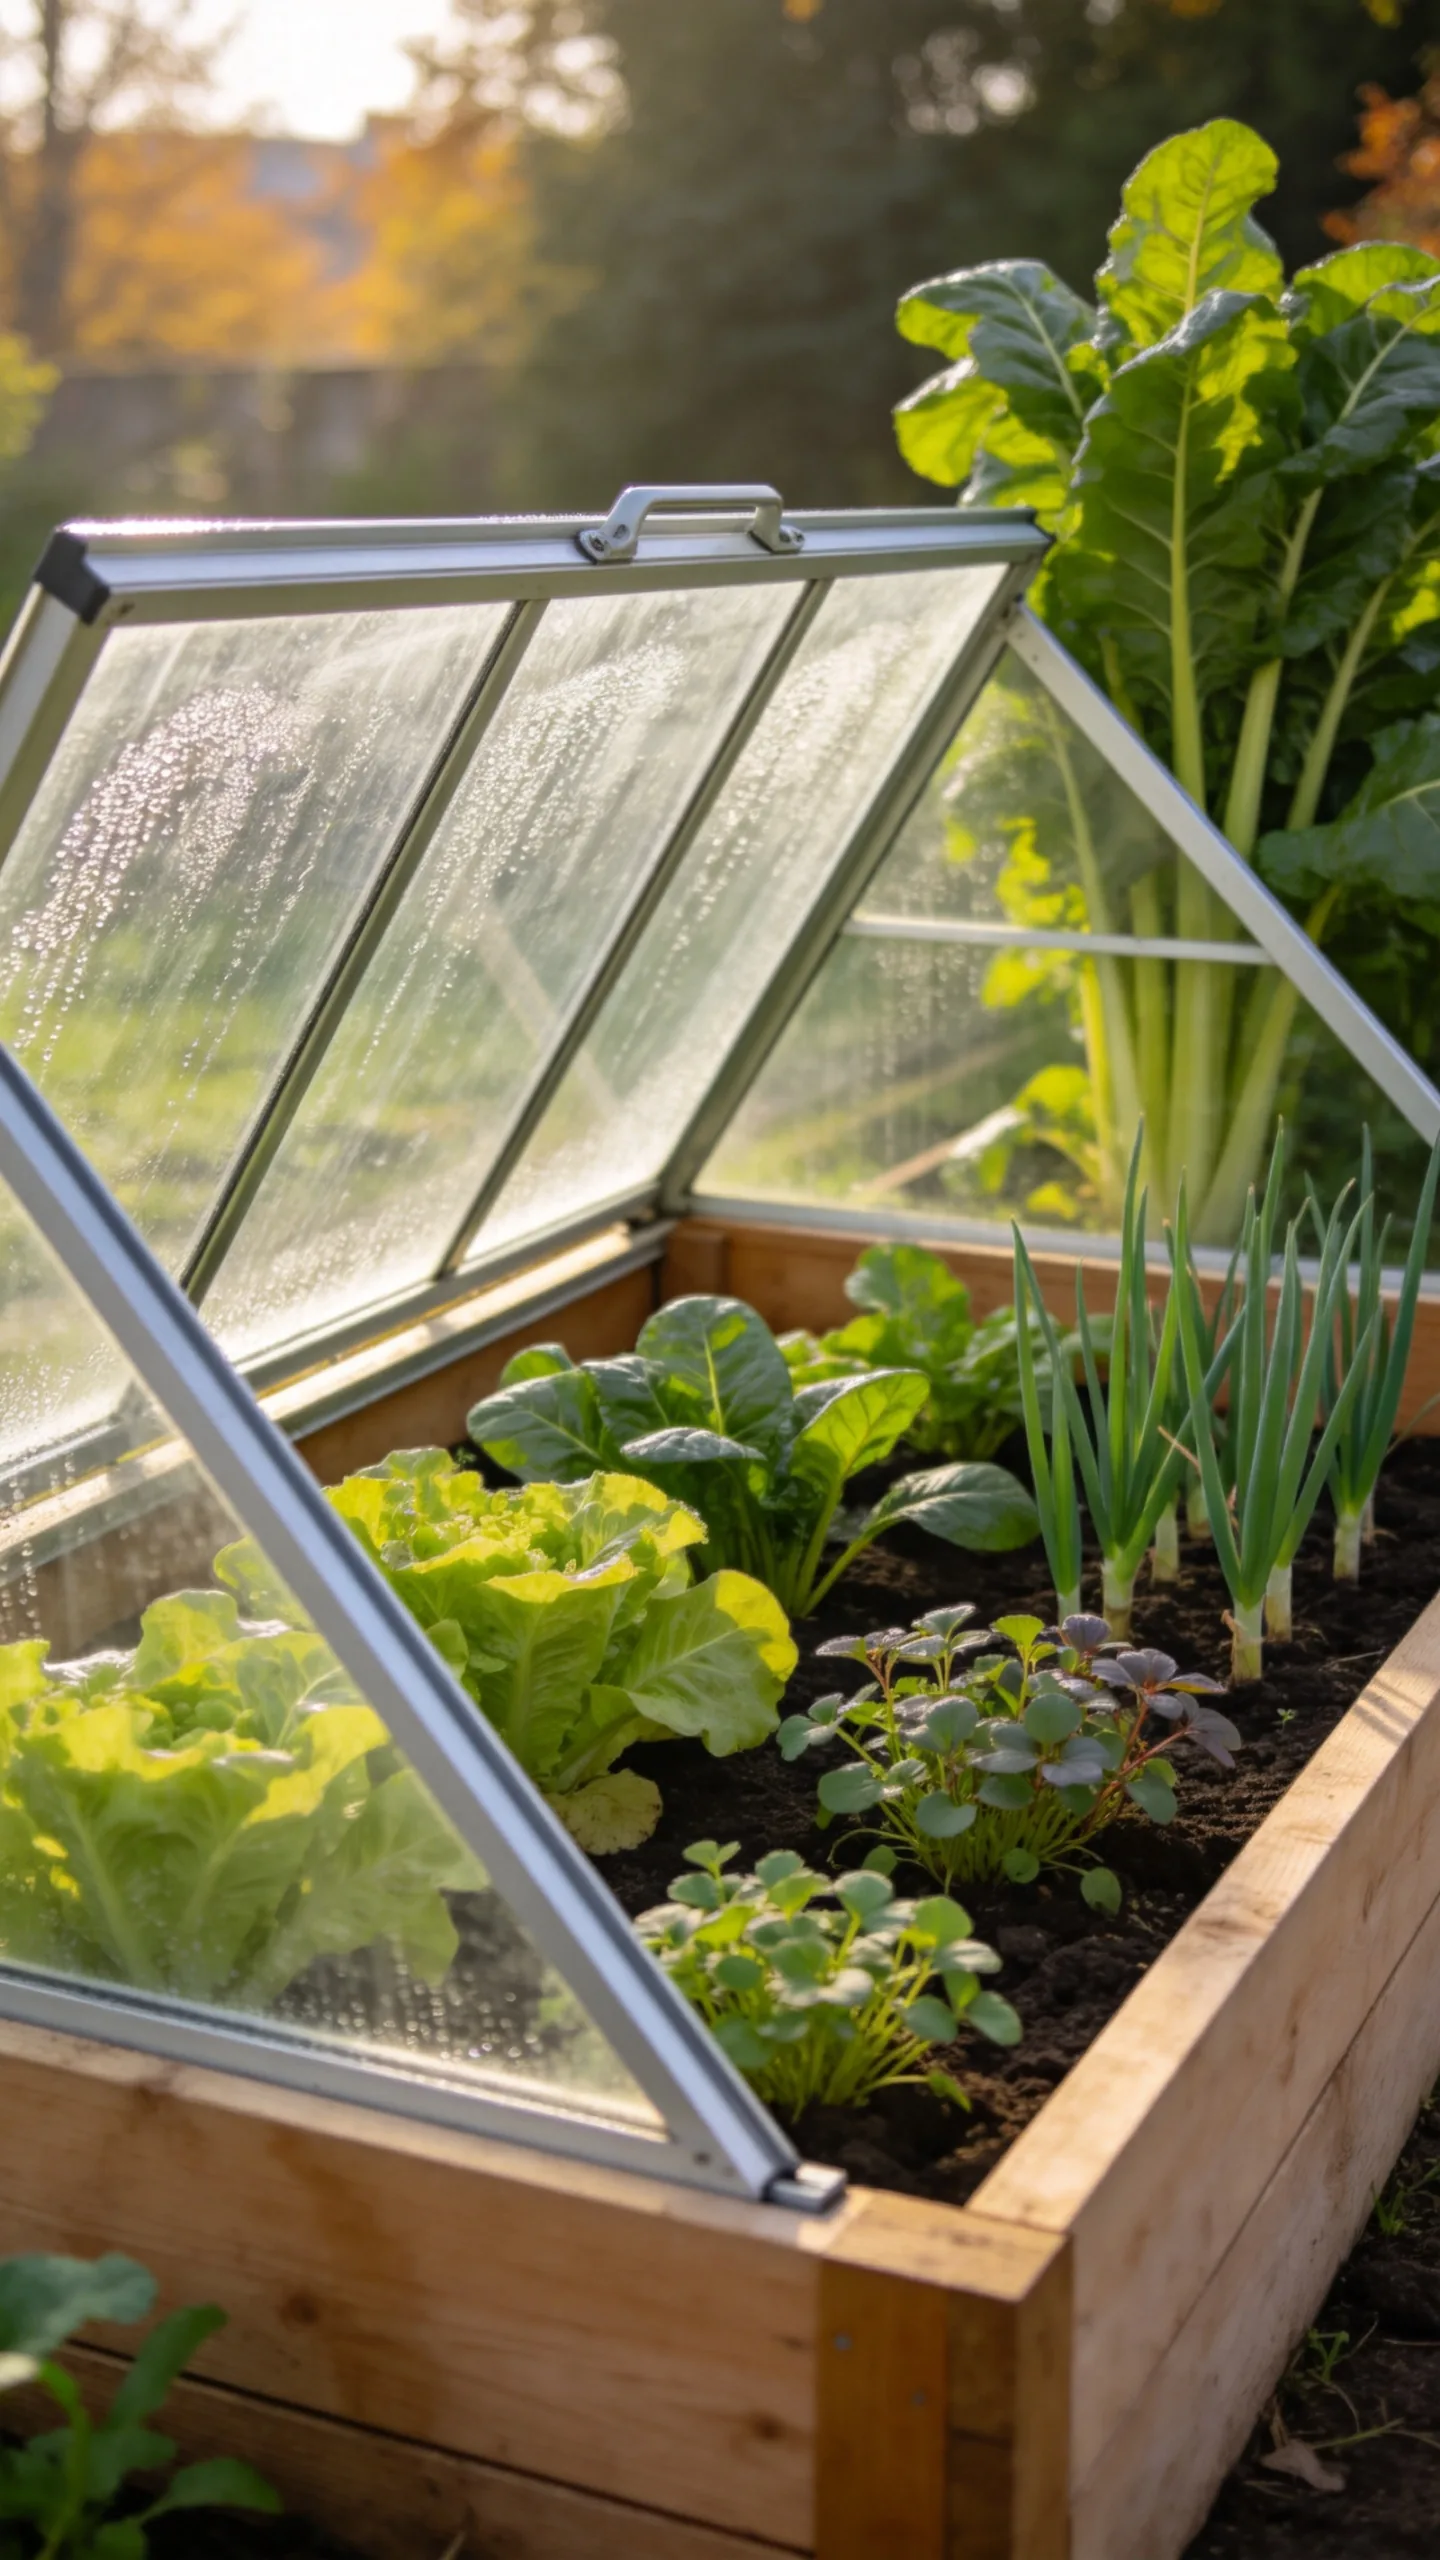
Fit a low raised bed with a transparent cold-frame lid that slopes toward the south. Plant spinach, mâche, claytonia, winter lettuce, scallions, or other locally hardy greens inside, placing the tallest crop near the higher back wall.
The cover traps warmth and protects leaves from wind, but it must be vented on sunny days to prevent overheating. Water in the morning and avoid saturating the soil as temperatures cool. A cold frame extends the useful season most effectively when crops are established before growth slows, rather than being sown after the soil is already cold.
10. Removable Hoop-Covered Bed
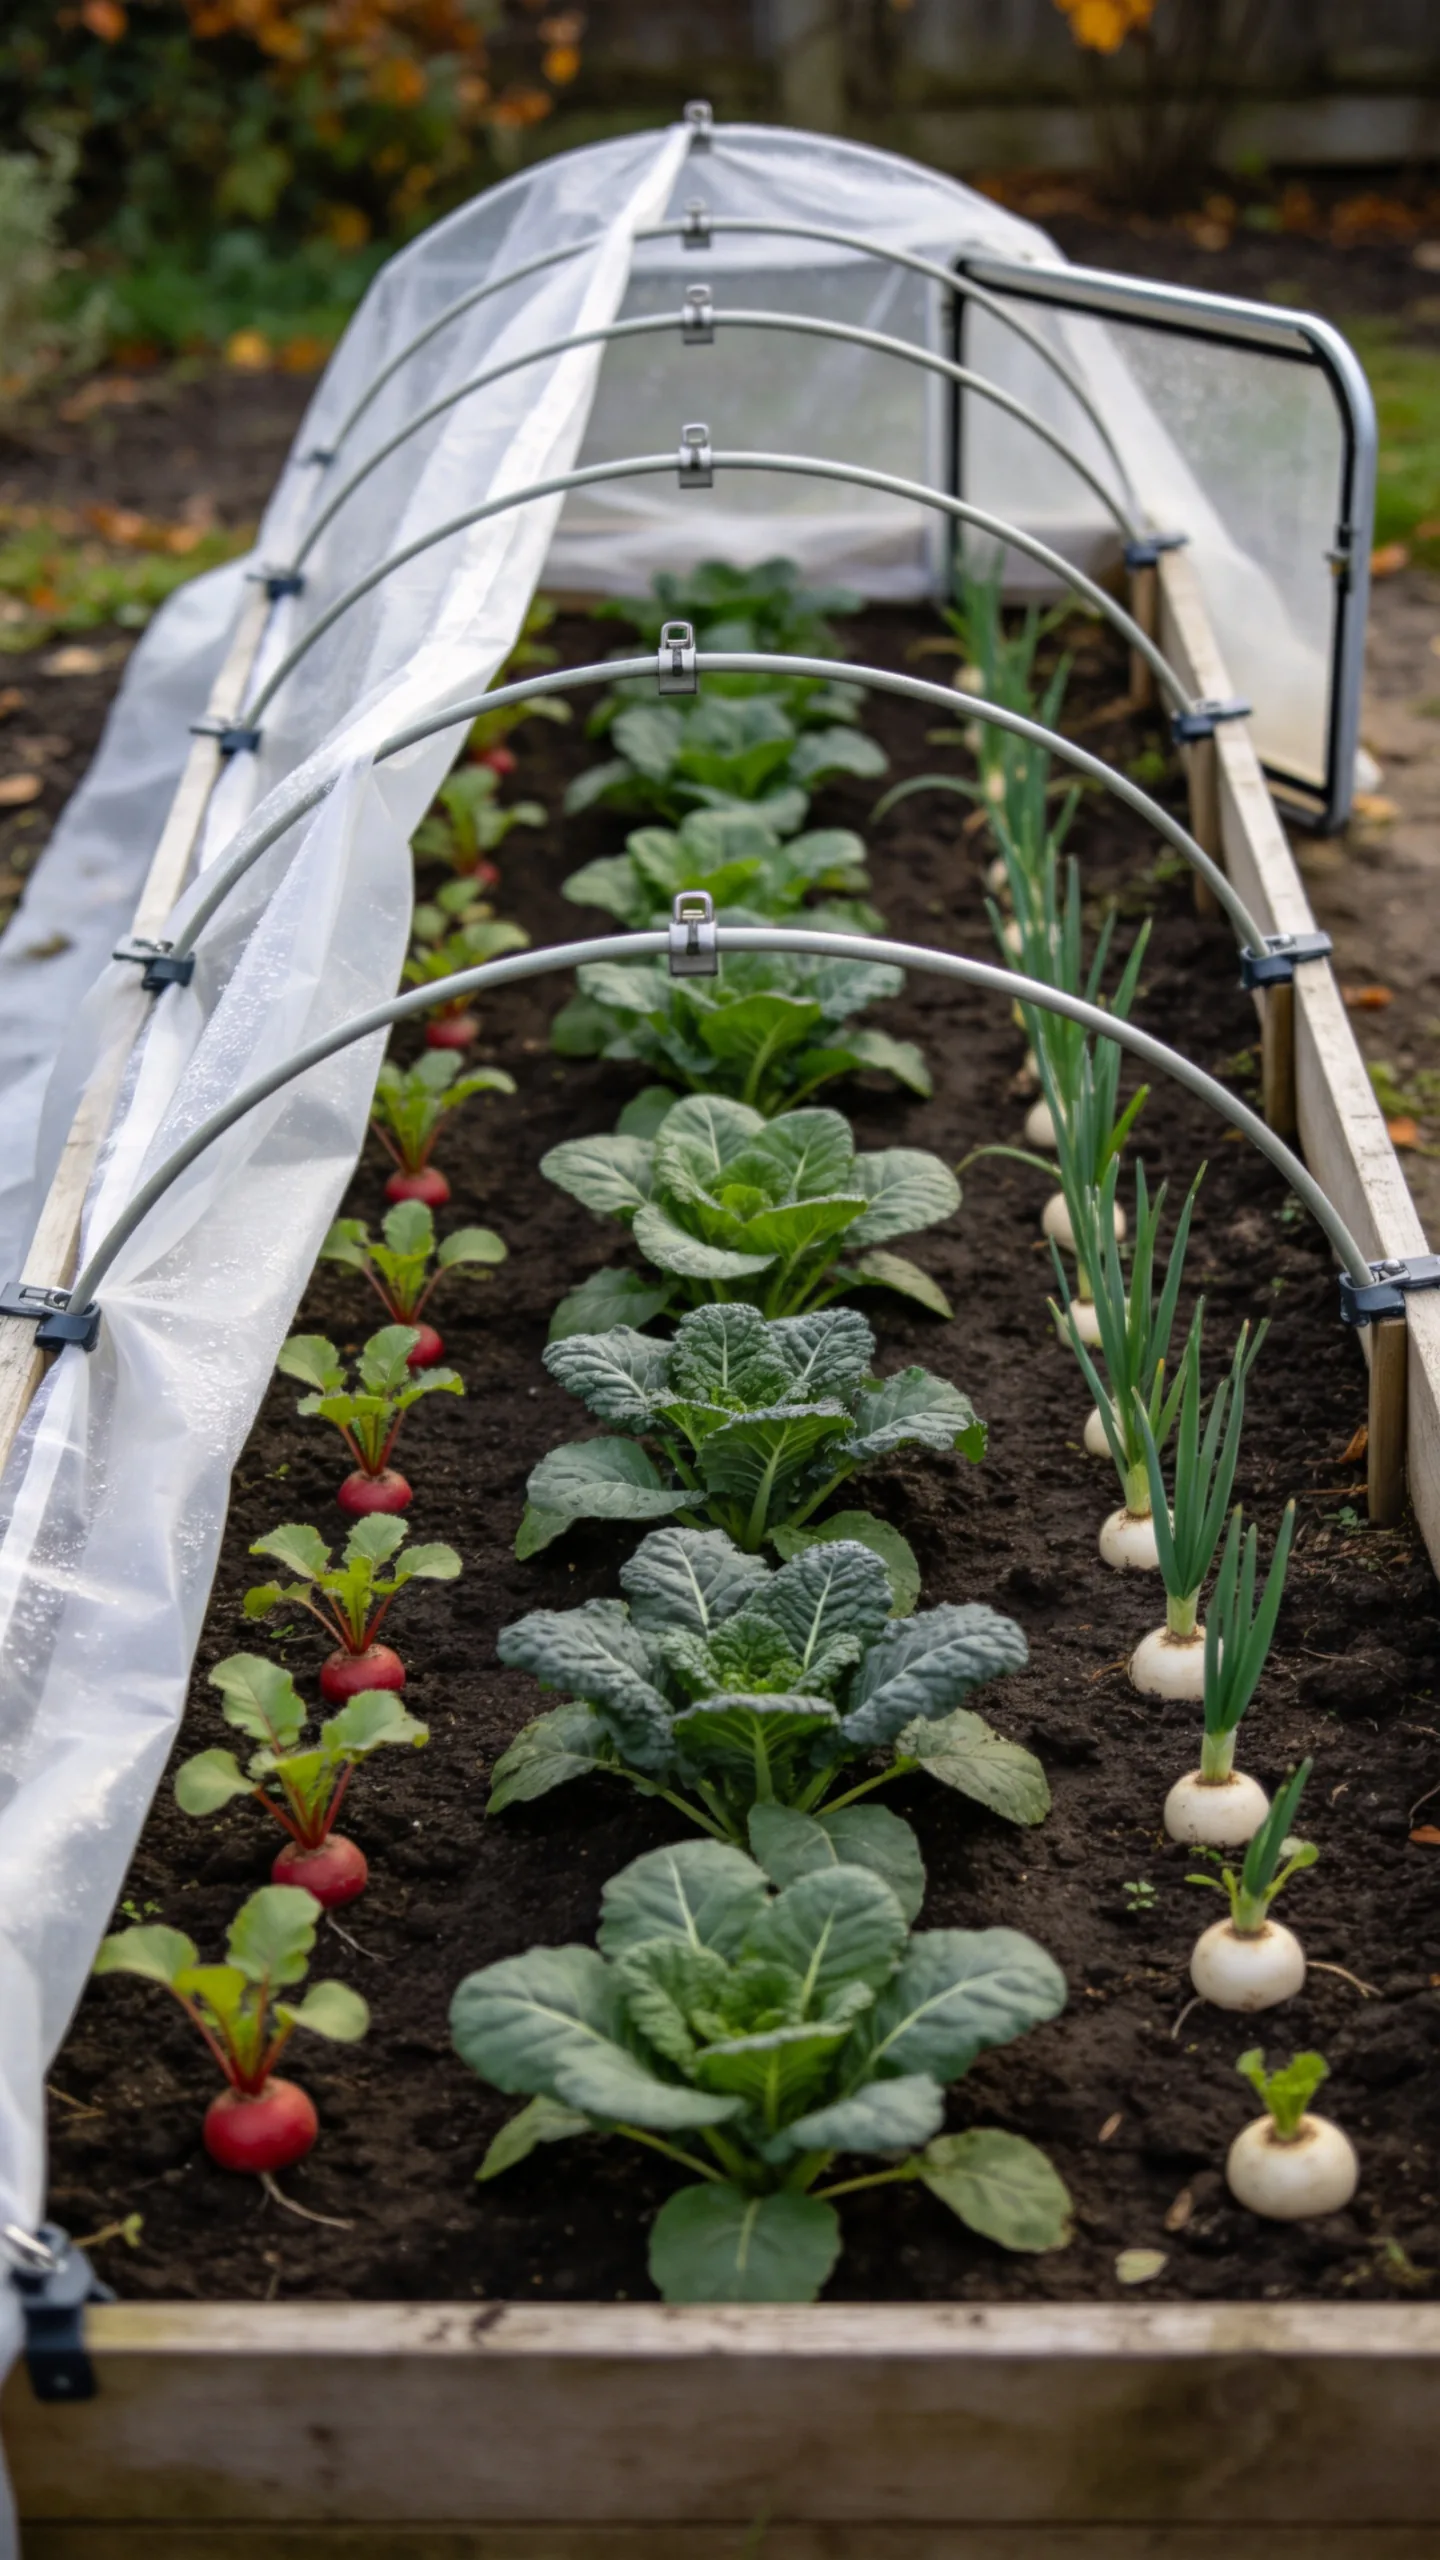
Insert short lengths of rigid pipe along the sides of a raised bed and bend flexible hoops over the top. Cover the hoops with insect mesh early in the season, then switch to frost cloth or greenhouse plastic as temperatures fall. Secure the material with clips and weigh down the edges against wind.
Lay out hardy greens down the center and shorter radishes, scallions, or baby turnips along the sides. Keep leaves from pressing against plastic, where condensation and cold contact can cause damage. If using plastic rather than breathable fabric, open the ends for ventilation whenever daytime temperatures rise.
11. Vertical Planter for Leafy Greens
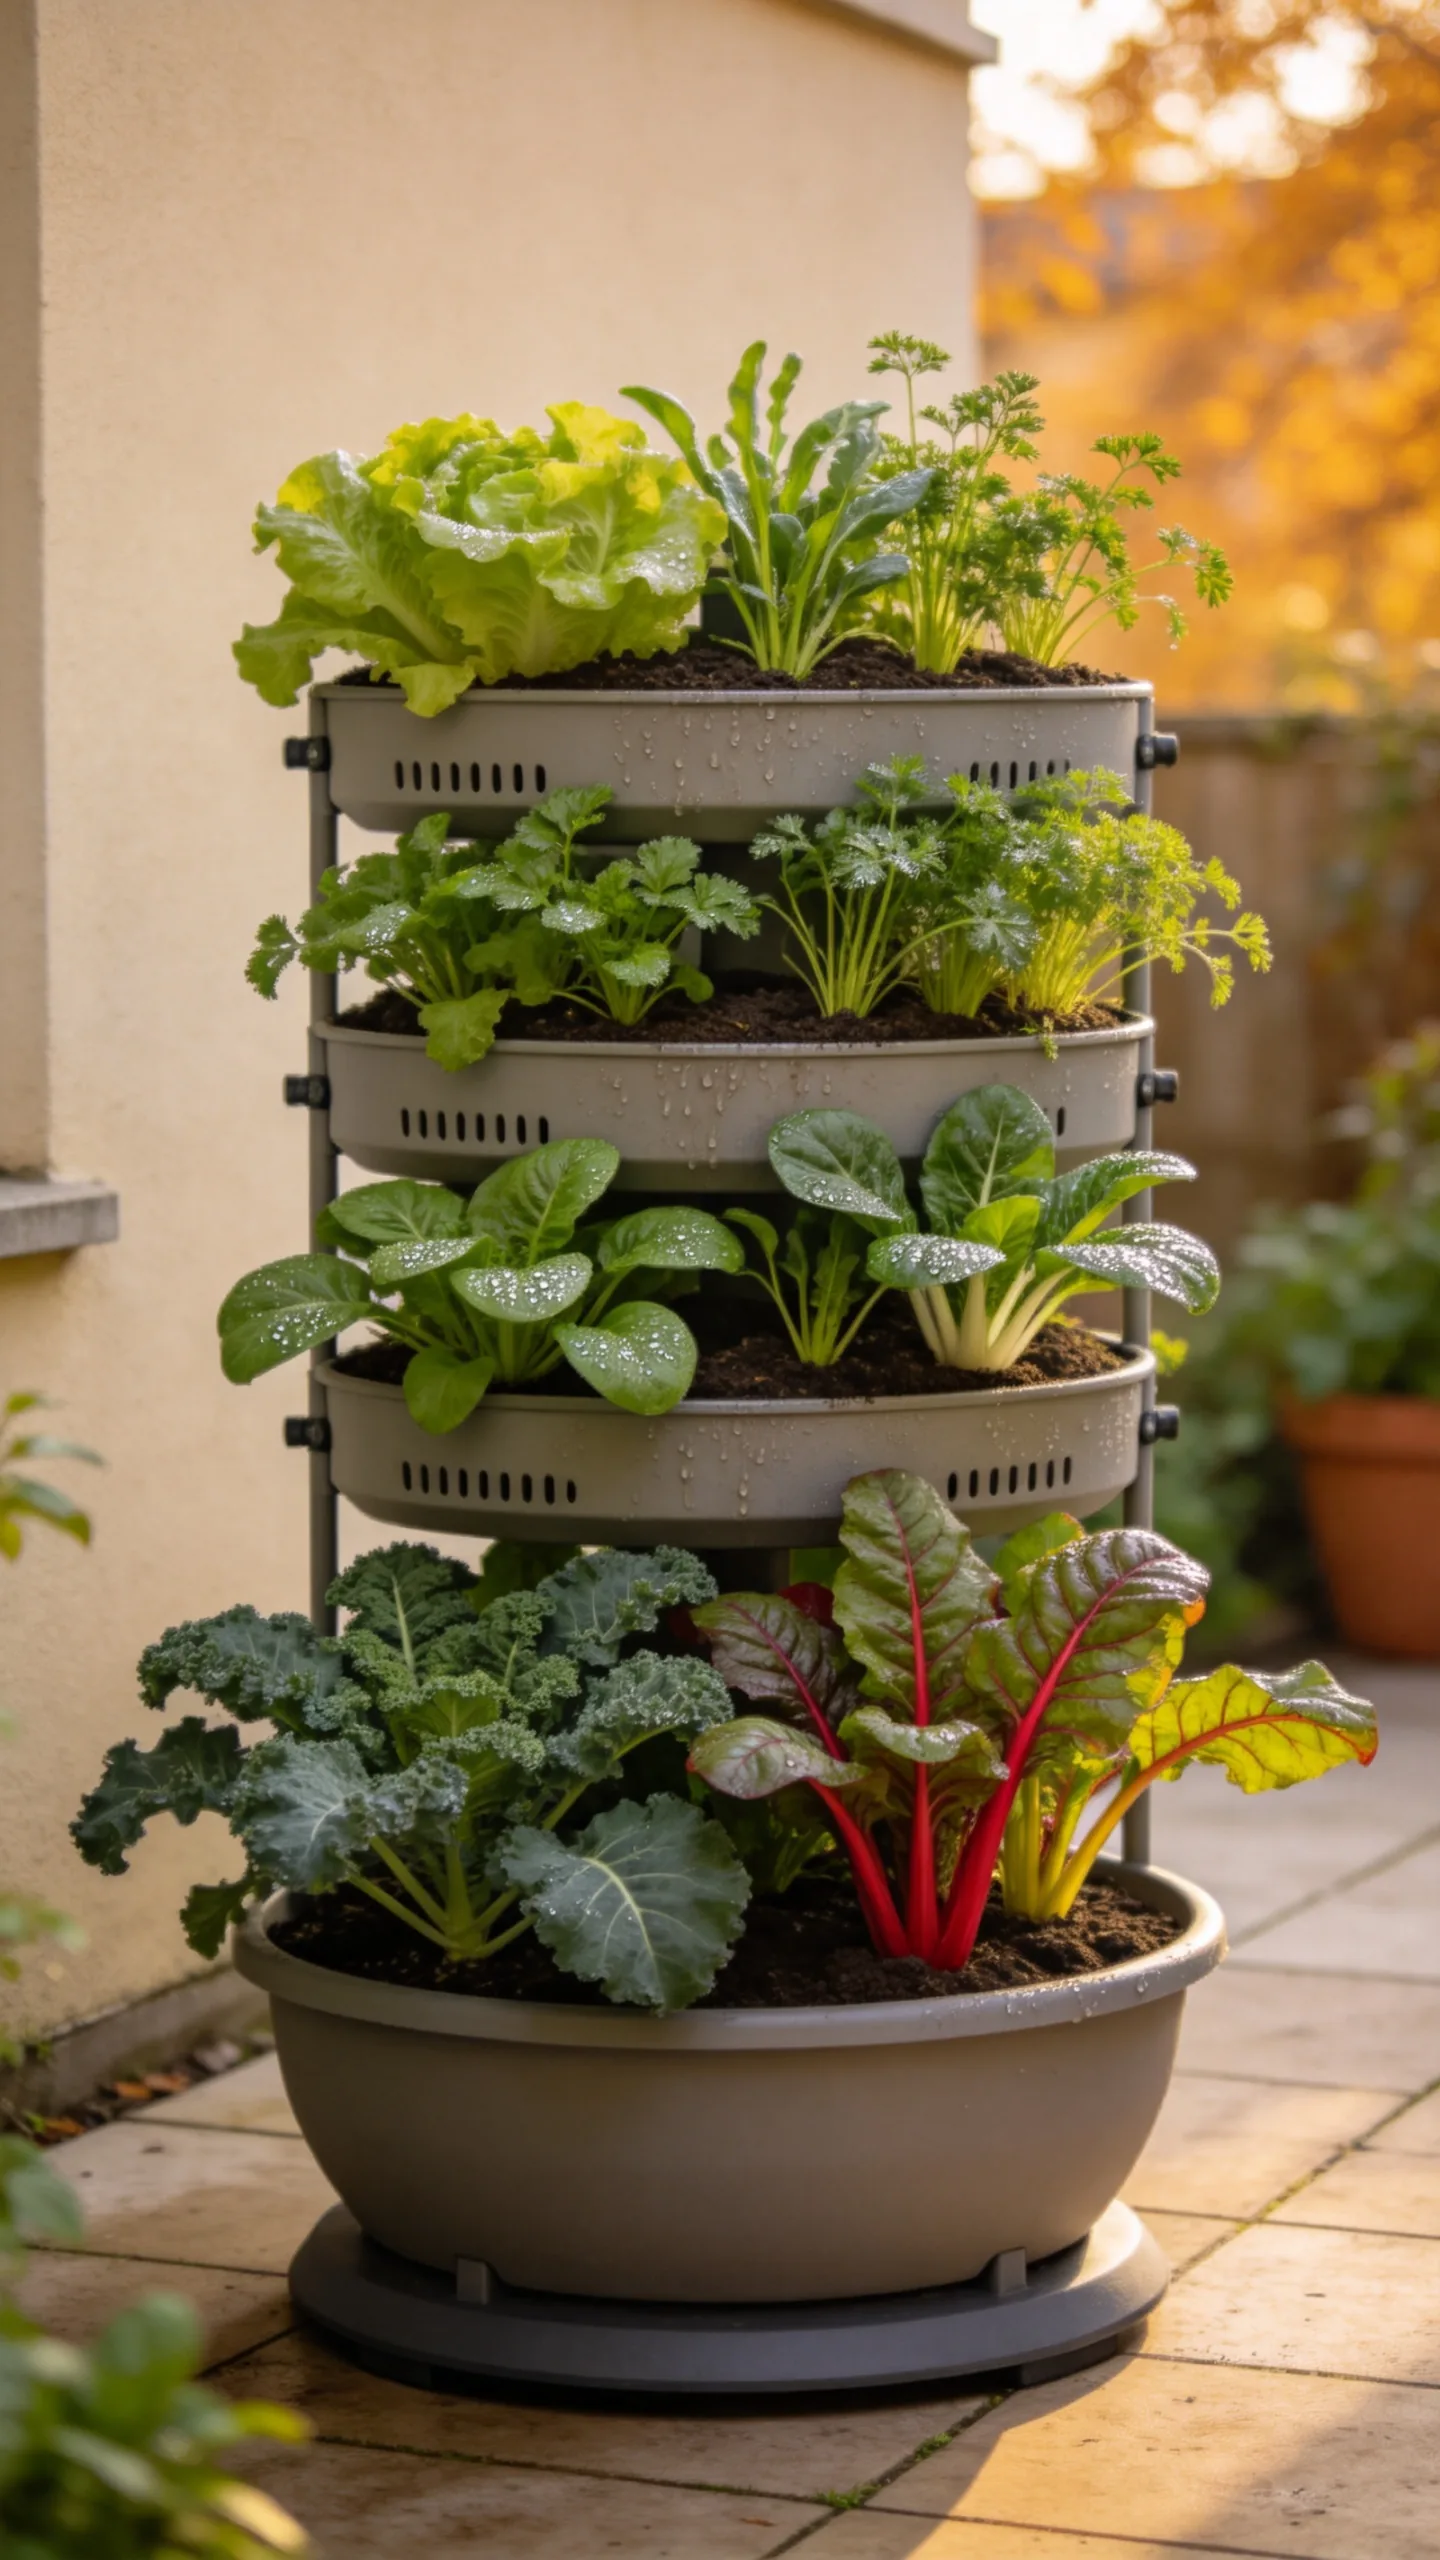
Use a freestanding pocket planter, stacked container tower, or tiered shelf in a sunny courtyard or patio. Plant compact lettuce, arugula, parsley, spinach, and Asian greens in the pockets, keeping larger kale or chard plants in the deepest containers at the bottom.
Vertical planting increases growing area without occupying more floor space. Because upper pockets often dry faster and may drip onto lower plants, check moisture at several levels instead of watering on a fixed schedule. Anchor tall units securely and rotate movable planters periodically if one side receives substantially more light.
12. Patio Container Cluster
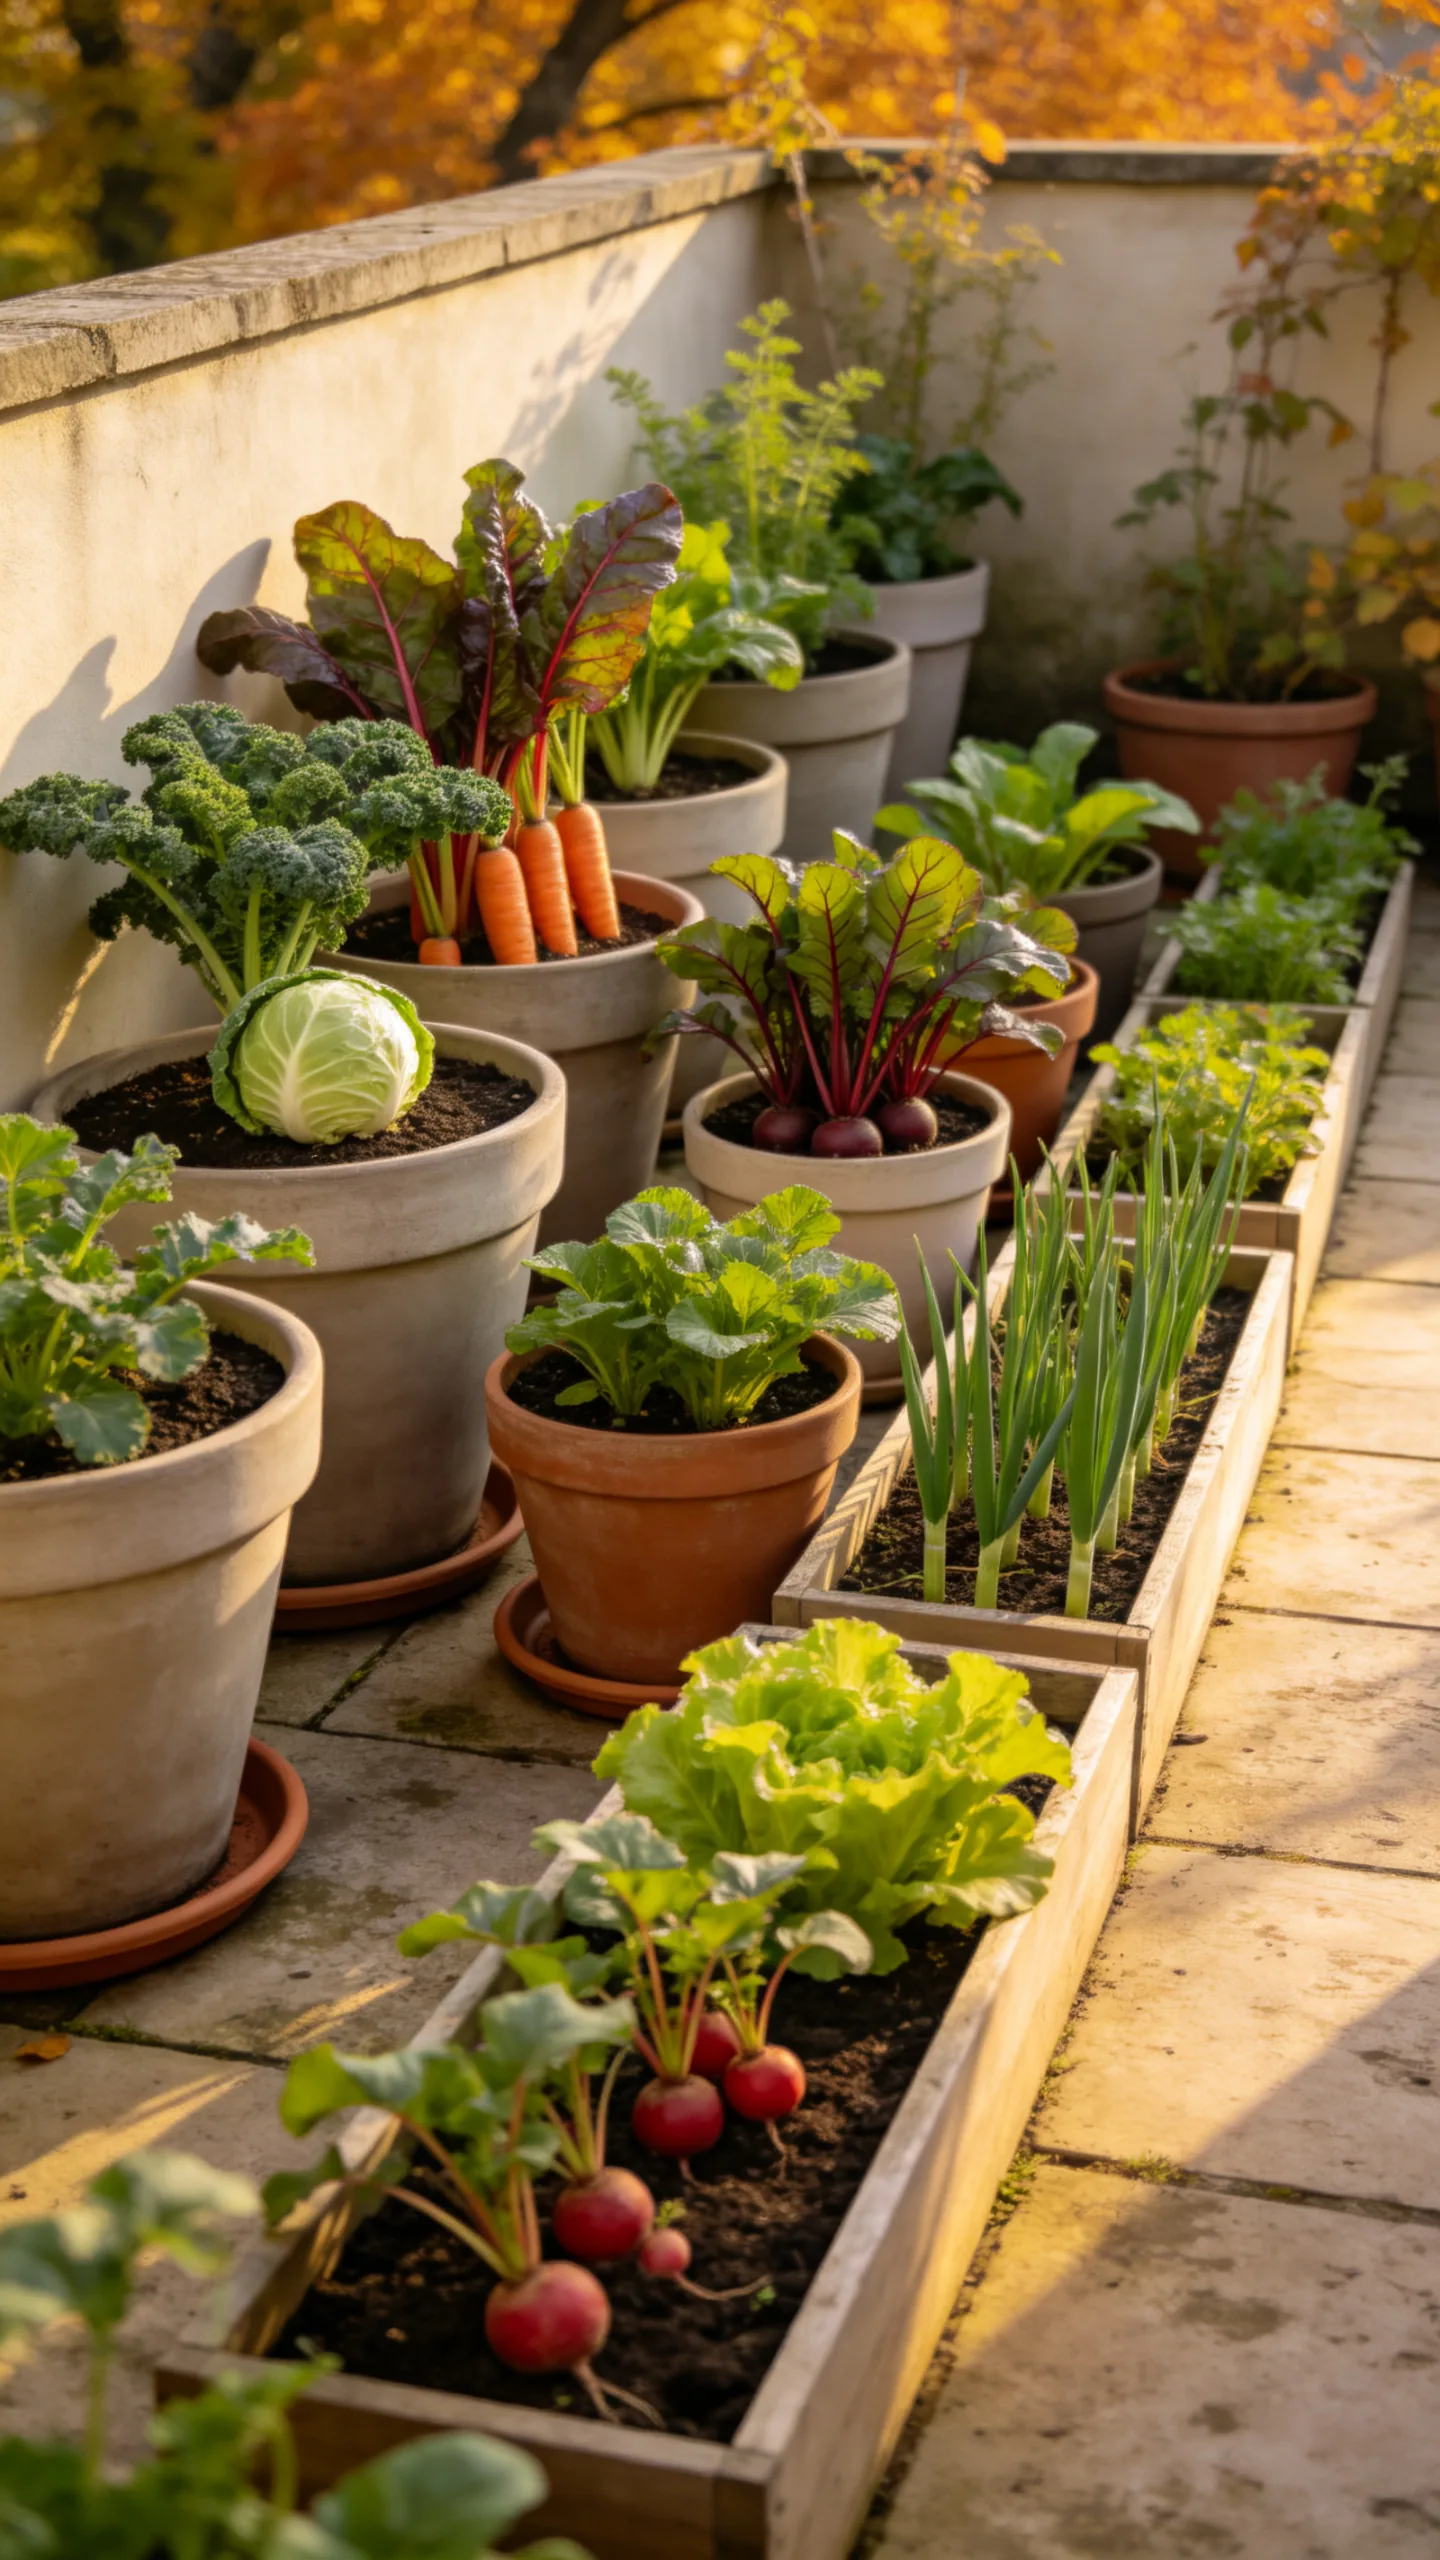
Group several containers by crop depth and mature size instead of trying to grow everything in one pot. Use deep containers for carrots, kale, chard, or compact cabbage; medium pots for beets and Asian greens; and shallow window boxes for radishes, lettuce, and scallions.
Arrange the tallest containers at the back and place low boxes along the sunny front edge. Grouping pots reduces wasted patio space and makes watering more efficient, but every container still needs drainage holes. Choose a quality potting mix rather than garden soil, and move tender containers against a sheltered wall when light frost is forecast.
13. Doorstep Kitchen-Harvest Bed
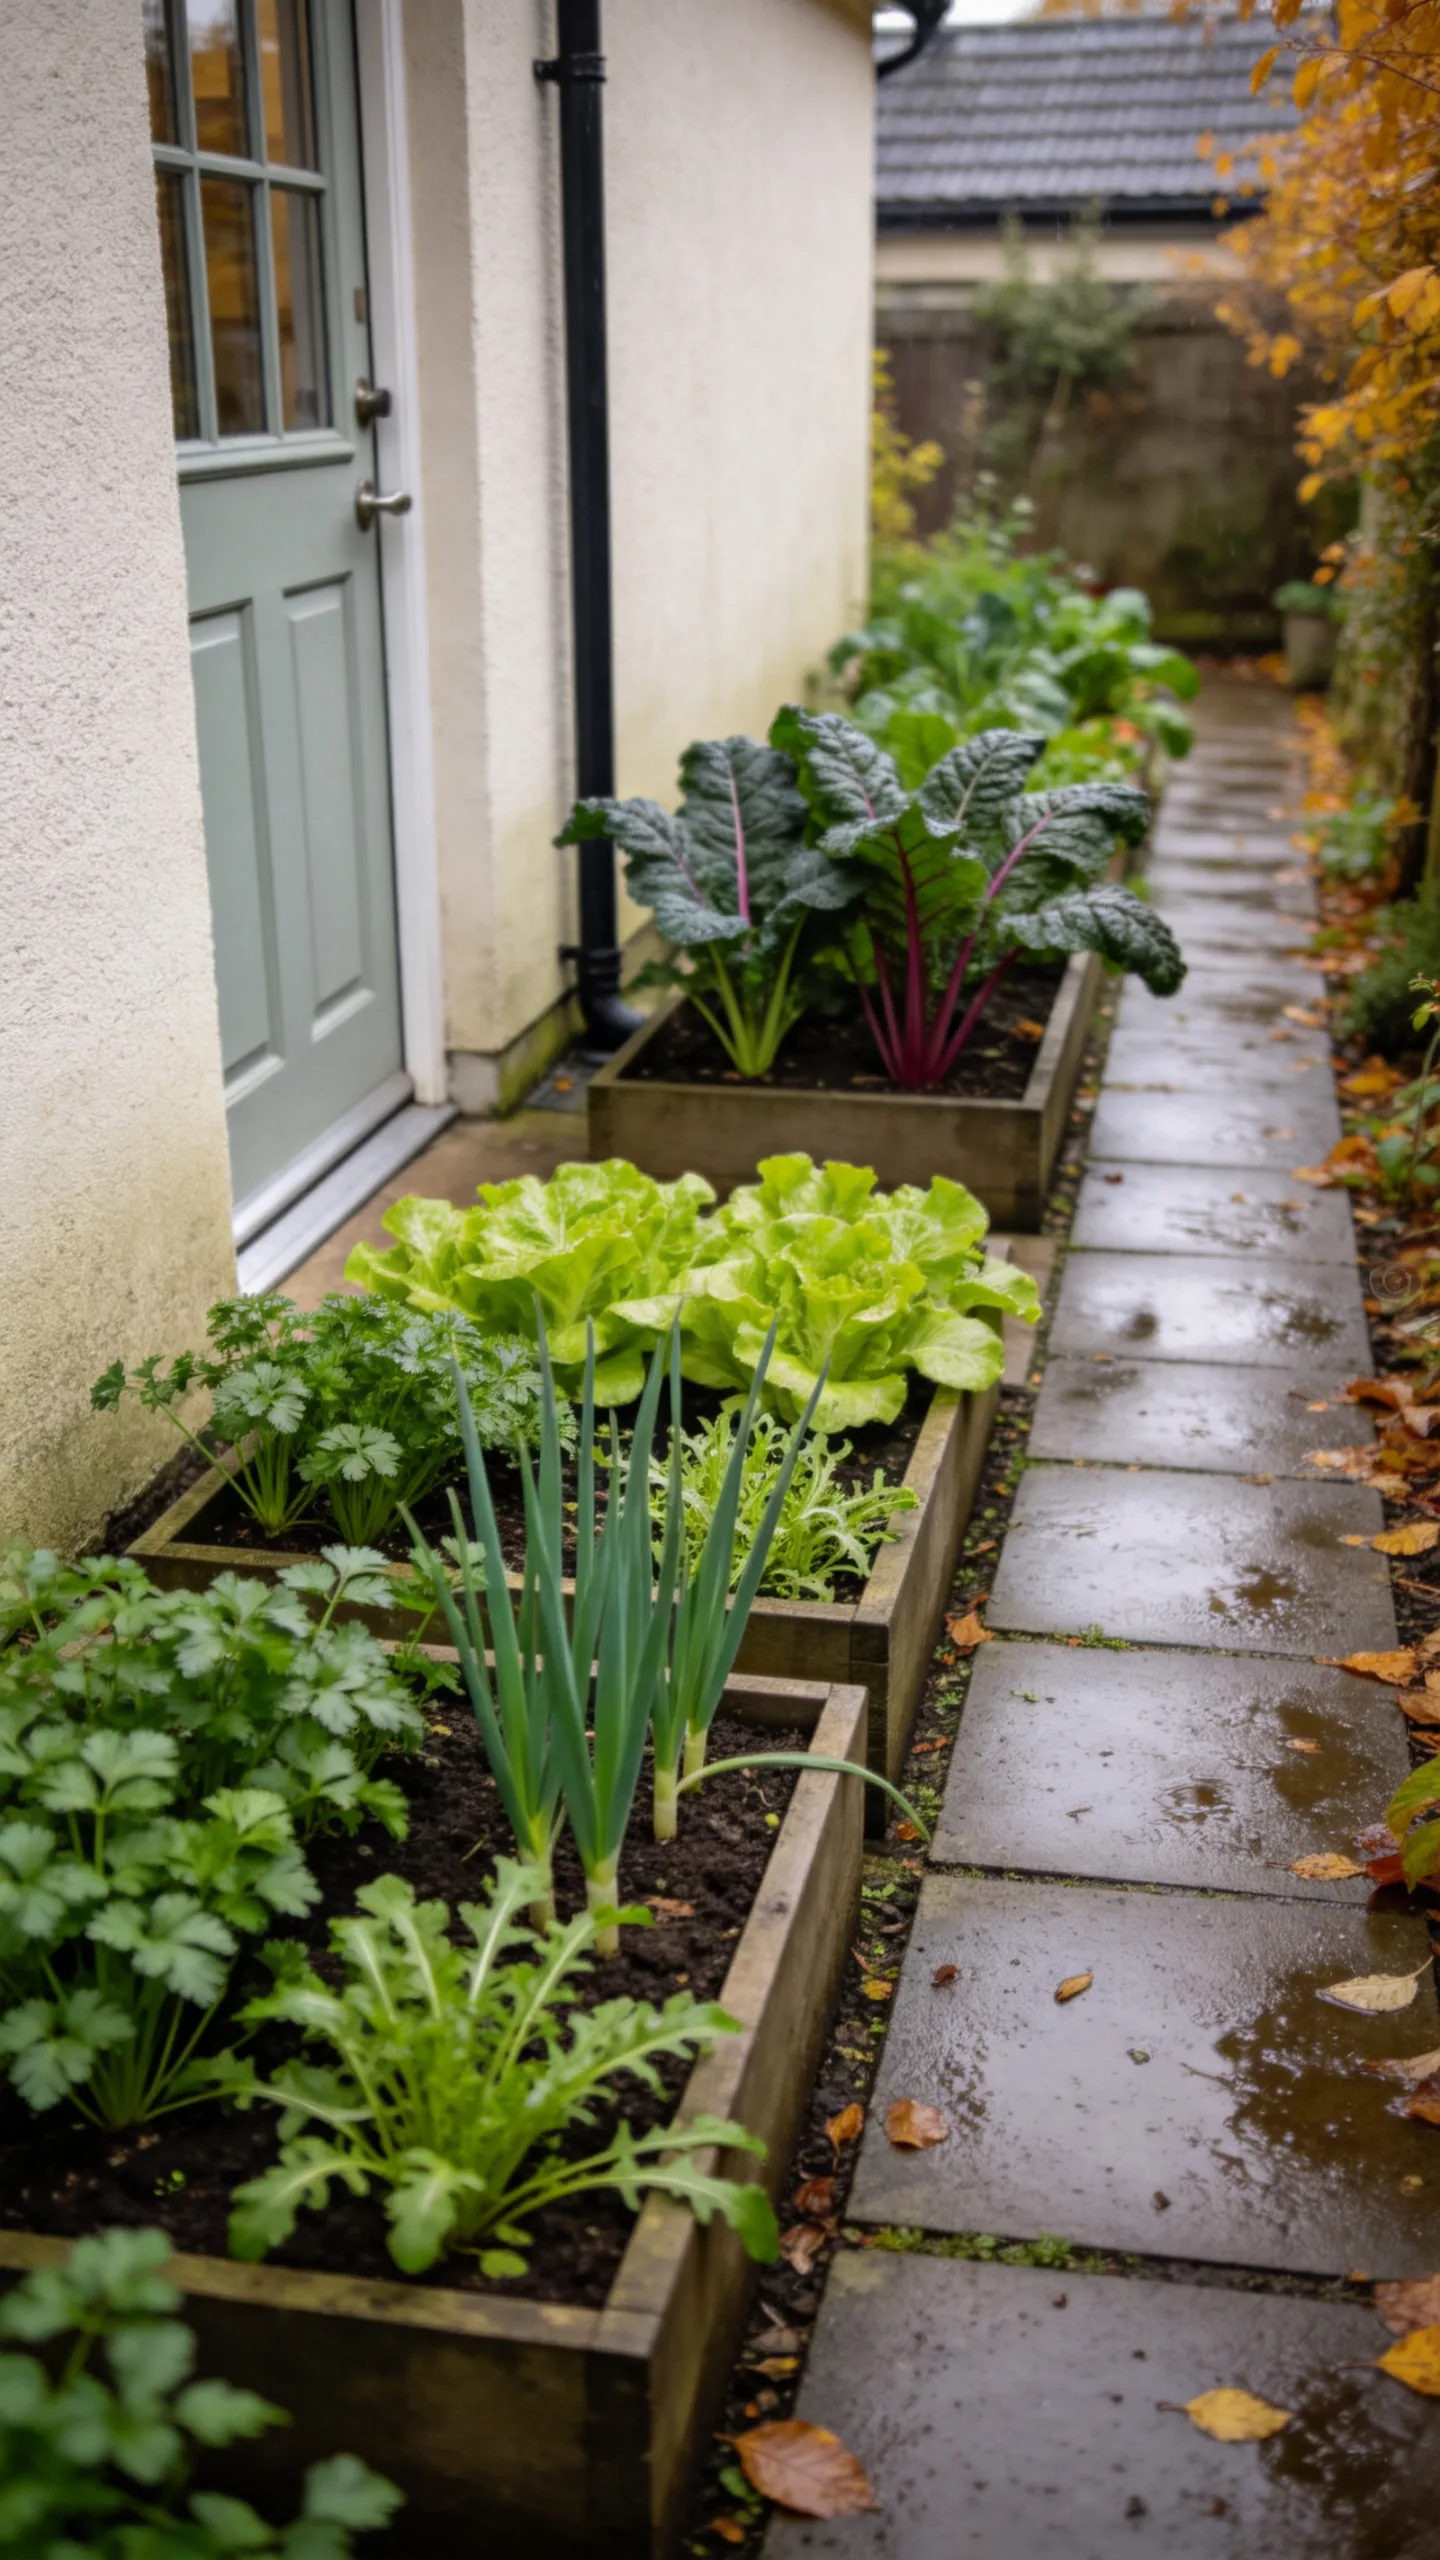
Place a narrow bed or row of rectangular planters near the kitchen door for vegetables that are harvested frequently. Fill the closest section with parsley, cilantro, scallions, lettuce, and arugula, then place larger kale or Swiss chard plants at the far end.
This layout prioritizes convenience during cool or wet weather, making it easier to pick a handful of greens for meals. Keep containers clear of roof runoff and walking routes. Cilantro is particularly useful in a fall layout because it generally tolerates cool conditions better than summer heat, although severe freezes may still require protection.
14. Keyhole Bed With a Central Access Path
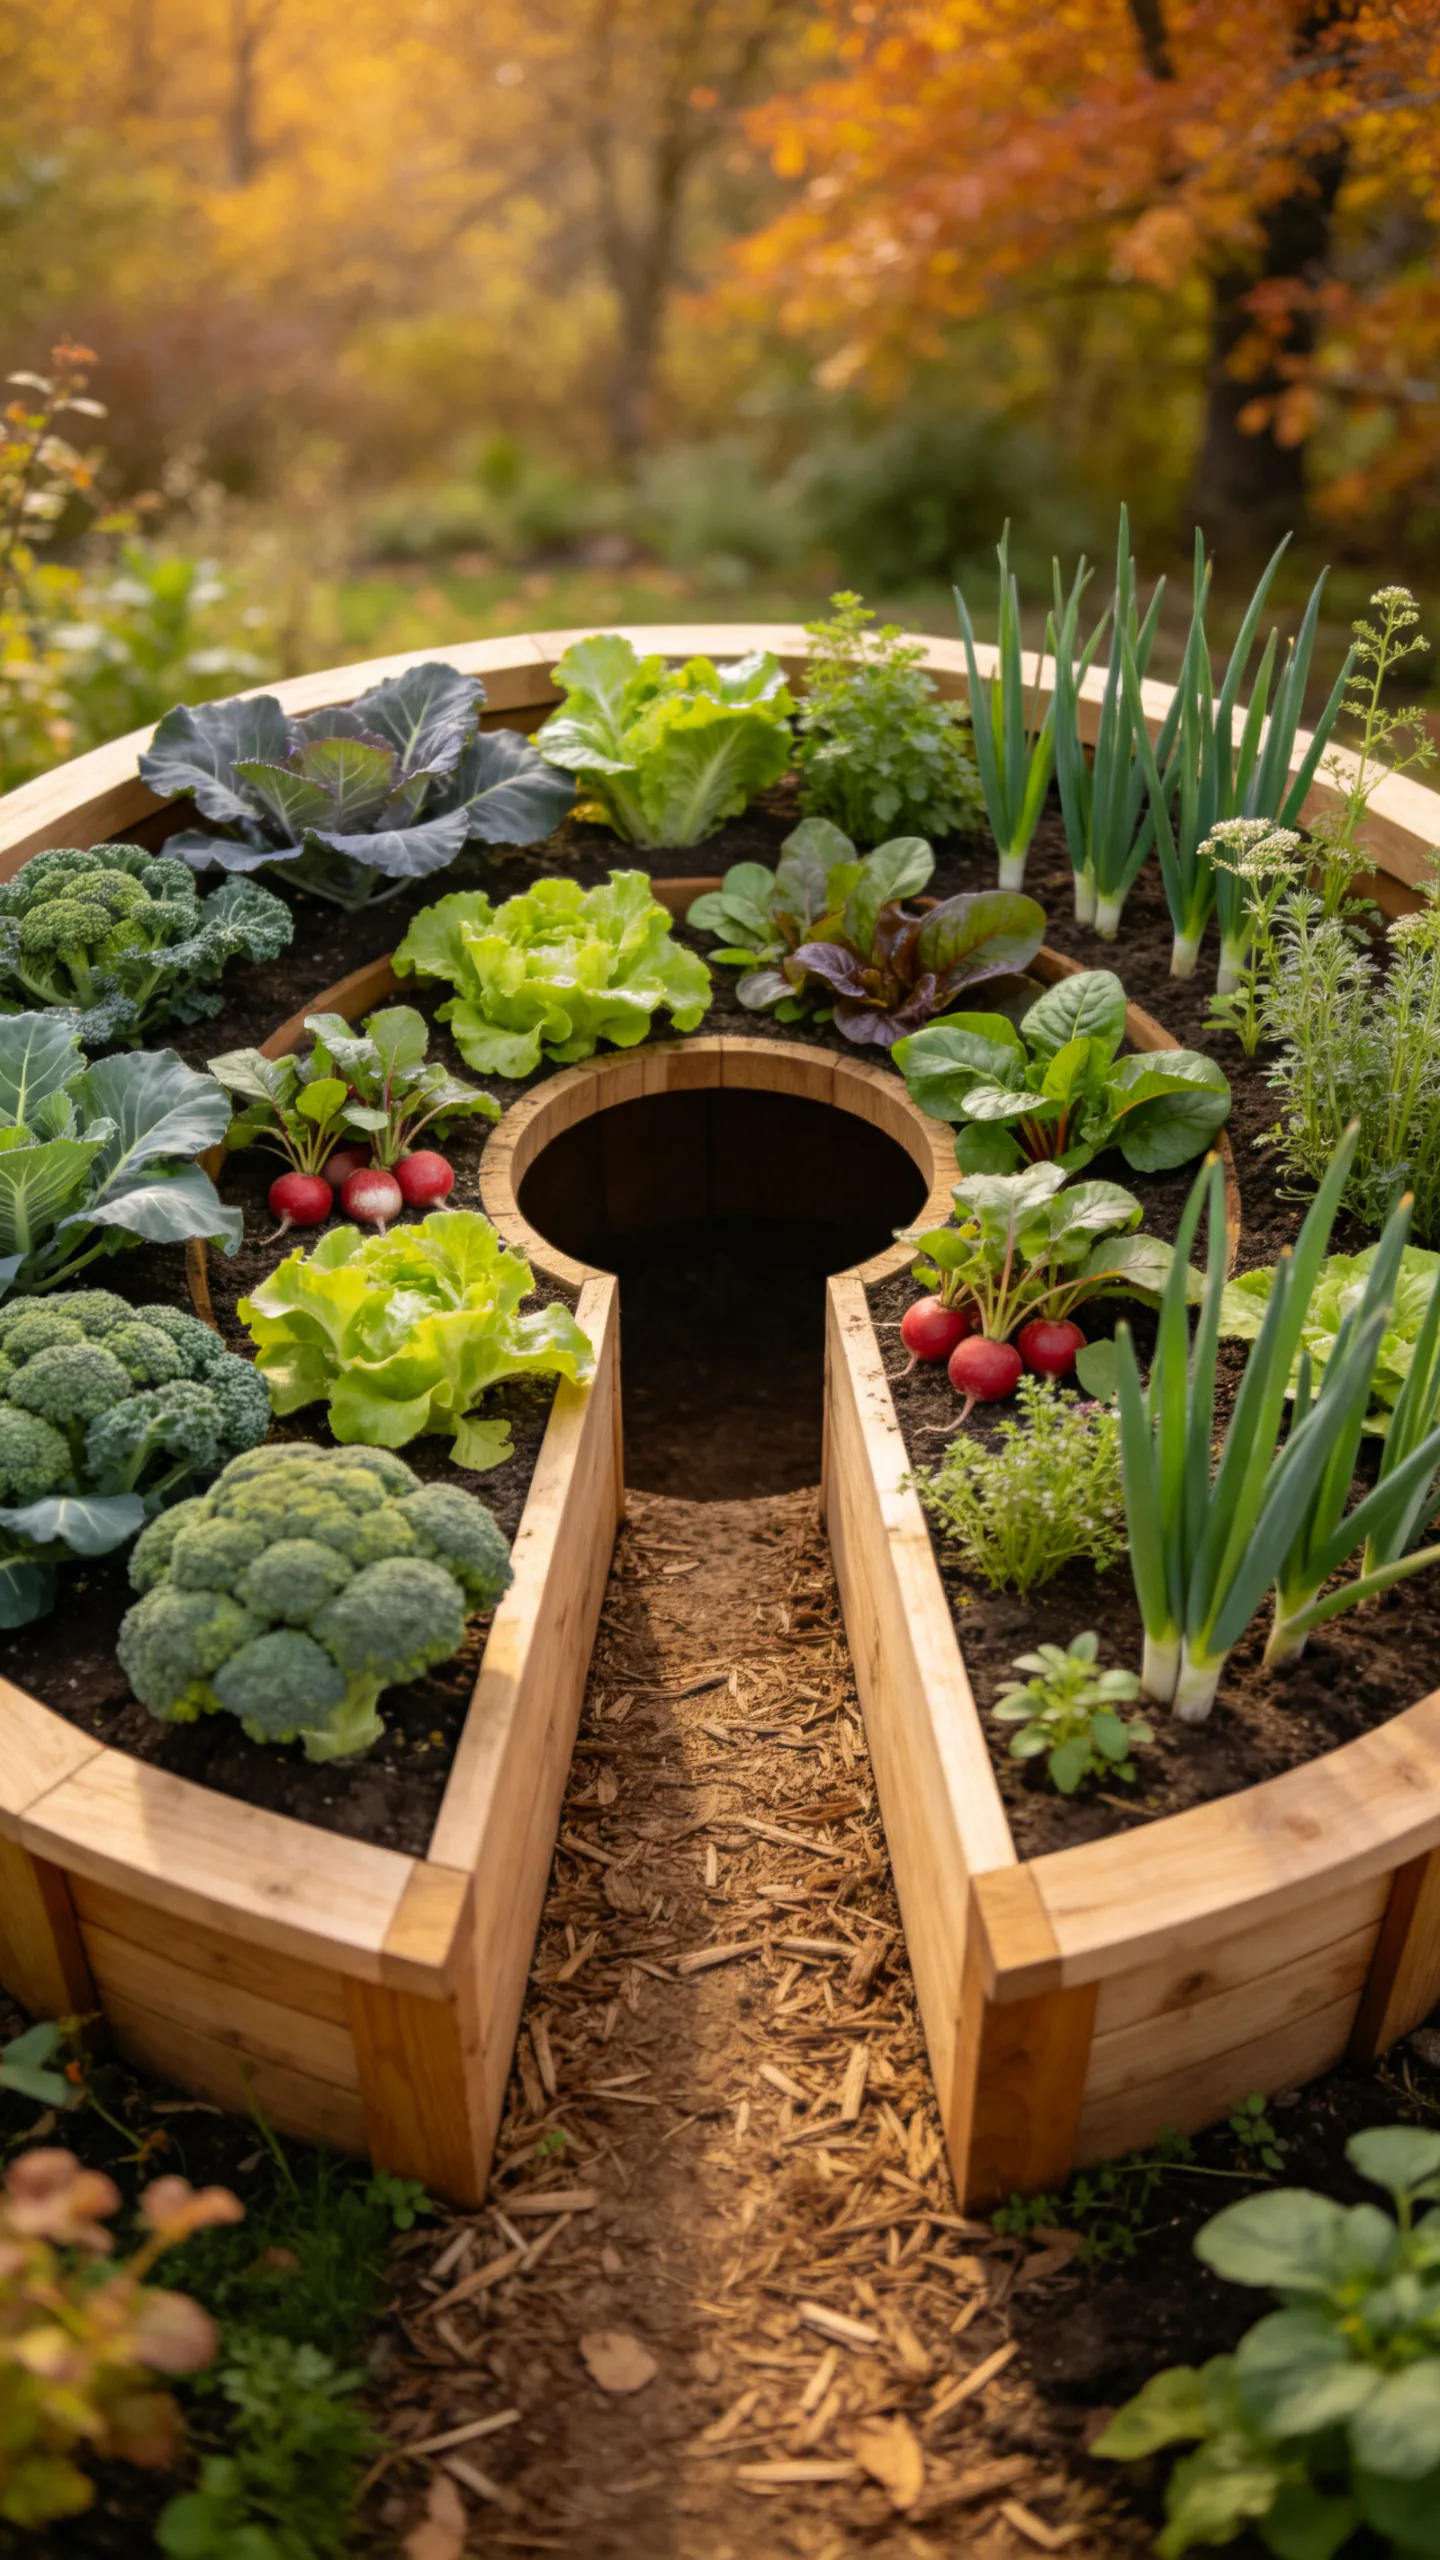
Build a compact rectangular or circular bed with a narrow path extending into the center, creating a keyhole shape. Plant kale, collards, or compact broccoli around the outer north edge and arrange lettuce, radishes, spinach, and herbs around the central opening.
The inset path lets gardeners reach more planting space without making the entire bed narrow. This is useful in a small yard where several separate paths would take up too much room. Add mulch to the access area and make the opening wide enough to kneel or turn comfortably without leaning on the soil.
15. Part-Shade Fall Greens Layout
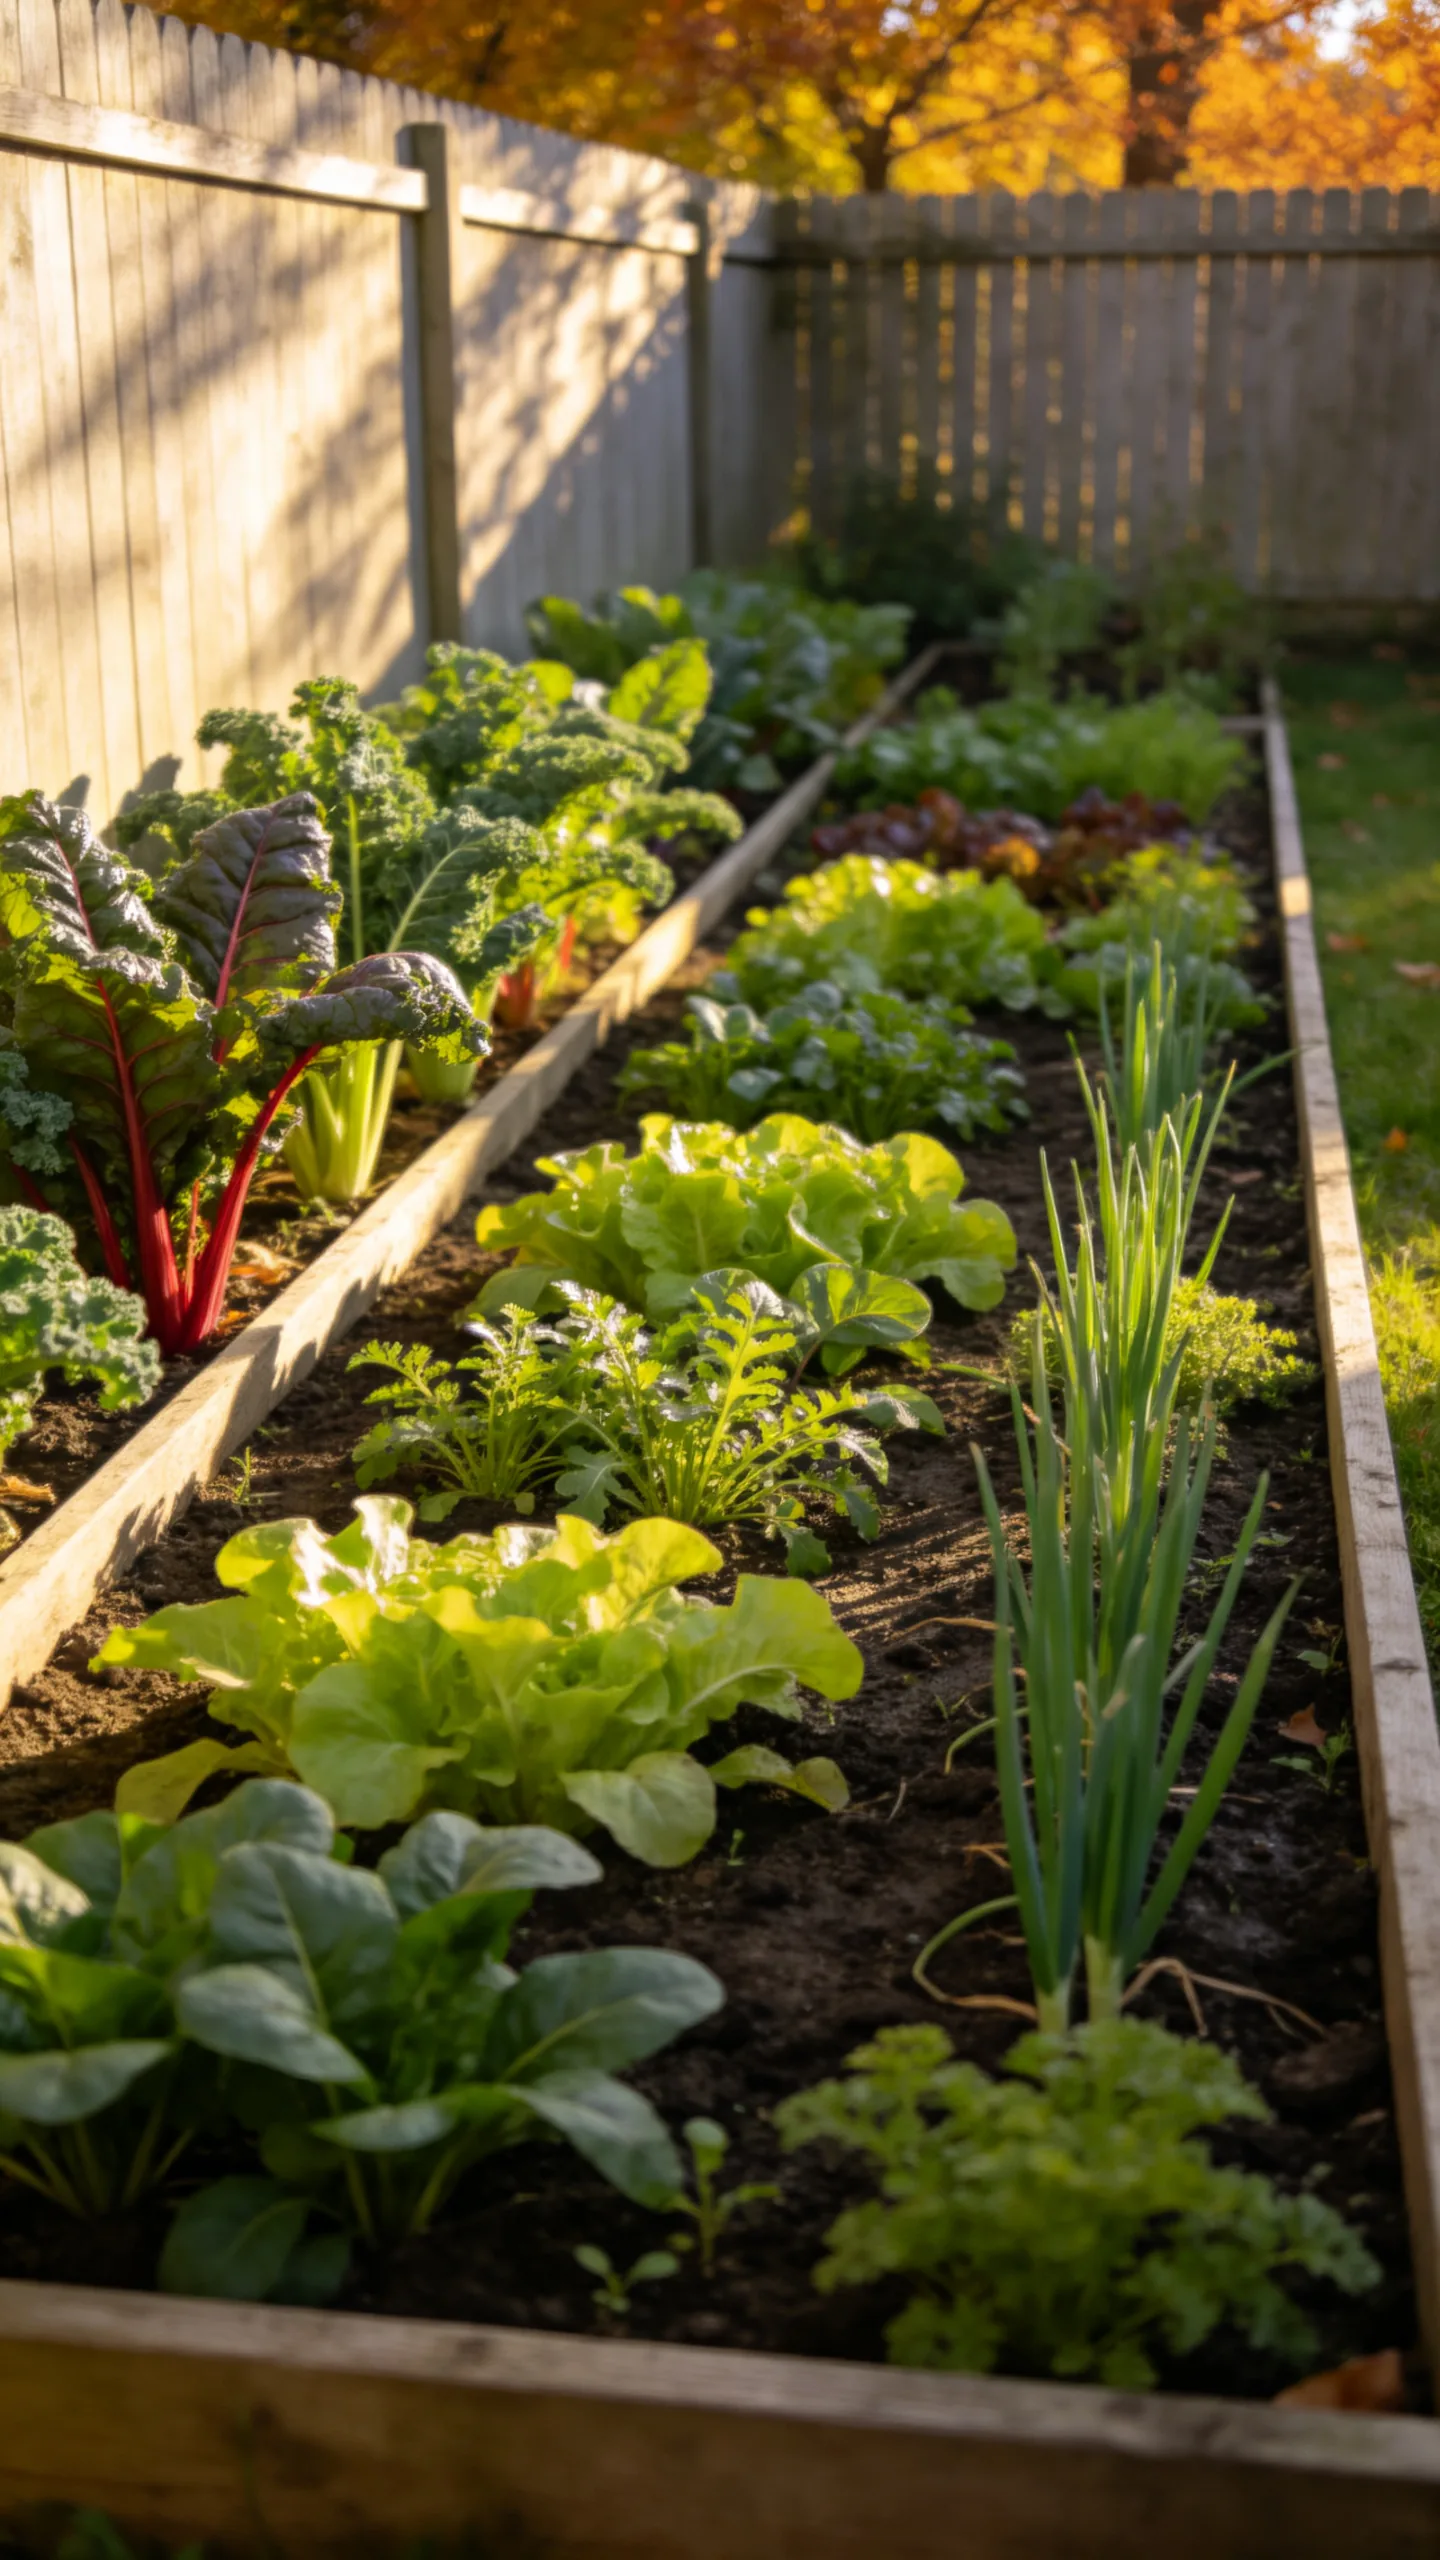
Use a bed that receives morning sun and light afternoon shade for spinach, lettuce, arugula, mustard greens, and scallions. Place the most sun-tolerant crops, such as kale or chard, along the brighter outer edge and reserve the shadier section for tender salad leaves.
This arrangement can make use of a side yard or a bed shaded by a fence, but fall crops still need adequate light. Observe the site after nearby trees and buildings cast their seasonal shadows; a location that worked in summer may receive much less autumn sun. Avoid dense planting in damp shade, and give plants extra room if airflow is limited.
16. Tiered Bed for a Sloped Small Yard
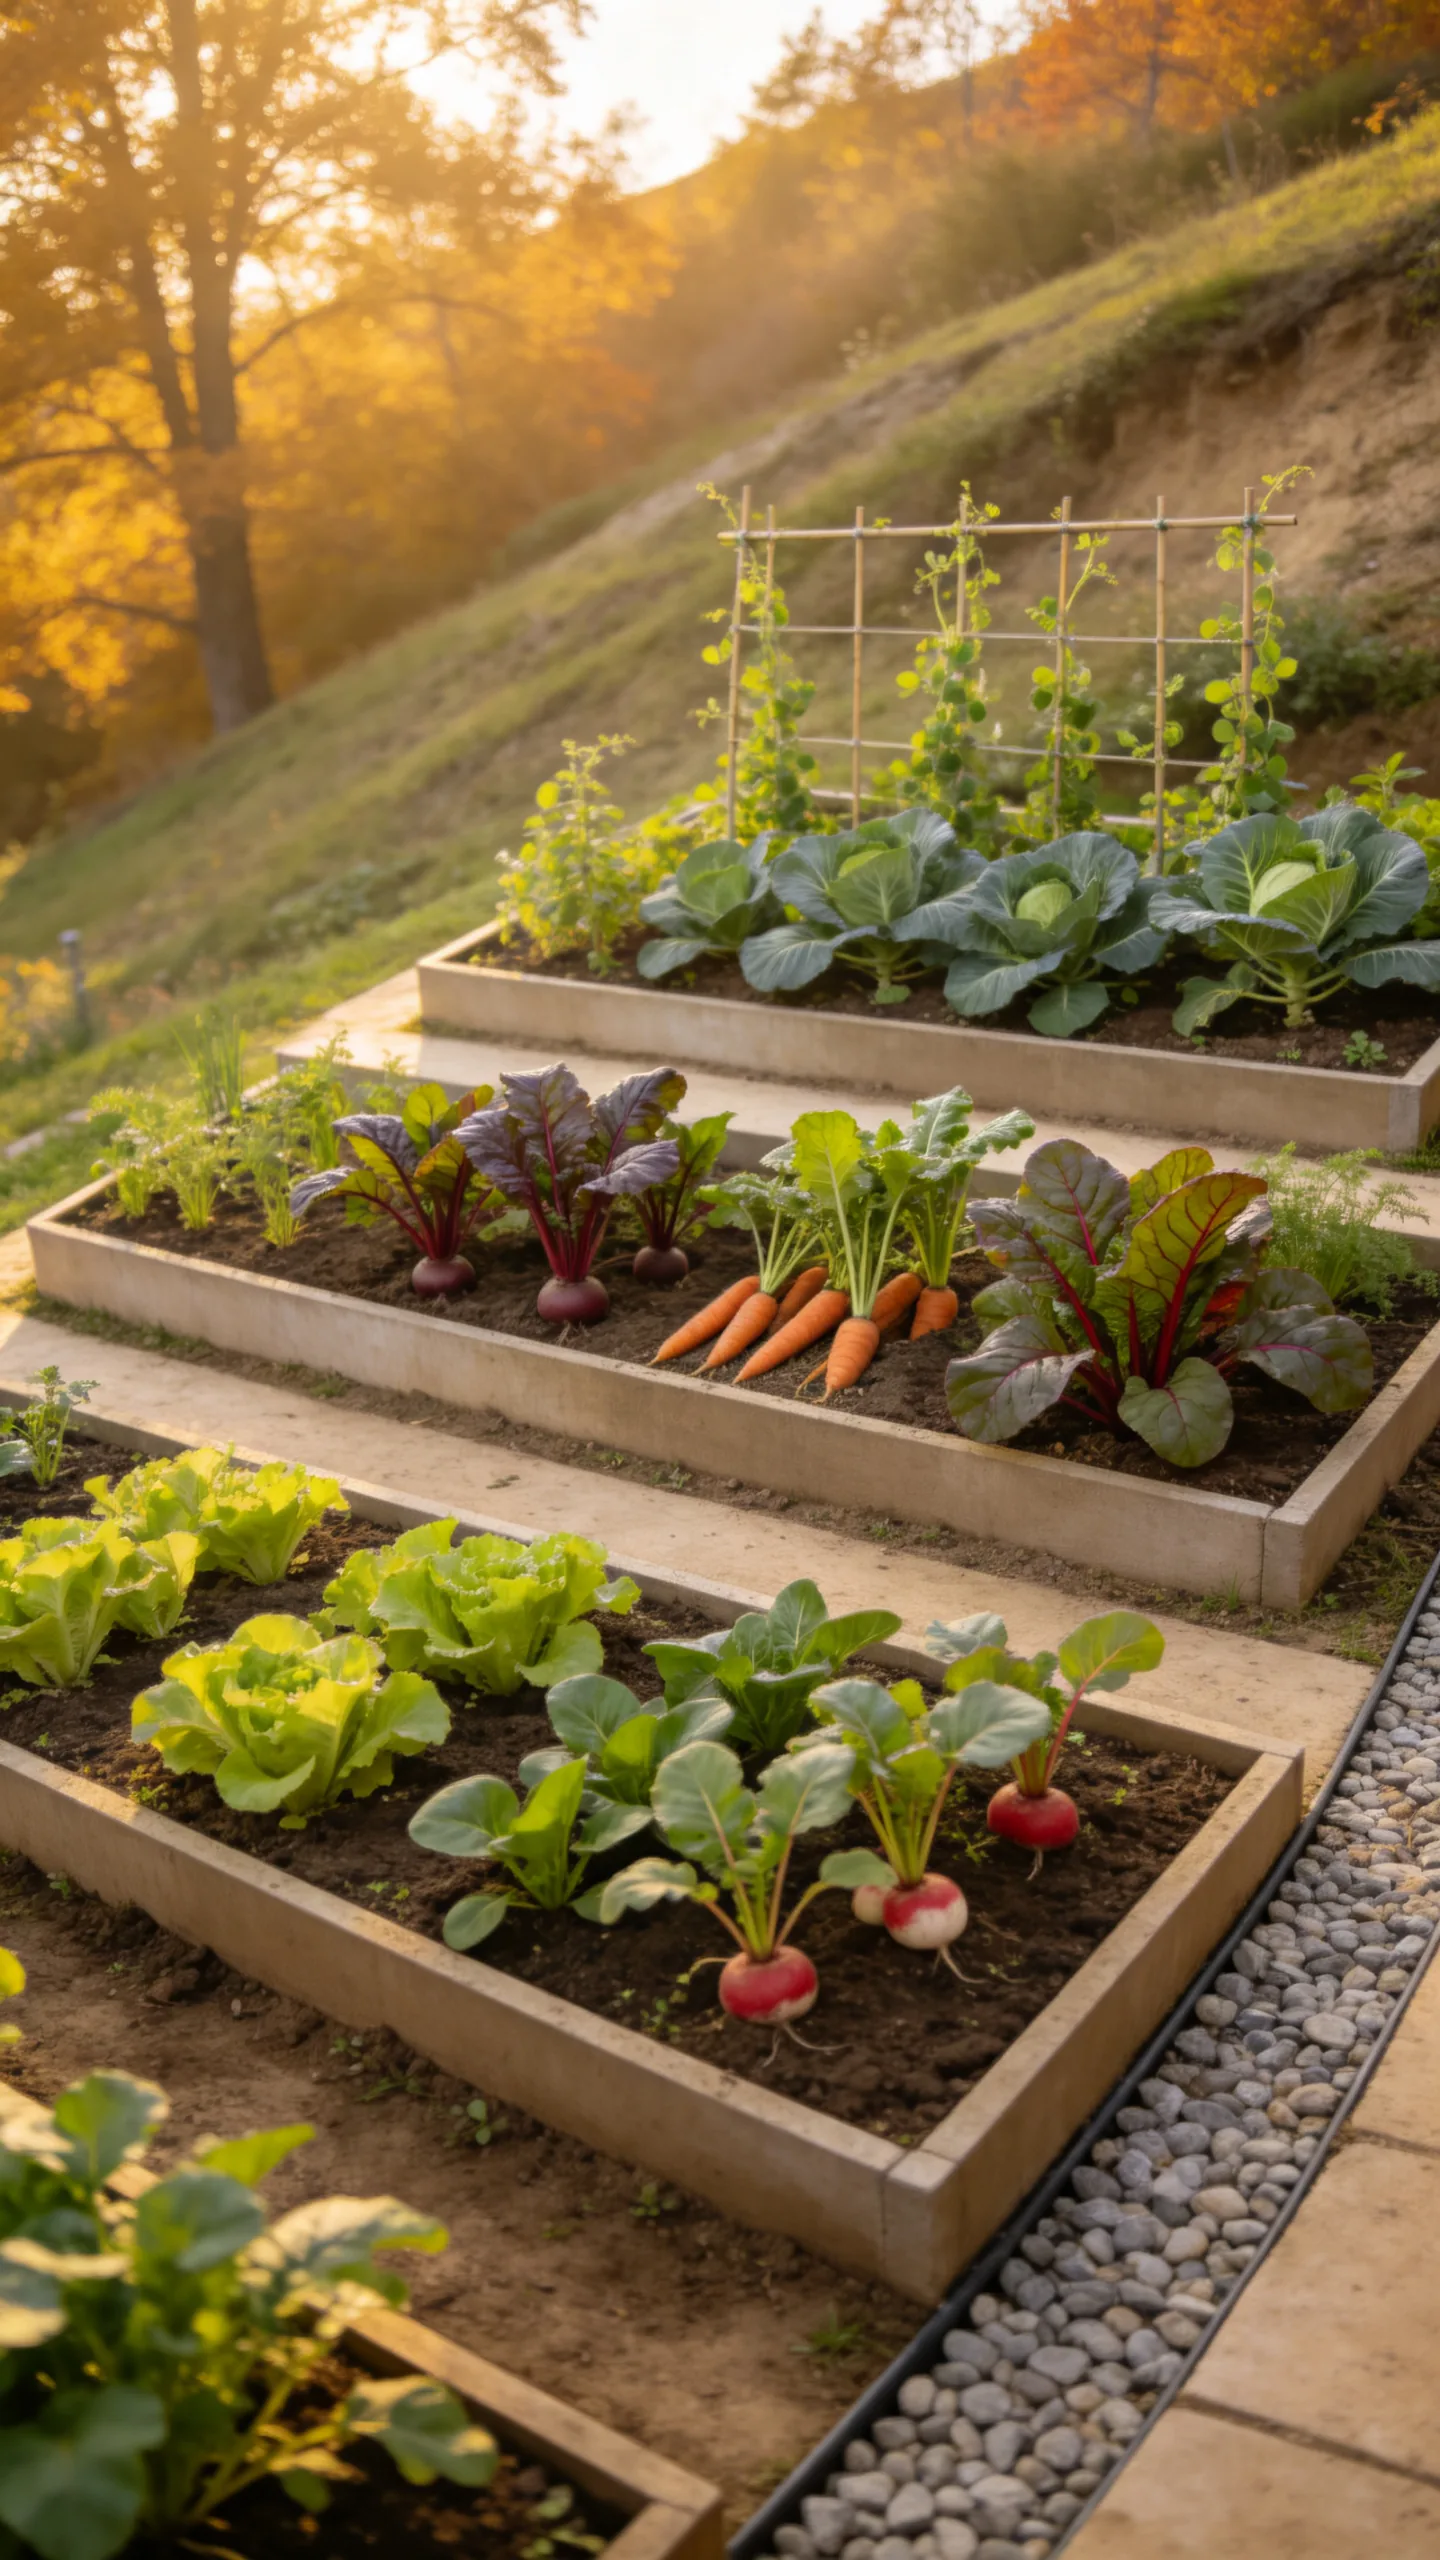
Install two or three narrow raised-bed tiers across a gentle slope, with level paths between them. Put tall brassicas or trellised peas on the highest northern tier, medium-height roots and chard in the middle, and low salad greens on the lowest southern tier.
Terracing creates flat planting areas, reduces awkward cultivation on a slope, and keeps one row from shading the next. Direct excess water toward a safe drainage area rather than allowing it to pool behind bed walls. For steep sites or substantial retaining walls, use appropriate structural guidance instead of relying on lightweight garden boards.
17. Pollinator-Edged Vegetable Bed
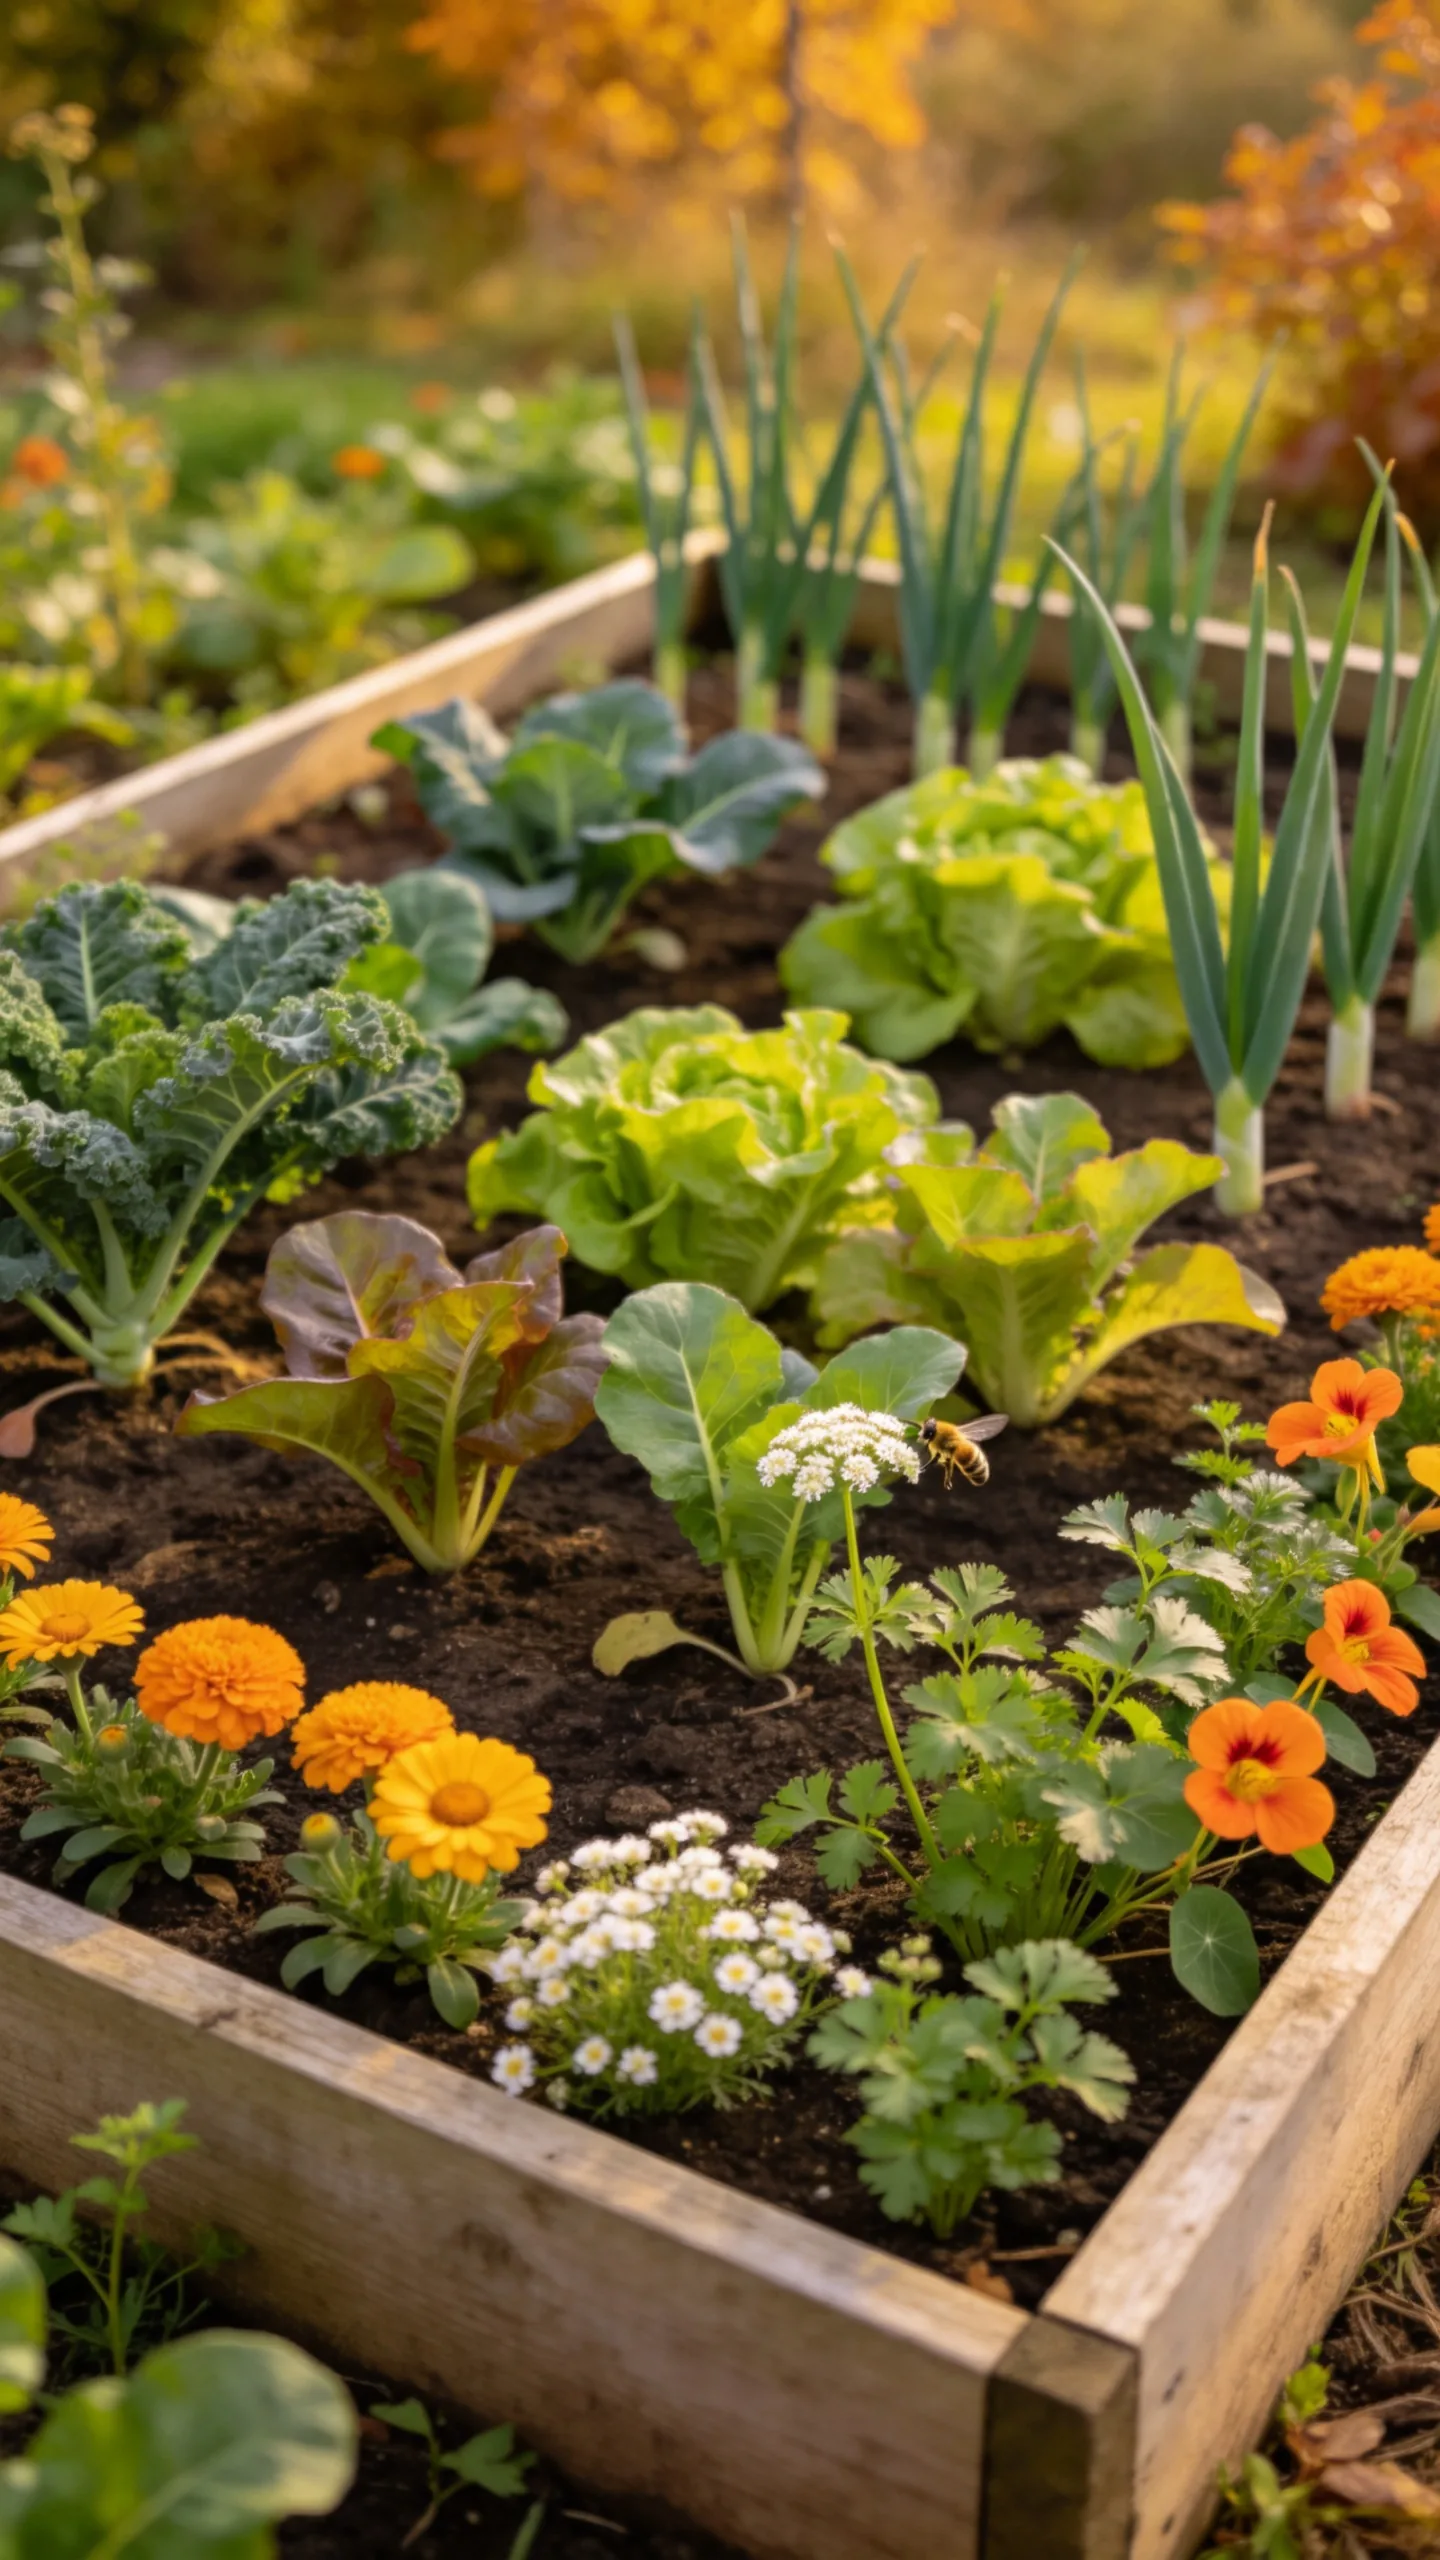
Reserve the center of a raised bed for fall vegetables and plant a narrow flower-and-herb border around selected edges. Suitable options may include calendula, sweet alyssum, cilantro allowed to flower, dwarf nasturtiums, or other cool-season plants recommended for the local climate.
Keep spreading flowers away from small seedlings and trim them if they begin to shade the vegetables. The border adds visual definition and can provide floral resources while conditions remain mild. Avoid treating open blooms with broad-spectrum pesticides, and remove diseased plant material rather than composting it in place.
18. Four-Quadrant Rotation Bed
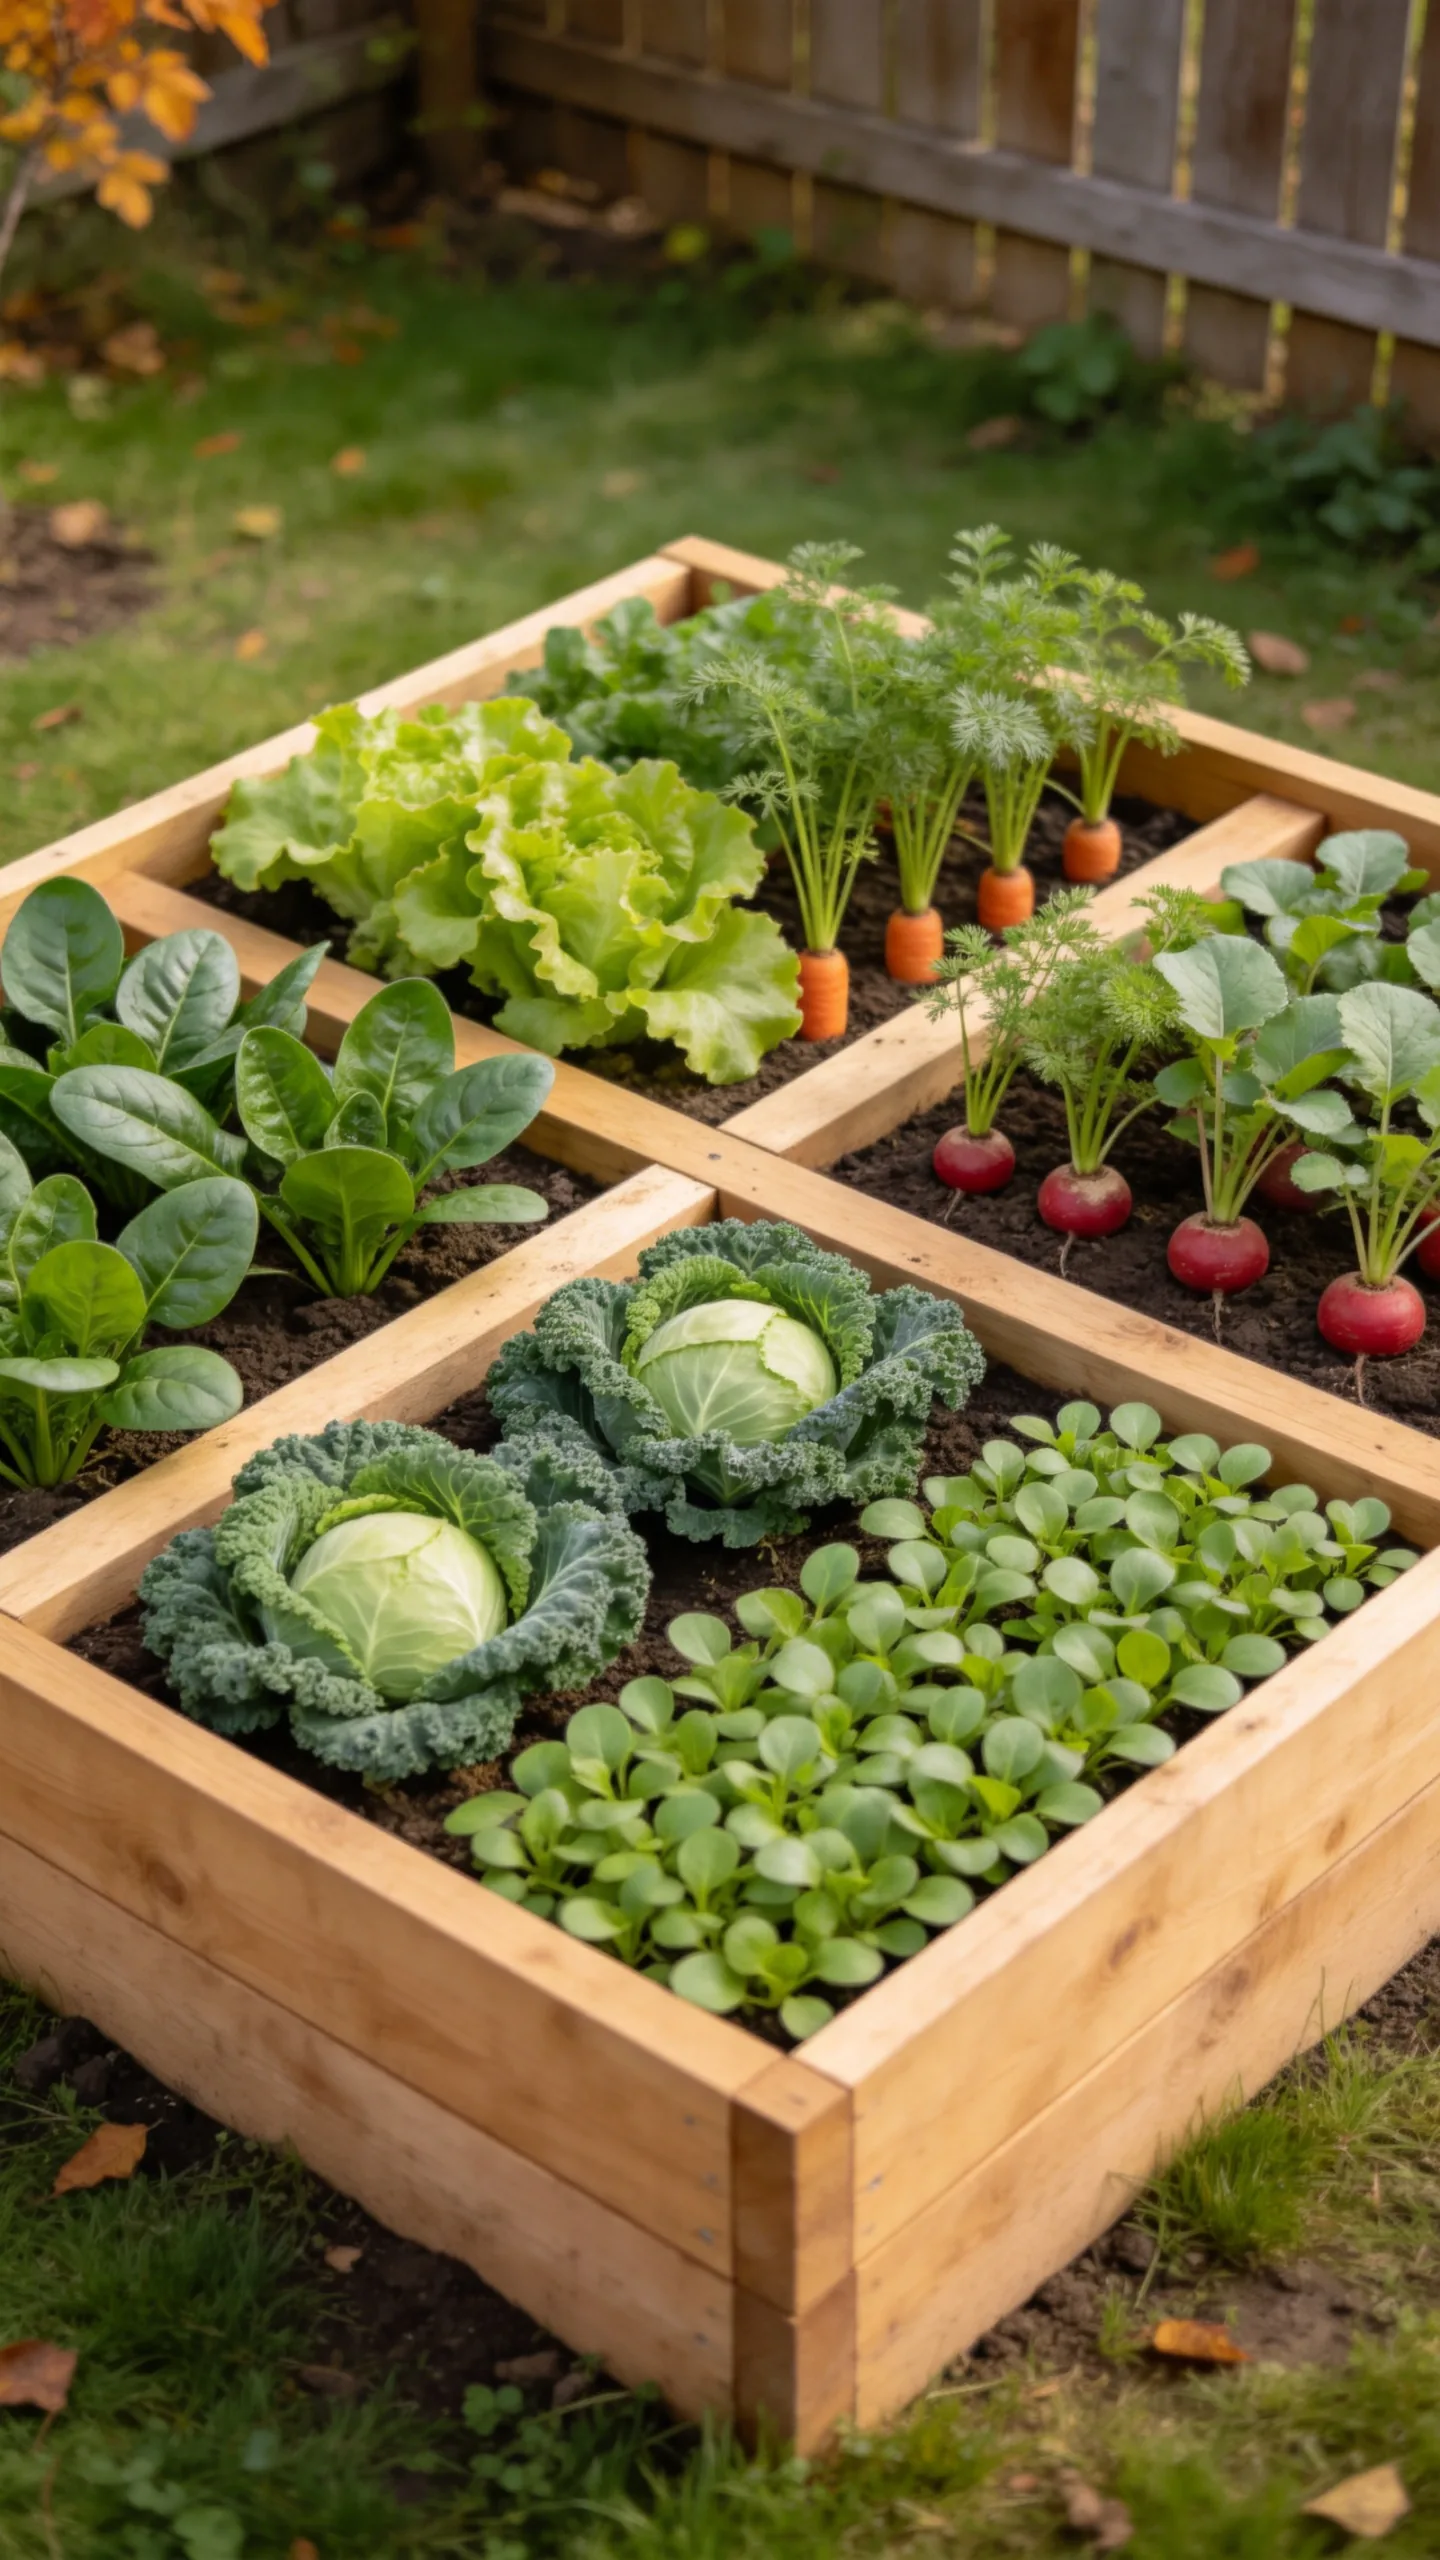
Divide a square raised bed into four large quadrants: leafy greens, root vegetables, brassicas, and a soil-building or quick-crop section. For fall, one quadrant might hold spinach and lettuce, another carrots and radishes, a third compact kale or cabbage, and the fourth a fast cover crop or additional salad greens.
Mark the quadrants and keep a simple planting record so crop families can be moved in the next main season. Rotation is more useful when it is coordinated across all beds rather than merely shifting plants a few feet, but this layout still makes spacing, soil amendments, and recordkeeping easier. Choose a cover crop suited to the local planting window and one that can be cut or removed without becoming difficult to manage in a small bed.