DIY Backyard Shade Ideas: Pergolas, Shade Sails & Canopies on a Budget
Your patio shouldn’t feel like a frying pan. You don’t need a designer budget to cool things down, either. With a few DIY tricks, you can build shade that looks good, lasts, and doesn’t eat your weekend. Let’s plan smart, grab some hardware, and turn that backyard into a shady hangout—no regrets, no sunburns.
Start With the Sun: Where Shade Actually Works
You can throw fabric everywhere and still cook under it if you place things wrong. So start by watching your yard for a day and track the sun. Morning shade feels great on east sides; late-day scorch hits west-facing spots hardest. Want the best all-day comfort? Angle shade toward the south, and you’ll block the most heat.
Walk the space and note hot zones, breezes, and glare angles. Where do you hang out—grill, chat, nap? Shade those areas first. If you host at night, aim for shade that doubles as a vibe: pergola lights, soft curtains, and a sail that frames the sky.
Quick tip: Stand where you want shade at 5 p.m. and look toward the sun. That’s the direction your shade needs to block. It sounds obvious, but plenty of folks ignore it and then wonder why they still sweat.
Fast, Cheap Wins: Weekend Shade You’ll Love
Umbrellas, pop-up canopies, and strategic tarps deliver quick relief. They aren’t fancy, but they work—and they buy you time while you plan the bigger build.
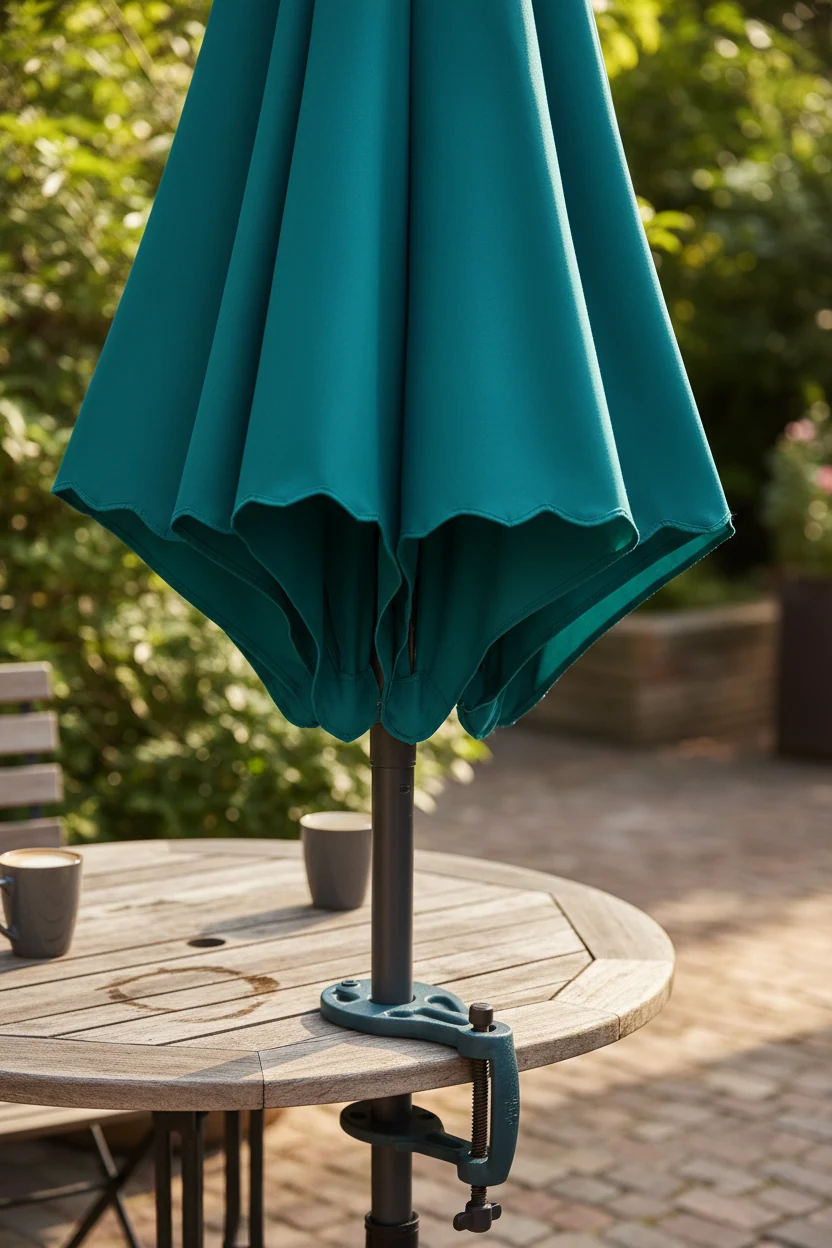
- Market umbrellas: Go 9–11 ft for real shade. Choose a vented top and heavy base. Clamp to a table or install a ground sleeve so gusts don’t turn it into a backyard kite.
- Pop-up canopies: Easy deploy, easy store. Stake corners, add weight bags, and pick UV-rated fabric. Skip the ultra-cheap ones that shred after one windy afternoon.
- Smart tarp hacks: Stretch shade cloth between two trees or posts with bungee cords and carabiners. Keep a slight slope so rain doesn’t pool.
Want more style? Combine an umbrella with outdoor curtains along a fence or pergola. You’ll block low-angle sun and cut glare, and it looks intentional, not like you panic-bought summer.
Shade Sails: The Budget Hero That Looks Custom
Shade sails bring big design energy with small cost. They fit weird spaces, they handle wind well when you rig them right, and they last for years with decent fabric. And yes, you can install them without calling a contractor.
Pick the Right Fabric
Choose HDPE shade cloth for airflow and durability. It resists UV, sheds some rain, and breathes so you don’t build a sauna. Want rain protection? Use polyester or PVC-coated sails and slope them aggressively. Skip cotton unless you enjoy mildew.
- HDPE: 85–95% shade, great airflow
- Polyester: better water resistance, slightly hotter
- PVC-coated: most waterproof, needs strong anchors
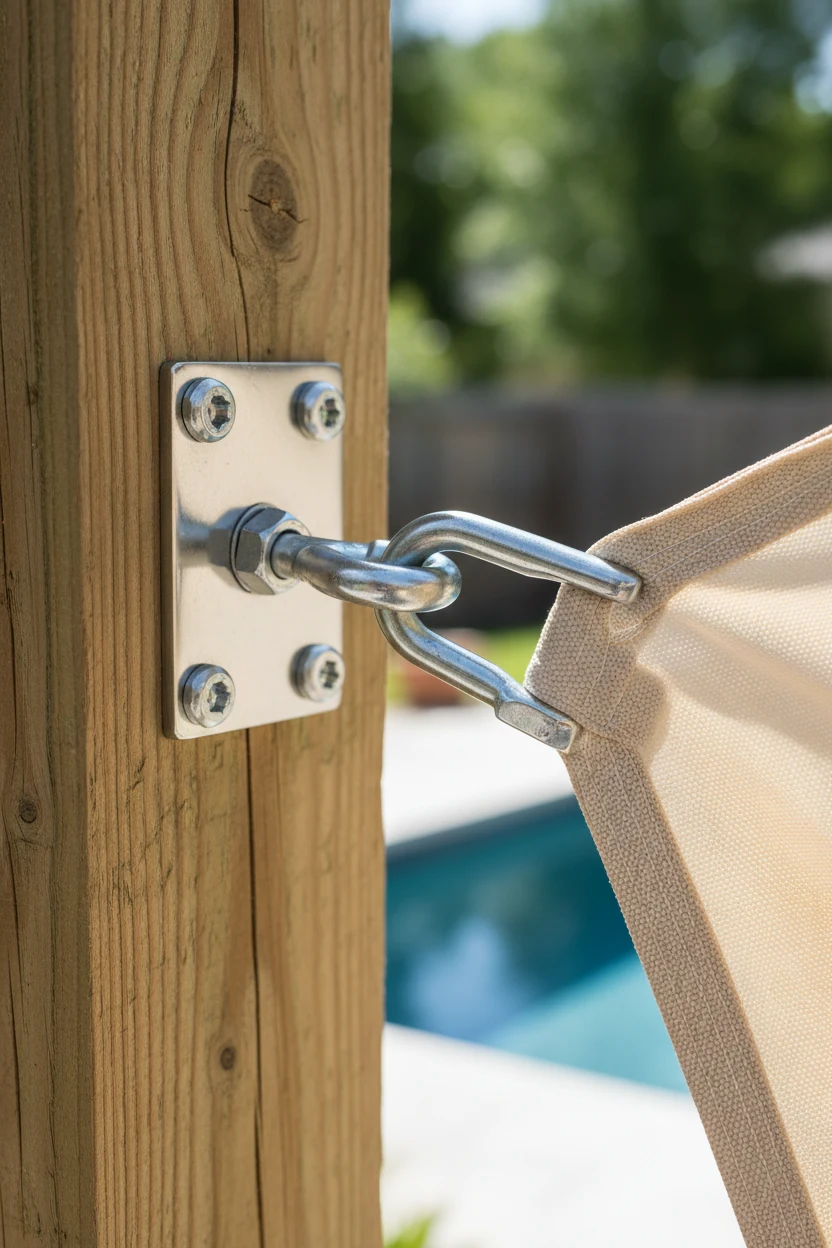
Strong Anchors, Happy Sails
Don’t screw sails into flimsy fence posts and hope for the best. Use 4×4 or 6×6 posts set in concrete, or anchor to the house with stainless hardware. Angle posts 5–10 degrees away from the sail to resist pull.
- Hardware: stainless pad eyes, turnbuckles, shackles, and carabiners
- Anchors: post bases or concrete footings (12–18 in diameter, 24–36 in deep)
- Fasteners: lag bolts for framing, through-bolts for posts
Avoid the Sag: Smart Geometry
Give the sail tension and twist. Elevate opposite corners to create a hyperbolic curve. Pitch at least one corner 12–18 inches higher than the others so rain runs off. Use turnbuckles and pull the sail tight—you’ll avoid flapping, sagging, and the “I tried” look.
Cost Snapshot
You can build a clean sail setup for $120–$400 depending on size and hardware.
- Sail: $60–$150
- Posts and concrete: $60–$150
- Hardware: $30–$100
FYI: Cheap hardware rusts fast. Stainless lasts and saves money long-term.
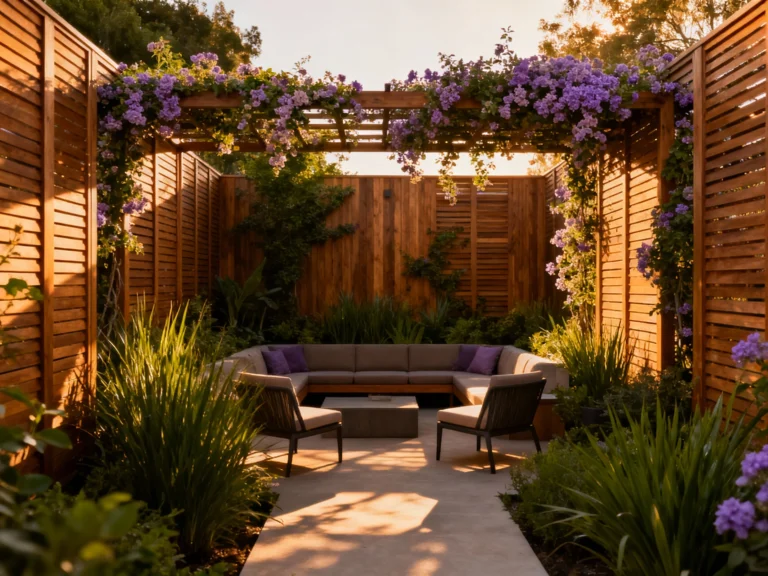
Pergolas on a Budget: Simple Frames, Big Impact
Pergolas add structure and instant “outdoor room” vibes. You don’t need elaborate joinery or fancy beams. Build a simple rectangle, anchor it well, then add slats, fabric, or vines for shade.
Materials That Don’t Break the Bank
Use pressure-treated 4×4 or 6×6 posts and 2×6 or 2×8 beams. Buy standard lengths and keep cuts minimal. Stain or seal after a week of drying. If you hate greenish lumber, go cedar for a little more cash and less maintenance.
- Posts: 4×4 for smaller spans, 6×6 for beefier look and strength
- Beams/Rafters: 2×6 for most builds, 2×8 for wider spans
- Connectors: galvanized or powder-coated brackets and screws
Anchoring Without Pouring a Fortune
Strong bases keep everything upright when the wind shows up. Set posts in concrete footings or use post base brackets with wedge anchors on an existing slab. Add diagonal braces if your area gets gusty.
- Footings: 24–36 in deep in most climates
- Post bases: attach to slab with concrete anchors
- Bracing: 2×4 diagonals or metal knee braces for stability
Add Shade: Slats, Canopies, and Vines
Stack rafters close for static shade, or install a retractable canopy with shade cloth. Curtains along the sides block low sun and create instant privacy. Feel fancy? Train vines up the posts and over the top for living shade.
- Rafters: 4–6 in spacing for strong shade
- Canopy: grommeted fabric on wire rope for easy slide
- Vines: grape, wisteria, or trumpet vine for fast cover
DIY Timeline
You can build a basic pergola in a weekend. Day one: set posts and pour footings. Day two: add beams, rafters, and finish hardware. Stain or seal next weekend when you’re not racing the clock.
Pro move: Measure twice, set posts plumb, and square the frame before you lift a single beam.
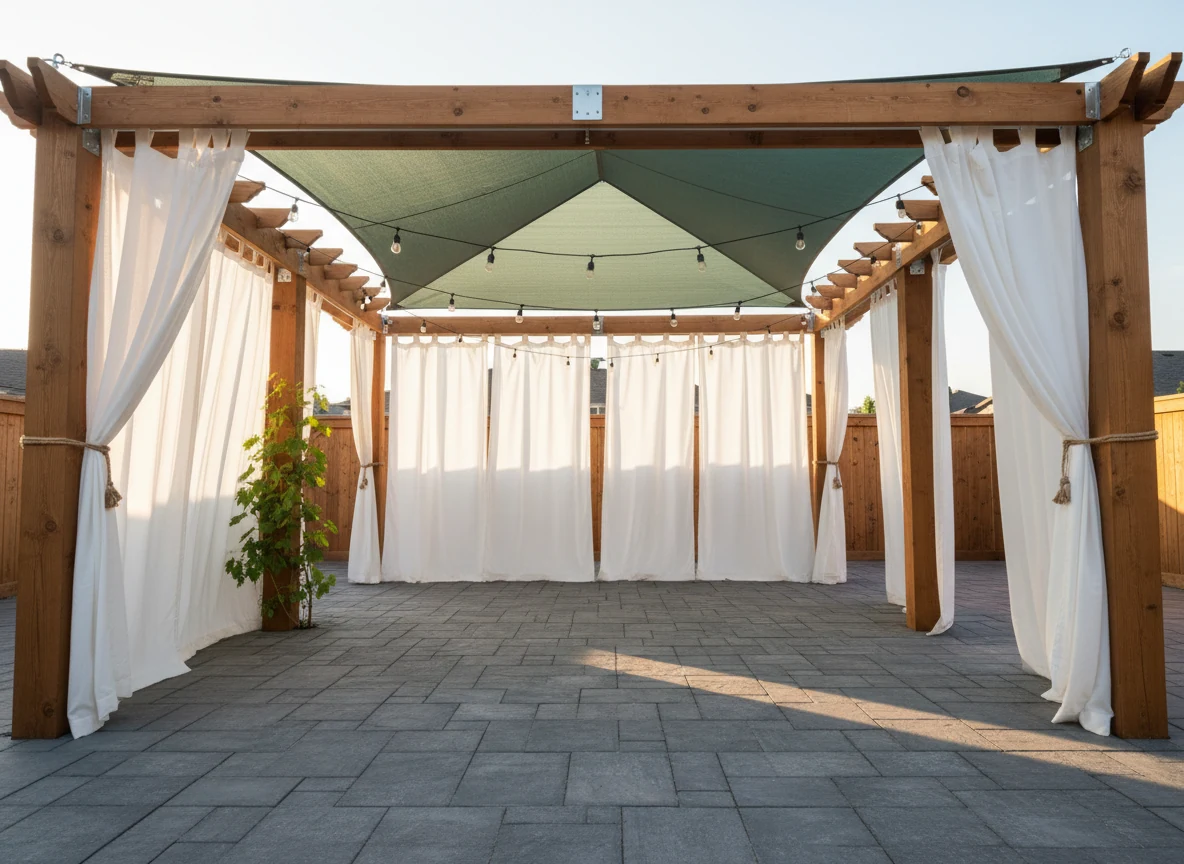
Canopies & Curtains: Soft Shade With Maximum Flex
If you like options, build soft shade you can slide, drop, or tie back. Canopies handle overhead sun; curtains block the low stuff and wind gusts. You get shade and privacy without heavy lumber or hard angles.
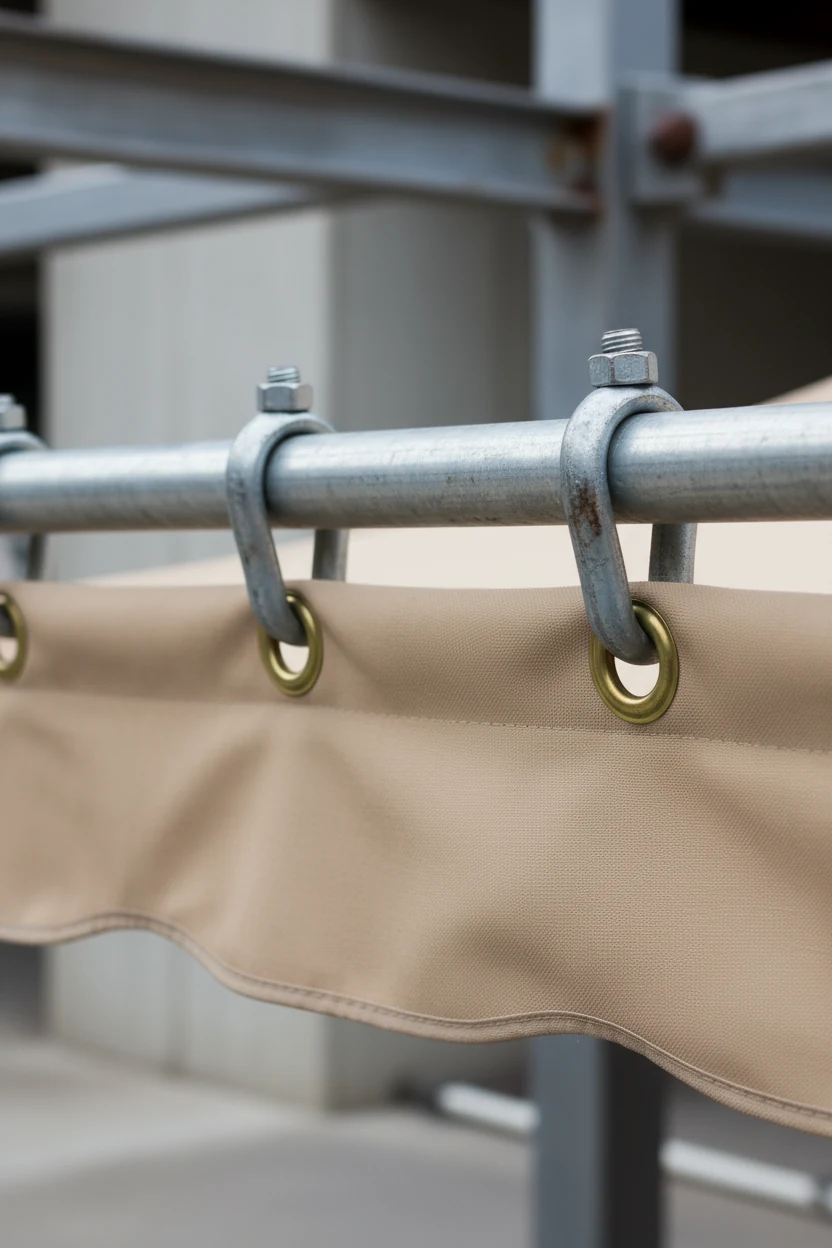
Rail Options That Actually Glide
Use wire rope (aircraft cable) with turnbuckles, or mount EMT conduit as rails. String grommeted panels on carabiners or drapery rings. Keep runs under 20–25 ft per cable to avoid sag, or add a center support.
- Wire rope: 3/16–1/4 in, stainless preferred
- Turnbuckles: tighten for smooth slide and taut lines
- Conduit: clamp to pergola beams with U-bolts
Fabric That Survives Real Weather
Pick solution-dyed acrylic or UV-stabilized polyester for long life. Shade cloth breathes and rarely mildews, so it’s great over dining areas. Want full rain block? Use coated polyester and slope the run.
- Acrylic (like Sunbrella): best UV resistance, great color retention
- Polyester: solid budget option with decent UV protection
- Shade cloth: cool and breezy for hot climates
Keep It Clean and Taut
Add tie-backs or magnets to hold curtains on breezy days. Install a 1–2 in drop every 6 ft of canopy for water runoff. Rinse fabric monthly if pollen attacks, and hit stains fast—your future self will thank you.
Little upgrade: Clip LED strip lights under the canopy rail for instant ambiance. Your backyard just became the place to be.
Plant Power: Living Shade That Gets Better Every Year
Plants deliver gorgeous shade, bird chatter, and cooler temps. They take time, but they repay you every summer. Combine a simple pergola with fast vines and you’ll enjoy shade sooner than you think.
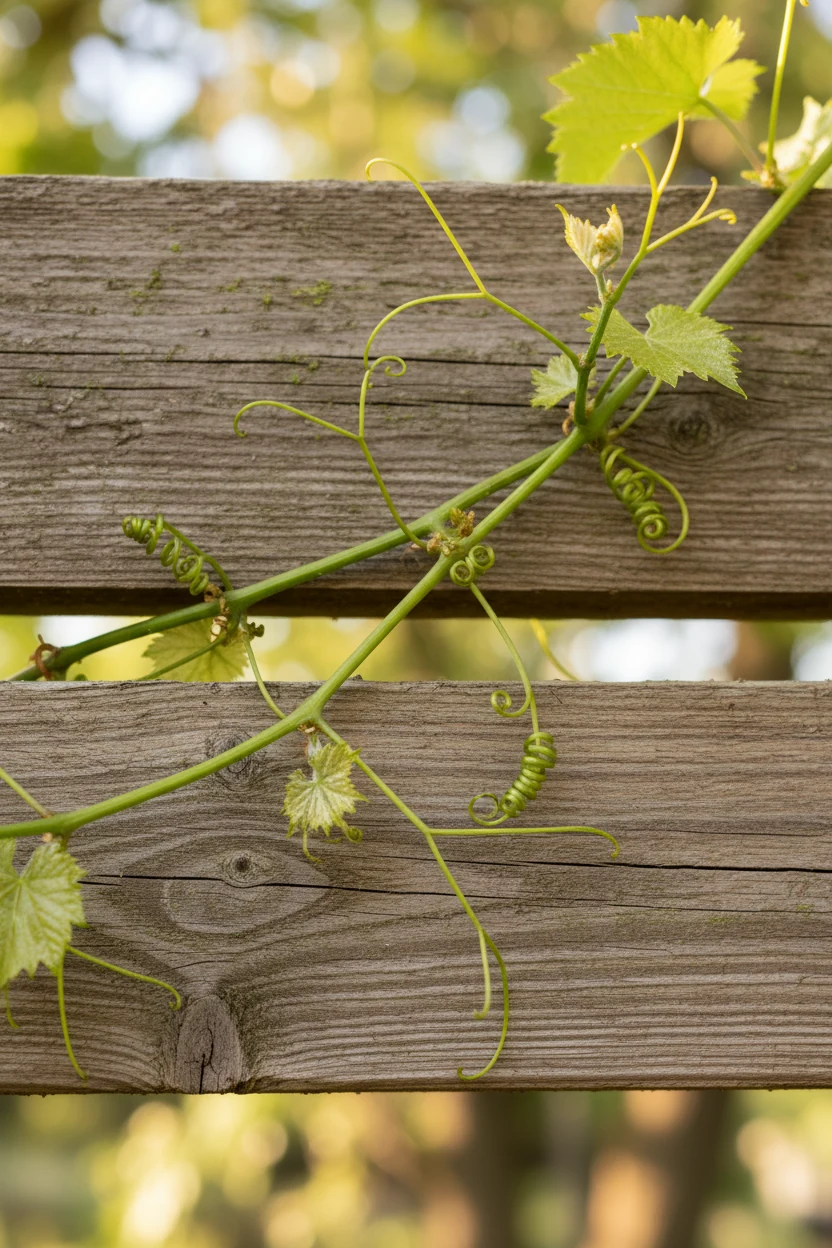
Fast-Growing Vines
Go for grape if you want fruit and dappled shade. Choose wisteria for dramatic blooms (and strong supports). Try passionflower or honeysuckle for quick coverage and pollinators.
- Grape: rugged, produces fruit, loves sun
- Wisteria: stunning, strong growth—needs serious structure
- Honeysuckle: easy, fragrant, less heavy
Train, Trim, Repeat
Guide vines up posts with eye screws and wire. Trim monthly to shape the canopy and avoid a jungle takeover. Weave tendrils along rafters to fill gaps where the sun sneaks through. It’s like bonsai, but bigger and less judgmental.
Watering and Support
Water deep during the first season, then taper as roots spread. Add a drip line on a timer so you don’t forget during heat waves. If a vine gets too enthusiastic, add extra wires and clips rather than hacking it back every weekend.
FYI: Vines get heavy. Build the pergola strong and you’ll never worry when they hit their stride.
Budget Smarts: Cut Costs Without Cutting Corners
You can save a lot when you buy strategically and keep designs simple. Use standard sizes and avoid weird angles that chew up lumber and your patience. Buy decent hardware once, not three times after rust wins.
- Source smart: Compare local big-box stores with lumber yards. Clearance sails and fabric can be steals. Stainless hardware costs more upfront but saves headaches.
- Design simply: Rectangles rule. Fewer posts and repeat spacing make builds faster and cheaper.
- Layer shade: Combine a sail with curtains or plantings. You’ll cover different sun angles without huge structures.
- DIY a little, buy a little: Prefab brackets and post bases speed the build and keep it safe. IMO, that’s money well spent.
Trim extras and put budget into the parts that matter: anchors, fabric quality, and smart orientation. Those deliver comfort every single day. Fancy beam cuts say “look at me,” but strong bases say “I’ll still be here next summer.”
FAQ: Your Shade Questions, Answered
How much shade do I need for a typical patio?
Aim to cover 60–80% of your main hangout zone. Leave some sky for light and breeze, then block the harsh angles from the west and south. If you host big groups, add a movable element—like an umbrella—that you can aim wherever people gather.
Should I attach a shade sail to my house?
You can, but do it right. Use lag screws into solid framing (rim joist or studs), not siding or fascia alone. Keep the sail tensioned and sloped so water runs off. If you feel unsure, anchor to posts instead and skip the what-ifs.
What’s the cheapest long-term shade option?
A well-rigged HDPE shade sail wins for cost, durability, and looks. Add a second sail or curtain panels for low sun angles. Plant vines to boost shade in a year or two, and you’ll stack savings and style.
How do I keep fabrics from getting gross?
Rinse monthly, spot-clean early, and store panels in winter if you get heavy storms. Choose solution-dyed acrylic or UV-stable polyester so color and fibers hold up. If pollen attacks your area, a quick hose-down every two weeks keeps things fresh.
Do I need permits for a pergola?
Check local codes. Some areas let you build small pergolas without permits, but others set rules for height, setbacks, and footing depth. It takes five minutes to ask and it saves you headaches later. Build safe and you’ll enjoy the shade without drama.
How do I handle wind?
Use vented designs and strong anchors. Tension sails, add diagonal bracing on pergolas, and avoid giant, flat tarps that act like parachutes. If a storm rolls in, drop the canopy or remove a panel—ten minutes now beats repairs later.
Conclusion
You don’t need a huge budget to chill your backyard. Start with smart placement, then mix shade sails, simple pergolas, and soft canopies for layered comfort. Build strong, choose decent fabric, and keep things flexible so you can adapt through the seasons. Do that, and your patio shifts from scorched to stellar—no sweat, literally.