Budget Plant Rack Ideas Under $50 You’ll Love
You want more plants but not more bills, right? Same. Let’s build plant racks that look chic, hold strong, and cost less than a week’s worth of fancy coffees. Whether you rent a shoebox or you’ve got a porch with personality, I’ve got clever, budget-friendly ideas that won’t wobble or ugly-up your space. Ready to turn your plant chaos into a lush little gallery without spending more than $50?
What Actually Matters (So You Don’t Waste Money)
You don’t need a designer piece. You need something that fits your space, holds your plants, and doesn’t fall apart after your third watering day. Focus on these basics and you’ll win every time.
- Weight rating: Wet soil gets heavy fast. Estimate 10–15 lb for small pots, 20–30 lb for medium terracotta. Choose racks with a stated weight limit, or build to handle that.
- Depth and height: Measure your pots and leaves. Keep shelf depths between 8–12 inches for small to medium plants. Tall plants need at least 16–24 inches of vertical clearance.
- Water protection: Use trays, liners, or sealed surfaces. Bare particleboard swells when wet, and it won’t thank you for it.
- Light access: Tiered racks give every plant some sun. Keep lower shelves for shade lovers, upper shelves for sun hogs.
- Stability: Wall-anchor skinny pieces or choose wider bases. Nobody wants a “timber!” moment mid-misting.
Quick Measuring Cheats
- Small pots (4–6 inches): 6–8 inches shelf depth
- Medium pots (8–10 inches): 10–12 inches shelf depth
- Trailing plants: leave 12 inches of drop room
- Grow lights: add 6–8 inches headroom for fixtures
DIY Racks From Stuff You Already Own
You might already own your next plant rack. Short stools, step ladders, shoe racks, even side tables can become plant stages with a little tweaking. IMO, upcycling beats buying new when you need a custom fit.
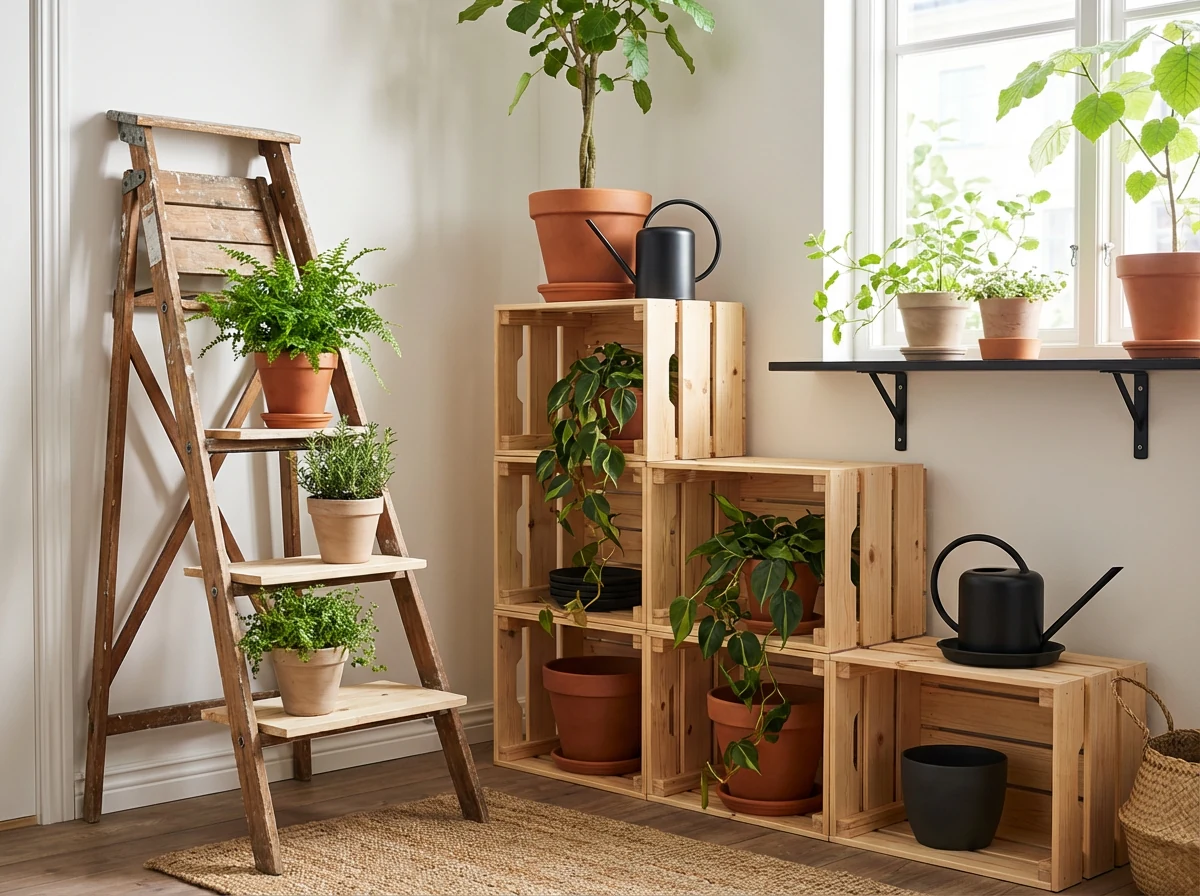
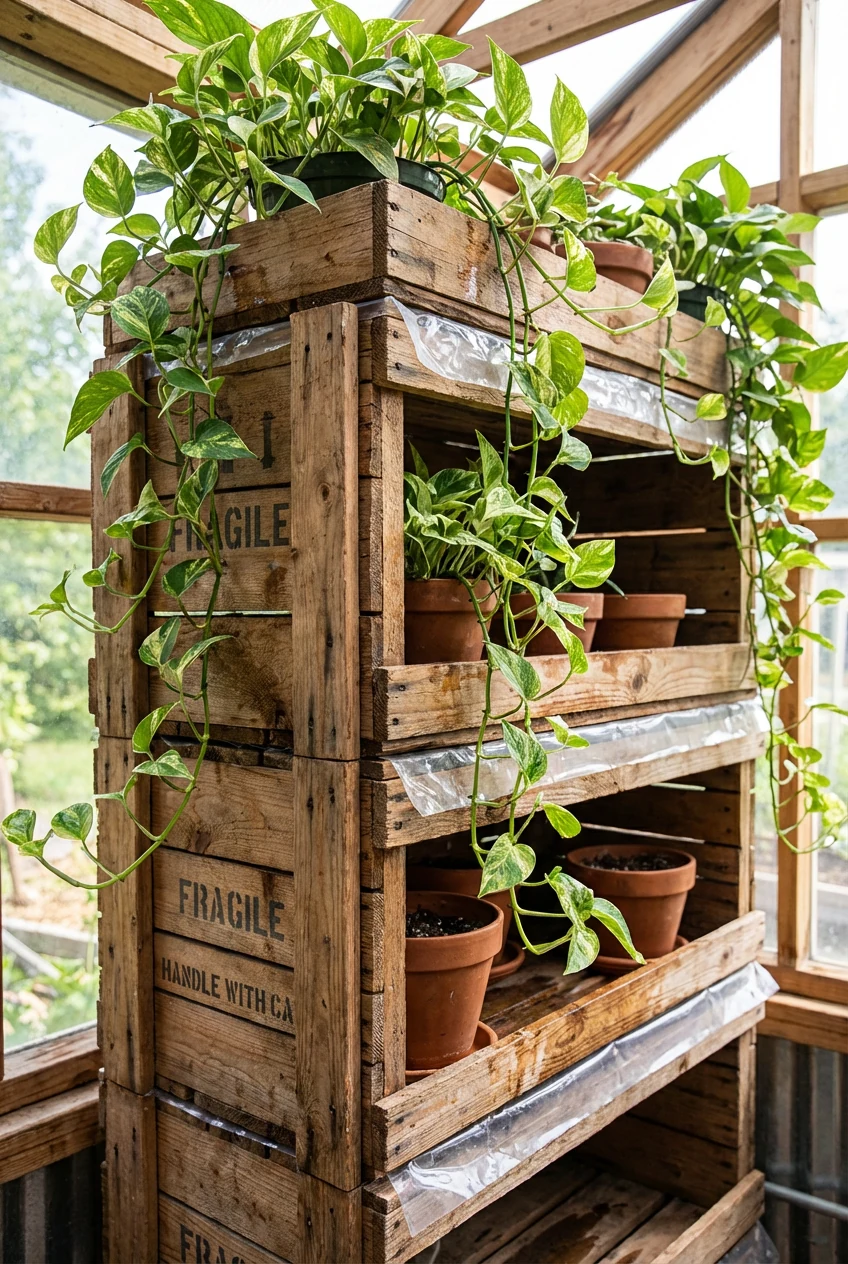
The Crate Stack (Cute and Strong)
You can stack wooden crates like Lego for adults. They give you cubbies for trailing plants and plenty of charm.
- Grab 3–6 unfinished wooden crates (usually $8–$12 each at craft stores). Total: $24–$48.
- Sand edges lightly. Stain or paint if you want, then seal with a water-based polyurethane for moisture resistance.
- Stack horizontally for stability, like bricks. Use 1-inch wood screws to join crates at touch points.
- Add trays or plastic liners inside to catch drips.
Pro tip: Put the heaviest pots on the bottom crate row. You’ll lower the center of gravity and keep your vines safe.
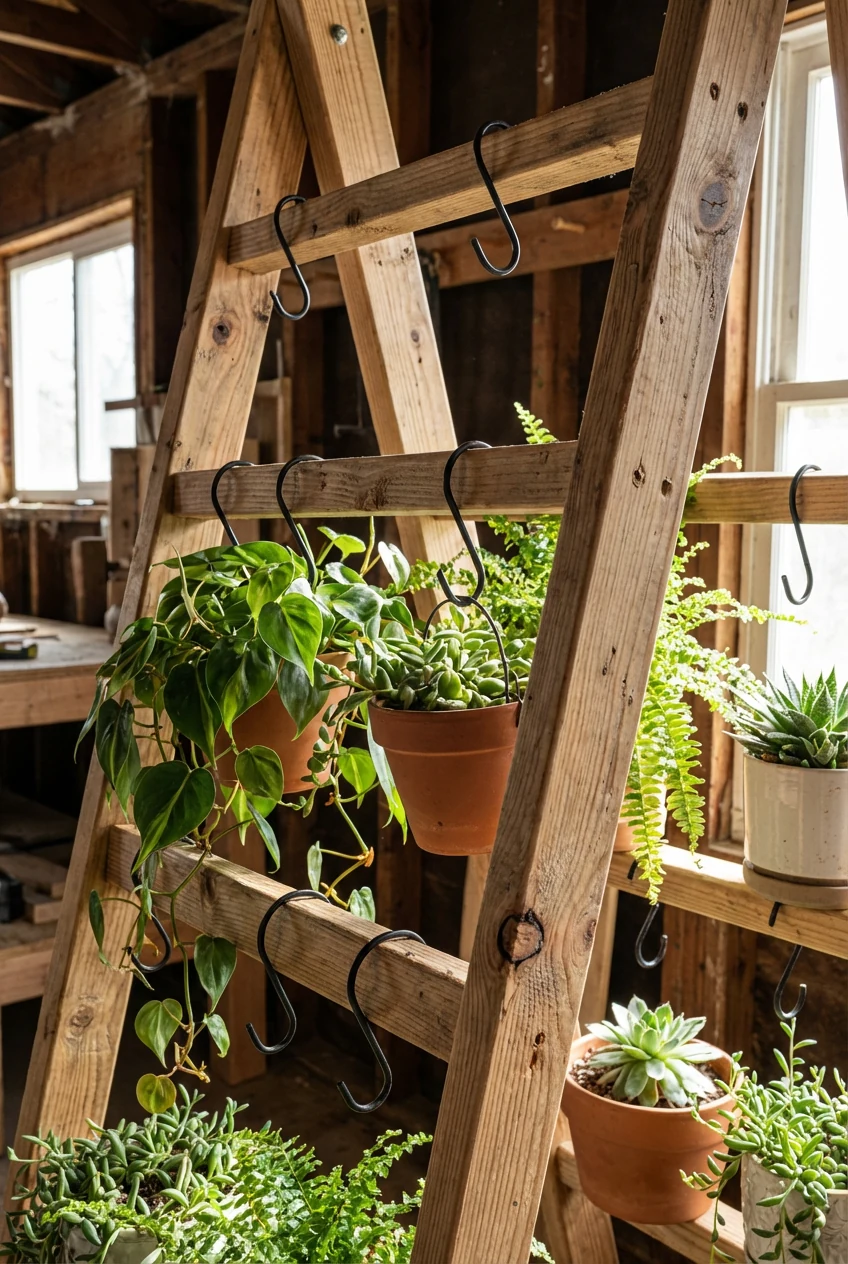
Ladder Leaner (Minimal Effort, Maximum Drama)
Do you have a 2–3 step folding ladder? Boom, instant tiered display.
- Cover steps with cut-to-size pine boards for larger pots. Attach with zip ties or screws.
- Use S-hooks on the top bar for hanging planters.
- Add felt pads where the ladder touches the wall to prevent scuffs.
You get a compact footprint with eye-level plant action. FYI, I love this for narrow balconies.
Shoe Rack Reboot
Basic metal or bamboo shoe racks cost peanuts and hold 6–10 small plants easily.
- Look for 2–3 tier racks under $25–$40.
- Cover wire slats with slatted bamboo mats for a flat surface.
- Line each tier with boot trays or cafeteria trays to catch runoff.
Bonus: Stack two identical shoe racks for a taller unit (zip ties help with stability).
Thrift Store and Dollar Store Treasure Hunt
Secondhand shops and dollar stores hide gold if you know what to look for. You’ll score unique pieces that look intentional, not “college dorm 2.0.”
Great Candidates to Flip
- TV tray tables: Sturdy, slim, and often under $10. Group two for a symmetrical display.
- Side tables and nesting tables: Mix heights for dimension. Use coasters or cork tiles to protect tops.
- Metal baker’s racks: Usually under $30 used. Perfect airflow for plants.
- Bookshelves: Short, shallow ones work best. Add peel-and-stick vinyl to waterproof shelves.
- Wire cubes (those modular grids): Reconfigure into a low, long rack. Zip ties make them rock-solid.
What To Check Before You Buy
- Wiggle test: push side-to-side. If it sways a lot, skip it or plan to wall-anchor.
- Surface material: choose solid wood, metal, or plastic over raw particleboard. Moisture ruins particleboard.
- Rust: light rust on metal frames cleans up easily; deep pits mean trouble.
- Smell: funky musty = hard pass for indoor use.
Dollar Store Upgrades That Look Pricey
- Plastic trays and bins as drip catchers
- Self-adhesive vinyl sheets to waterproof shelves
- Pack of felt pads to stop wobble and protect floors
- Zip ties and S-hooks for quick customization
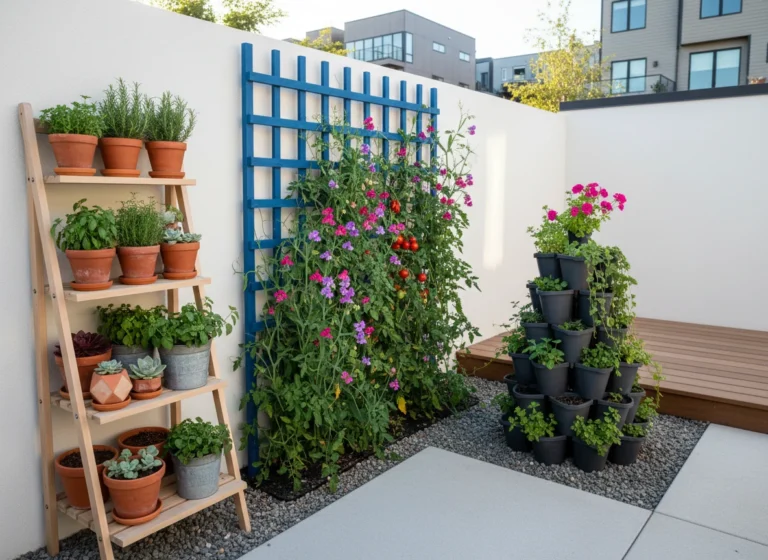
Wall, Window, and Tiny Nook Solutions
No floor space? Go vertical. You can mount sturdy, sleek shelves under $50 with basic hardware. It looks custom, and your plants get primo light.
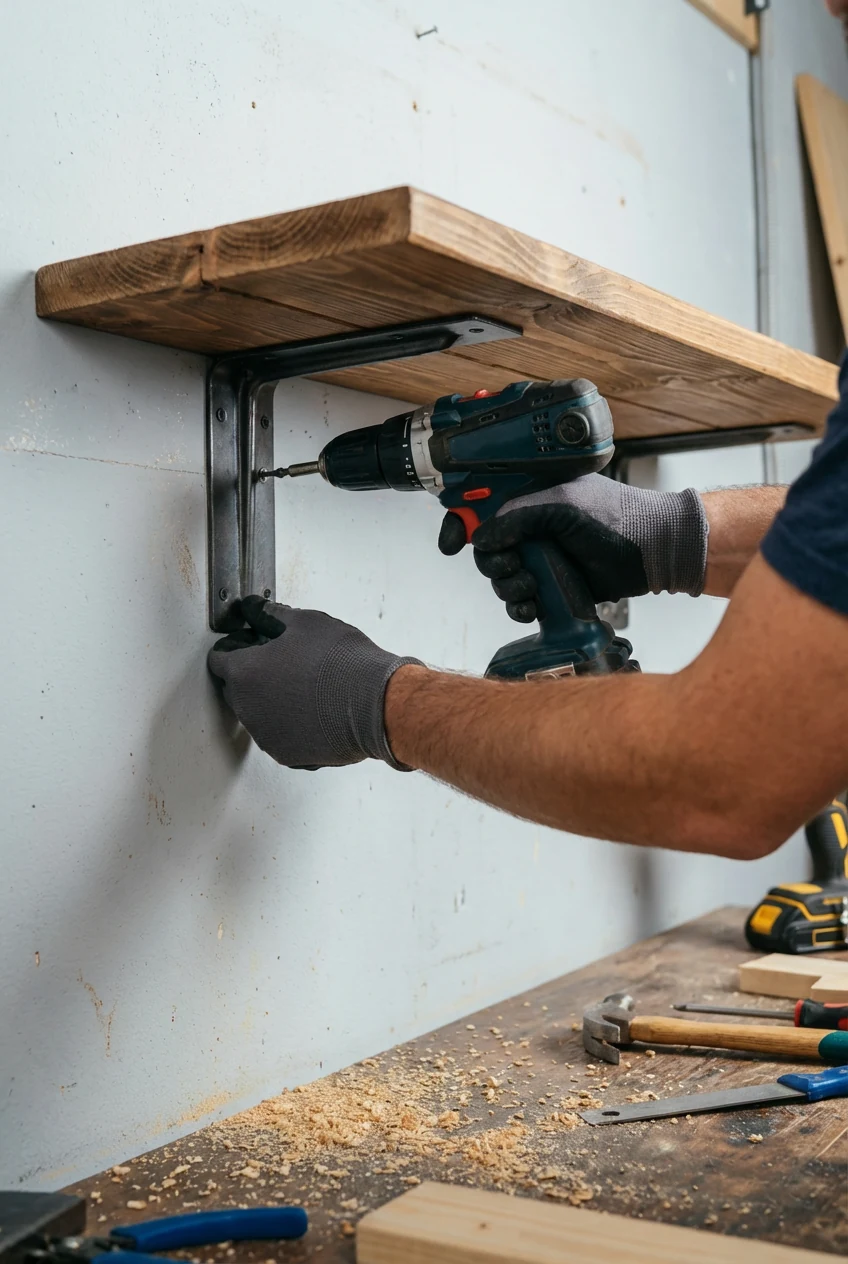
Simple Bracket Shelf (Under $40)
- Buy a pine board (1×8 or 1×10), cut to window width: $10–$15.
- Grab two metal L-brackets: $6–$12. Choose heavy-duty ones if you plan to load it up.
- Seal the board with polyurethane or clear lacquer.
- Anchor brackets into wall studs or use heavy-duty drywall anchors.
- Add a narrow tray to protect the wood from water.
You get an instant sun shelf for succulents and herbs. Plus, it keeps countertops open.
Tension Rod Plant Rail
Place a high-strength tension rod inside a window frame and hang small planters or propagation tubes.
- Use S-hooks or macrame hangers.
- Limit to 10–15 lb total unless the rod says otherwise.
- Keep plants away from hot glass in summer to avoid leaf scorch.
Pegboard Plant Wall
Pegboard feels extra, but it’s ridiculously useful.
- Mount a 2×4 ft panel with spacers so hooks sit correctly: $20–$30.
- Use pegboard shelves, hooks, and baskets for plants and tools.
- Arrange a grid of small trailing plants for a living gallery.
FYI: Keep catch trays under heavier pots on shelves. Water and pegboard don’t get along without protection.
Outdoor and Balcony Racks That Can Take a Splash
You want pieces that handle rain and sun, not dissolve like a sugar cube. Choose simple, sturdy materials and lift pots off the ground for drainage.
Cinder Block + Board Shelf
The classic. It’s strong, cheap, and oddly modern.
- 4–6 cinder blocks: $8–$15 total
- Two 1×8 or 2×8 boards: $12–$30 depending on length
- Stack blocks, lay boards, and you’re done
- Seal boards or use composite deck boards if you can snag a scrap
Place the heaviest pots near the blocks. You’ll avoid saggy middle syndrome.
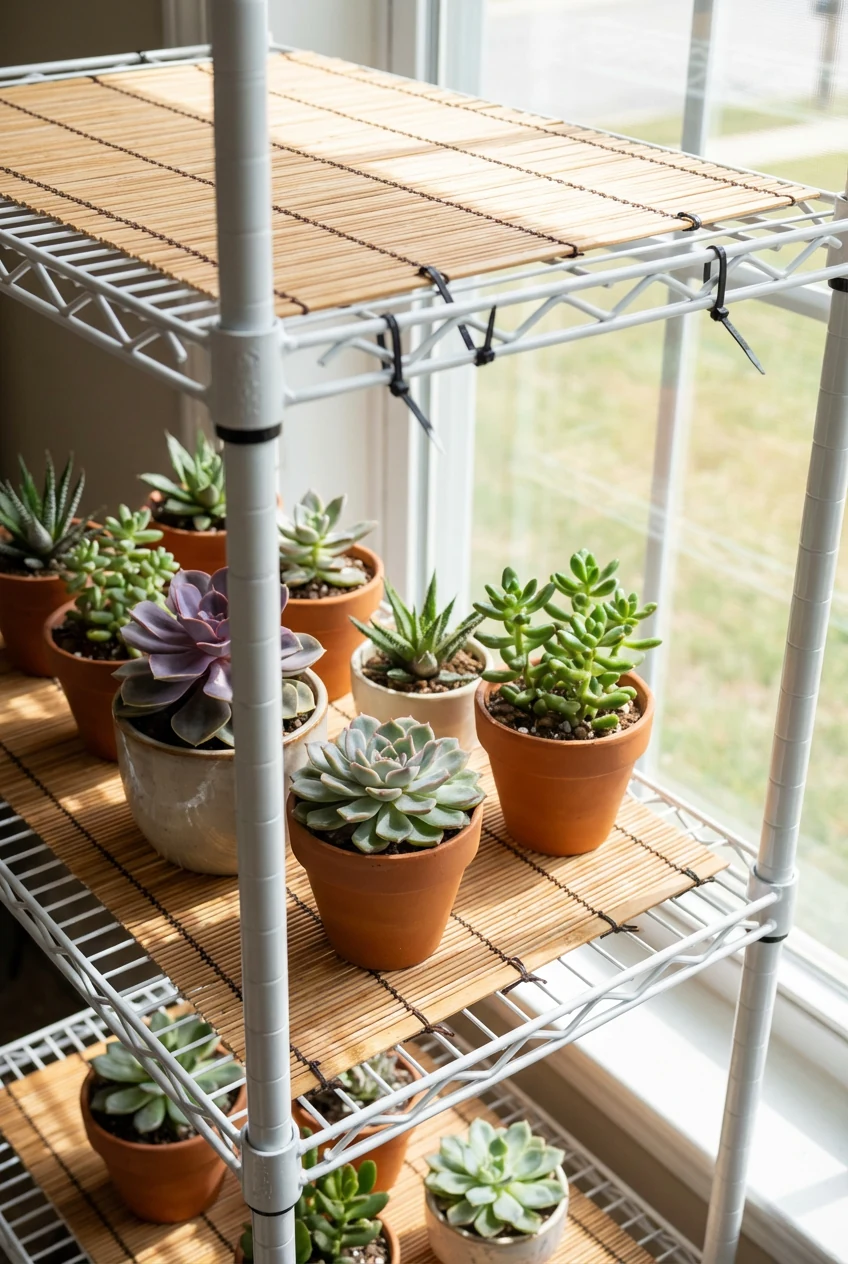
Wire Utility Shelving (Coated)
Look for plastic- or epoxy-coated wire shelves. They resist rust and let water run through.
- 3-tier units often run $25–$45
- Add zip-tied bamboo mats to soften the look
- Clip-on grow light bars work great under upper tiers
PVC Frame for Lightweight Pots
If you love a quick DIY, build a simple PVC rack.
- Buy 3/4-inch PVC pipe and T/Elbow fittings: $15–$25.
- Build a rectangle with crossbars like a mini greenhouse frame.
- Lay slatted plastic shelving or wire shelves on top.
- Use exterior-rated glue for joints if you want no wobble.
It won’t handle huge terracotta, but it handles herbs and small planters just fine.
Big-Box Hacks Under $50 (That Don’t Look Cheap)
These pieces punch way above their price. They’re easy to find, simple to customize, and they play nicely with plants.
- Spice racks as mini shelves: Mount two or three side-by-side for a skinny window garden. Paint to match trim.
- Metal rolling cart (the narrow kind): Often $30–$45. Line each tier with trays and roll it toward the light. Move it away at night to free space.
- Stackable pantry shelf risers: Create staggered levels on a tabletop. Use rubber feet to stop sliding.
- Small LACK-style table: Two stacked tables form a cute, modern two-tier rack for under $30–$40.
- Over-the-toilet shelf unit: Hear me out. Remove the bottom crossbar and you get a tall, slim plant station for hallways and balconies.
Make It Look Custom
- Spray paint metal frames satin black, brass, or soft white.
- Add peel-and-stick wood grain or marble to cheap shelves.
- Use matching saucers and trays. Uniform accessories = instant glow-up.
Style, Care, and “Please Don’t Tip Over” Tips
Cheap racks can look luxe when you style them right. You only need a few tricks and some restraint.
Design Moves That Always Work
- Group by leaf texture or color. Variegated up top, big glossy leaves mid-shelf, trailing plants on the edges.
- Vary height with risers: upside-down pots, cookbooks, or mini plant stands.
- Repeat matching planters for cohesion. Mix shapes, not 17 different colors.
- Leave negative space so plants can breathe and, you know, photosynthesize.
Water Without Wrecking Your Rack
- Use trays with pebbles or mesh to keep pots above runoff.
- Water in the sink, then return plants to the rack after they stop dripping.
- Seal wood edges. Edges fail first, so give them an extra coat.
Stability 101
- Put heavy pots on the lowest shelf, near the frame sides or supports.
- Wall-anchor tall or narrow pieces with simple L-brackets or anti-tip straps.
- Level the feet with felt pads or card shims if your floor dips.
Quick Builds Under $50 You Can Finish Today
Sometimes you want the shopping list and the steps, no fluff. Here you go.
Two-Tier Balcony Bench
- 1×10 pine board cut in half (two pieces), four 8-inch hairpin legs or simple blocks
- Screw legs to one board for the bottom tier, use 4–6-inch blocks to raise the second board in the back
- Seal surfaces and add rubber feet
- Cost: $35–$50
Window Sill Extender Shelf
- 1×6 board cut to span the sill, two small angle brackets under the sill lip
- Add non-slip drawer liner on top
- Great for herbs and small succulents
- Cost: $15–$25
Wire Cube Tower
- One box of wire grid cubes, lots of zip ties
- Build a 2×2 or 3×1 tower, double up shelves with two panels for extra strength
- Line shelves with plastic corrugated board or cutting mats
- Cost: $20–$35
Common Mistakes (And How To Avoid Them)
Learn from everyone else’s “oops.” Your plants and your floors will thank you.
- Overloading a cute but flimsy stand: If it bows or creaks, lighten the load or reinforce it.
- Ignoring water protection: Add trays, liners, and sealants. A warped shelf kills the vibe fast.
- Blocking light with solid tiers: Use slatted or wire shelves so lower plants still get light.
- Skipping anchoring on tall racks: One tug from a curious cat equals carnage.
- Random pot chaos: Repeat a color or finish so the whole arrangement looks intentional.
FAQ
What’s the best material for a budget plant rack?
I vote for metal or solid wood. Metal racks handle weight and moisture better, and they clean up easily. Solid pine or hardwood works well once you seal it. Particleboard stays cheap, but it swells when wet, so use liners if you go that route.
How do I keep my rack from getting water damage?
Use trays or saucers under every pot, and line shelves with waterproof layers. Peel-and-stick vinyl, clear polyurethane, or thin plastic sheets all work. Water in the sink when possible, then return plants after the drip stops. Your future self will thank you (and so will your floors).
Can I use heavy terracotta pots on cheap racks?
Yes, but keep them low and near structural supports. Terracotta gets heavy when wet, so spread weight across the frame. Double up wire shelves or choose racks rated for heavy loads. If the rack flexes, move that big boy to the bottom.
How do I make a cheap rack look expensive?
Keep it cohesive. Pick one color palette for pots and trays, and use matching saucers. Paint metal frames in a luxe finish, like satin black or brass. Add small risers for layered height so the plants look styled, not plopped.
What’s the easiest under-$50 solution for a tiny apartment?
A two-bracket shelf under a sunny window wins, every time. It keeps counters clear, costs under $40, and gives your plants prime light. If you can’t drill, go with a narrow rolling cart and park it by the window during the day.
How do I prevent tipping if I have pets or kids?
Anchor tall racks to the wall with L-brackets or anti-tip straps. Put the heaviest pots on the lowest tier, and avoid top-heavy planters on high shelves. Keep trailing plants out of reach if your cat thinks they’re toys (because they do).
Conclusion
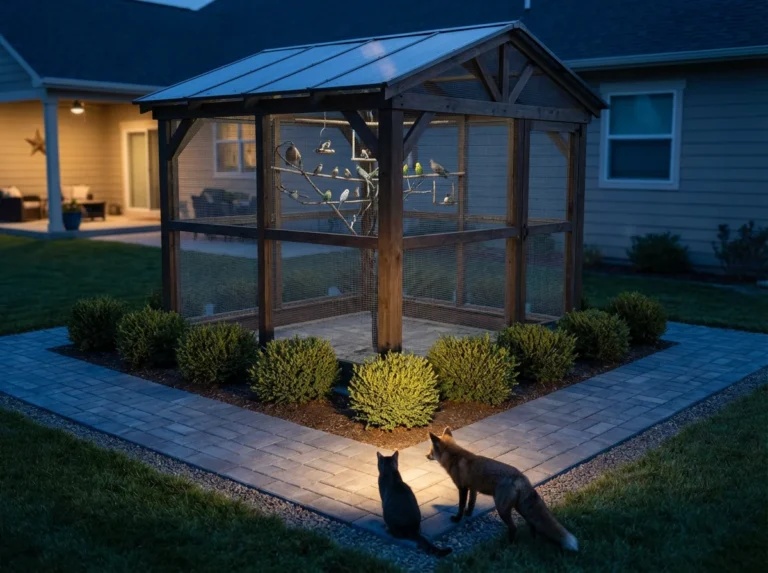
You don’t need a designer greenhouse to show off your jungle. You just need a smart rack that fits your space, manages water, and doesn’t wobble. Start with a crate stack, a bracket shelf, or a thrifted metal rack, then style with matching trays and a little paint. Keep it simple, keep it sturdy, and enjoy that lush, $50-or-less glow-up—because good plant shelves should make your space happier, not your wallet emptier, IMO.