DIY Front Yard Landscaping Under $100: Weekend Projects Anyone Can Do
You don’t need a landscaper, a bobcat, or a trust fund to make your front yard look fantastic. You just need a weekend, a plan, and less than $100. Seriously. You can boost curb appeal fast with smart, simple projects you can finish before Monday morning coffee. Ready to make your neighbors wonder what magic you pulled off?
Start Smart: Your Under-$100 Game Plan
You can’t do everything for $100, so choose the highest-impact moves. Think cleanup, edges, color, and lighting. Those four categories drive the “whoa!” factor without wrecking your wallet.
Work in layers:
- Clean first: trim, weed, and clear clutter
- Define edges: give beds and paths crisp borders
- Add texture: mulch and stones that contrast
- Pop color: a few plants and a container or two
- Light the way: solar stakes for quick drama
Set a simple budget:
- $25–$35: mulch and compost
- $20–$30: edging or stones
- $20–$30: plants or seeds
- $10–$20: solar lights or a mailbox makeover
FYI, you can swap categories based on your yard. Got great plants already? Push more budget into edging and mulch.
Pick Your Weekend Wins
You don’t need eight projects. Pick two or three high-impact tasks and crush them. Keep it fun and doable.
Quick combos that deliver:
- Combo A: Clean + Edge + Mulch (instant curb appeal)
- Combo B: Container Color + Solar Lights + Mailbox Refresh
- Combo C: Path Touch-Up + Seed-and-Mulch + House Numbers
Time estimates:
- Cleanup: 1–2 hours
- Edging: 1 hour
- Mulch: 1–2 hours
- Containers: 45 minutes
- Lighting: 30 minutes
IMO, Combo A gives the biggest transformation for the least money. It sets a clean stage for everything else.
Clean, Edge, and Mulch: Fast Curb Appeal
This trio flips a messy front yard into a tidy showpiece. You’ll ditch weeds, sharpen lines, and add rich color and texture.
Tools & Materials
- Hand pruners, gloves, trowel, rake
- Edger tool or flat spade
- Mulch: 3–4 bags (brown or black)
- Compost: 1 bag (optional for soil boost)
- Landscape fabric (optional, 1 small roll)
Step-by-Step
- Trim and weed: Cut back shrubs, yank weeds, and pull dead stuff. Keep shrubs off walkways so they don’t ambush guests.
- Define edges: Use a spade to cut a clean 2–3 inch trench around beds. Keep the trench smooth and consistent.
- Lay fabric (optional): Place fabric under areas with stubborn weeds. Don’t smother existing plants.
- Top with compost: Sprinkle a thin layer around plants. Compost feeds soil and makes you look like you know things.
- Mulch: Spread 2 inches thick. Keep mulch 2–3 inches away from stems and trunks to prevent rot.
Pro Tips
- Pick mulch color that contrasts your house. White siding? Go black mulch. Brick? Brown looks classic.
- Buy mulch on sale: Big box stores drop prices weekly. Check end caps for discounted bags.
- Edge by hand for control. Power edgers chew lawn; spades create crisp lines.
Low-Cost Edging and Path Touch-Ups
Edges guide the eye. You can build crisp lines without pricey metal borders. Use stones, bricks, or even repurposed wood.
Edging Options Under $30
- River rock: 1–2 bags create a flowing border.
- Brick or paver singles: Line them side-by-side for a classic look.
- Logs or scrap wood: Sand and seal them. Rustic charm on the cheap.
- Plastic edging strips: Flexible and fast. Use stakes for tight curves.
Install in 4 Simple Steps
- Mark your line with string or a garden hose. Keep curves smooth and intentional.
- Cut a shallow trench with a spade. Aim for 2–3 inches deep.
- Set your edging into the trench. Tap pieces snug and level.
- Backfill and mulch for a finished look. Hide gaps with small rocks.
Got a tired path? Refresh it with a few stepping stones and pea gravel. Fill low spots, set stones level, and sweep sand into gaps. It looks polished and costs less than dinner out.
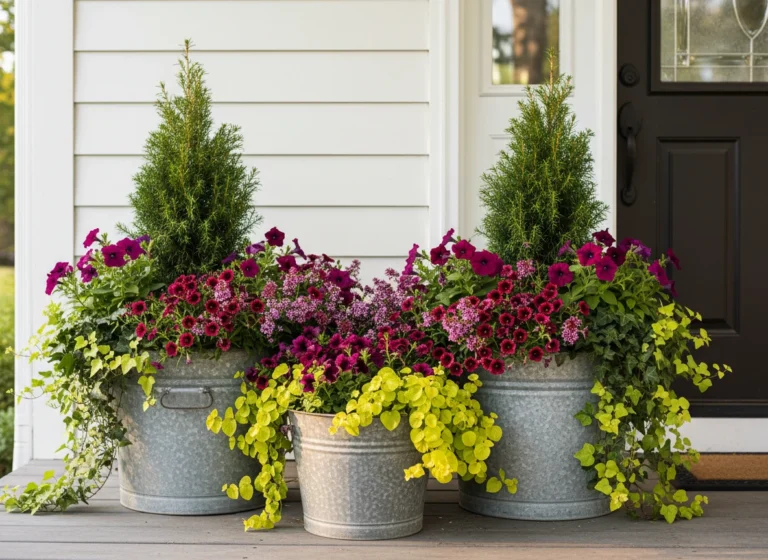
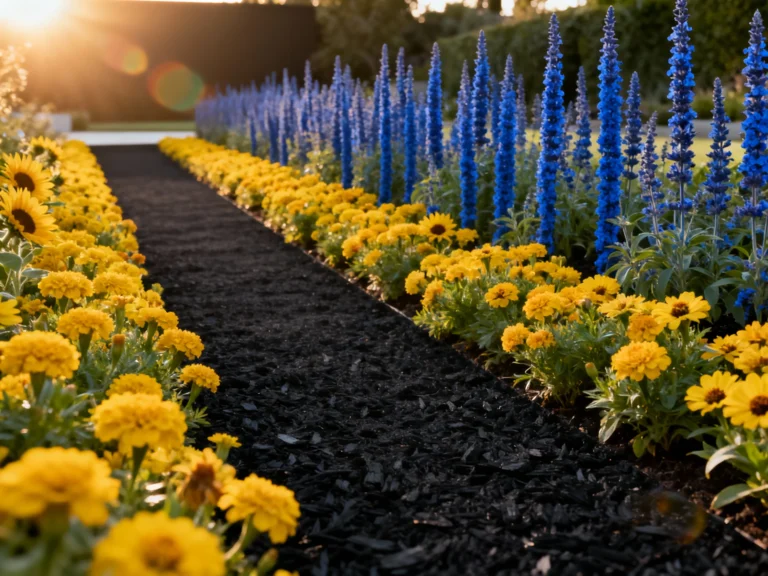
Color and Texture: Plants That Don’t Break the Bank
You don’t need a truckload of plants. You need smart choices and good placement. Focus on perennials, affordable annuals, and division freebies.
Spend Smart
- Split perennials: Ask neighbors for divisions (hostas, daylilies, sedum).
- Buy small: Starter plants cost less and catch up fast.
- Seed annual borders: Zinnias and marigolds grow quickly and shout “summer.”
- Use one statement container: A bold pot near the front step draws the eye.
Layout That Works
- Layer heights: Tall at the back, medium in the middle, short at the front.
- Group in threes: Odd numbers look natural. Avoid the lonely single plant look.
- Repeat color: Tie the yard together with 2–3 colors that show up in multiple spots.
Water Without Waste
- Water deep once or twice a week, not daily sprinkles.
- Mulch around plants to lock in moisture and keep roots cool.
- Morning water beats night water. Leaves dry quickly and stay healthy.
Use a thriller–filler–spiller combo in containers: one tall, one bushy, one trailing. It’s the cheat code for instant balance.
Small Finishes: Mailbox, Numbers, and Lights
Little upgrades punch way above their weight. They set the tone and pull everything together.
DIY House Number Glow-Up
- Clean the area around your current numbers.
- Paint a simple plaque or mount numbers on a stained board.
- Align numbers with a level. Straight lines scream “we care.”
Want extra flair? Add a small plant beneath or a magnetic planter to the doorframe. It whispers “designer,” not “budget.”
Mailbox Refresh
- Scrub and paint: One can of exterior spray paint fixes faded drama.
- New flag or trim: Cheap parts make it look new.
- Plant a mini bed: Edge a 2×3 foot area with rocks and add mulch.
You’ll spend $10–$20 and save yourself the annoyance of a rusty eyesore. The mail carrier might even compliment you. Maybe.
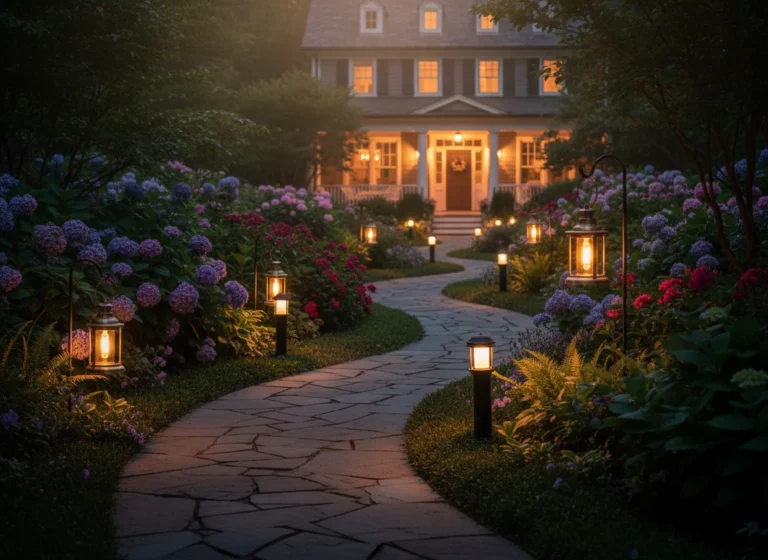
Solar Lights That Actually Look Good
- Line the walkway with 4–6 solar stakes.
- Place lights near focal points like your mailbox or house numbers.
- Hide bases with mulch or small rocks for a clean finish.
Avoid the runway vibe. Stagger lights slightly, and keep spacing consistent. Aim for 3–4 feet between lights for a soft, even glow.
Maintenance Hacks That Keep Costs Low
Great yards need consistency, not constant spending. Keep it tidy with quick routines and cheap tools.
- Ten-minute trim once a week: snip overgrowth and pull obvious weeds.
- Top off mulch lightly mid-season to freshen color.
- Edge touch-up monthly: one spade pass keeps lines sharp.
- Fertilize smart: one slow-release application in spring keeps plants happy.
- Keep a bucket for rocks, trash, and twigs; dump it each weekend.
FYI, quick attention beats big cleanups. Small moves keep your yard impressive without extra cash.
FAQ
Can I actually do all this for under $100?
Yes. You can build a strong mix of cleanup, edging, mulch, a few plants, and a couple of solar lights for less than $100. Prices vary by region, but sales and smaller quantities help a lot. Prioritize edges and mulch first, then add plants and lights with remaining budget.
What project gives the biggest impact fast?
Clean, edge, and mulch. These three create instant structure and color. Your yard looks intentional and tidy even with modest plantings. It’s the fastest way to flip a “meh” front yard into a “nice!” front yard.
How do I pick plants that survive without constant attention?
Choose hardy perennials like hosta, daylily, coneflower, sedum, and black-eyed Susan. They handle heat, grow back each year, and need minimal fuss. Mix in a few annuals like marigolds or zinnias for seasonal color without complexity.
Is landscape fabric worth it under mulch?
Use fabric selectively. Place it under paths or gravel sections, not around perennial roots. For beds, mulch and regular weeding work better long term. Fabric often traps moisture and creates headaches around plants.
How can I make cheap edging look expensive?
Keep lines smooth and consistent, match materials to your house style, and backfill neatly with mulch. Hide gaps with small stones and keep the grade level. Clean edges elevate even budget materials.
Do solar lights actually help curb appeal?
Yes, if you place them thoughtfully. Space them evenly and aim them along a walkway or toward a focal point. They add night-time polish and safety, and they install in minutes without wiring drama.
Conclusion
You can transform your front yard on a shoestring and a Saturday. Clean lines, fresh mulch, a splash of color, and a few lights make a huge difference. Start small, focus on high-impact moves, and keep a simple routine. Your yard will look dialed in, your budget will stay happy, and your weekend won’t vanish under a pile of projects—IMO, that’s a win.