DIY Backyard Duck Coop: Step-by-Step Plan for Under $200
You want ducks. You want a coop. You don’t want a second mortgage. Good news: you can build a sturdy, safe, easy-to-clean duck coop for under $200, and you can do it without losing a weekend to analysis paralysis. I’ll walk you through a simple plan that uses common materials, smart shortcuts, and zero fluff. Grab a coffee (or a hose), and let’s build a home your ducks will love.
Why a Budget Duck Coop Rocks
Ducks don’t ask for fancy. They ask for dry floors, fresh air, a secure door, and a spot to laze like feathery little royalty. We can deliver all of that for cheap with a compact footprint and clever design choices.
I set a $200 cap because money evaporates when you start adding “nice-to-haves.” We’ll hit the essentials and skip the extras that don’t help your ducks. Want to add a window box or a cute sign later? Absolutely. But the base build stays lean.
You don’t need pro tools. You need basic DIY grit, a tape measure, and a Sunday afternoon. Ready to flex those homebody muscles?
Plan Your Space
Think like a duck. Ducks don’t roost on poles like chickens. They sleep low, nest on the floor, and enjoy short ramps that don’t require a climbing harness.
Place the coop near water access, shade, and your sanity. You’ll haul water daily, so avoid a long trek. Keep it slightly elevated to dodge puddles and mud.
How much space per duck?
Give each duck roughly 4–6 square feet inside and 10–15 square feet in the run. You can start with 4 ducks comfortably in a 4×6 footprint. You’ll expand later when duck math hits (it happens).
Where should it sit?
Choose a flat spot with good drainage and partial shade. Face the main door away from prevailing winds. Keep the coop close to the run and water area to keep chores quick. You’ll thank yourself when you carry buckets in January.
Materials and Tools: The Budget-Friendly Checklist
You can buy new lumber or mix in reclaimed materials. I lean into leftovers, pallet boards, or old fencing for walls, while I keep structural pieces new. Safety first, bargains second.
Core materials (target budget under $200):
- 2×3 or 2×4 studs (10–12 pieces) — frame and door (~$50–$70)
- Exterior-grade plywood or OSB (2–3 sheets) — walls (~$50)
- Hardware cloth, 1/2 inch (10–25 feet) — vents and run edges (~$35–$50)
- Roofing: corrugated plastic/metal panels or asphalt shingles (~$25–$40)
- Screws, nails, staples — mixed box (~$10)
- Hinges (2–3) and a locking latch — predator security (~$12)
- Vinyl flooring remnant or heavy-duty tarp — easy-clean floor (~$10–$15)
- Concrete pavers or blocks — foundation risers (~$20)
Nice-to-have freebies:
- Exterior paint or stain leftovers — protect wood (free if you scavenge)
- Recycled fence boards — cladding and trim
- Pallet wood — ramp and small interior features
Tools (keep it basic):
- Tape measure, pencil, speed square
- Circular saw or handsaw
- Drill/driver with bits
- Staple gun for hardware cloth
- Level (or a phone app if you trust it)
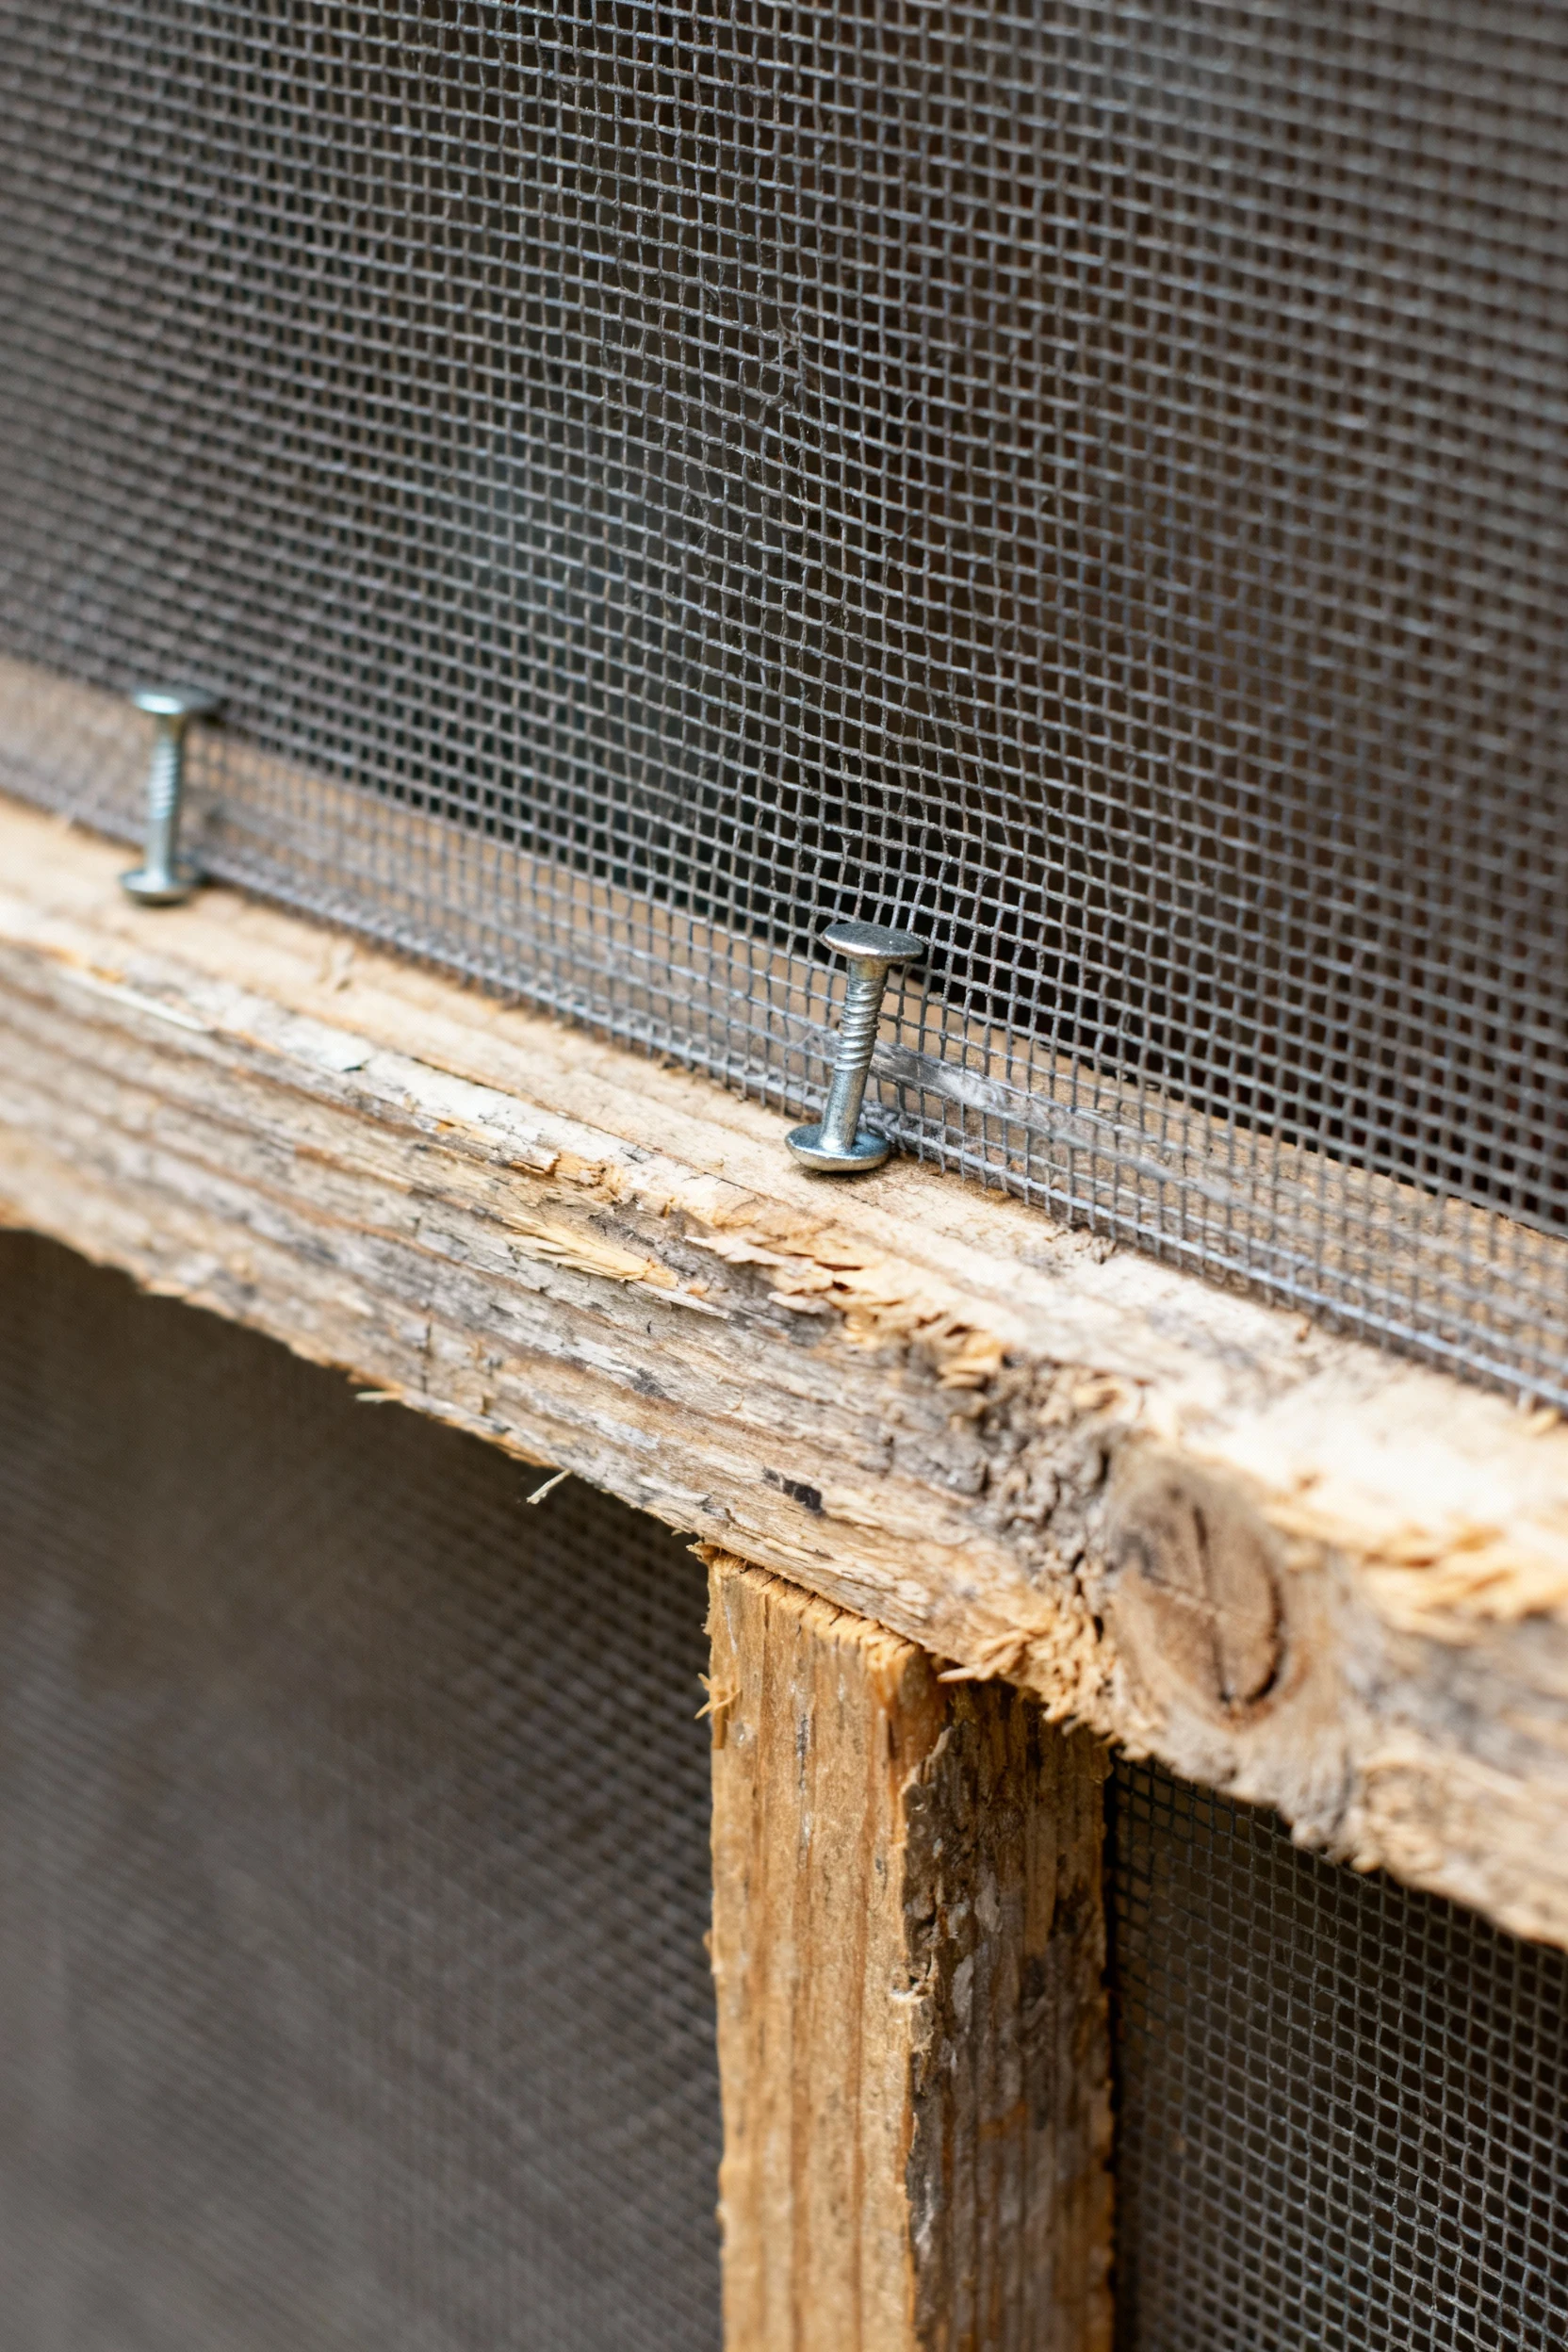
FYI: I rank hardware cloth as non-negotiable. Chicken wire keeps chickens in. It doesn’t keep predators out. Don’t cheap out on the mesh.
Design at a Glance
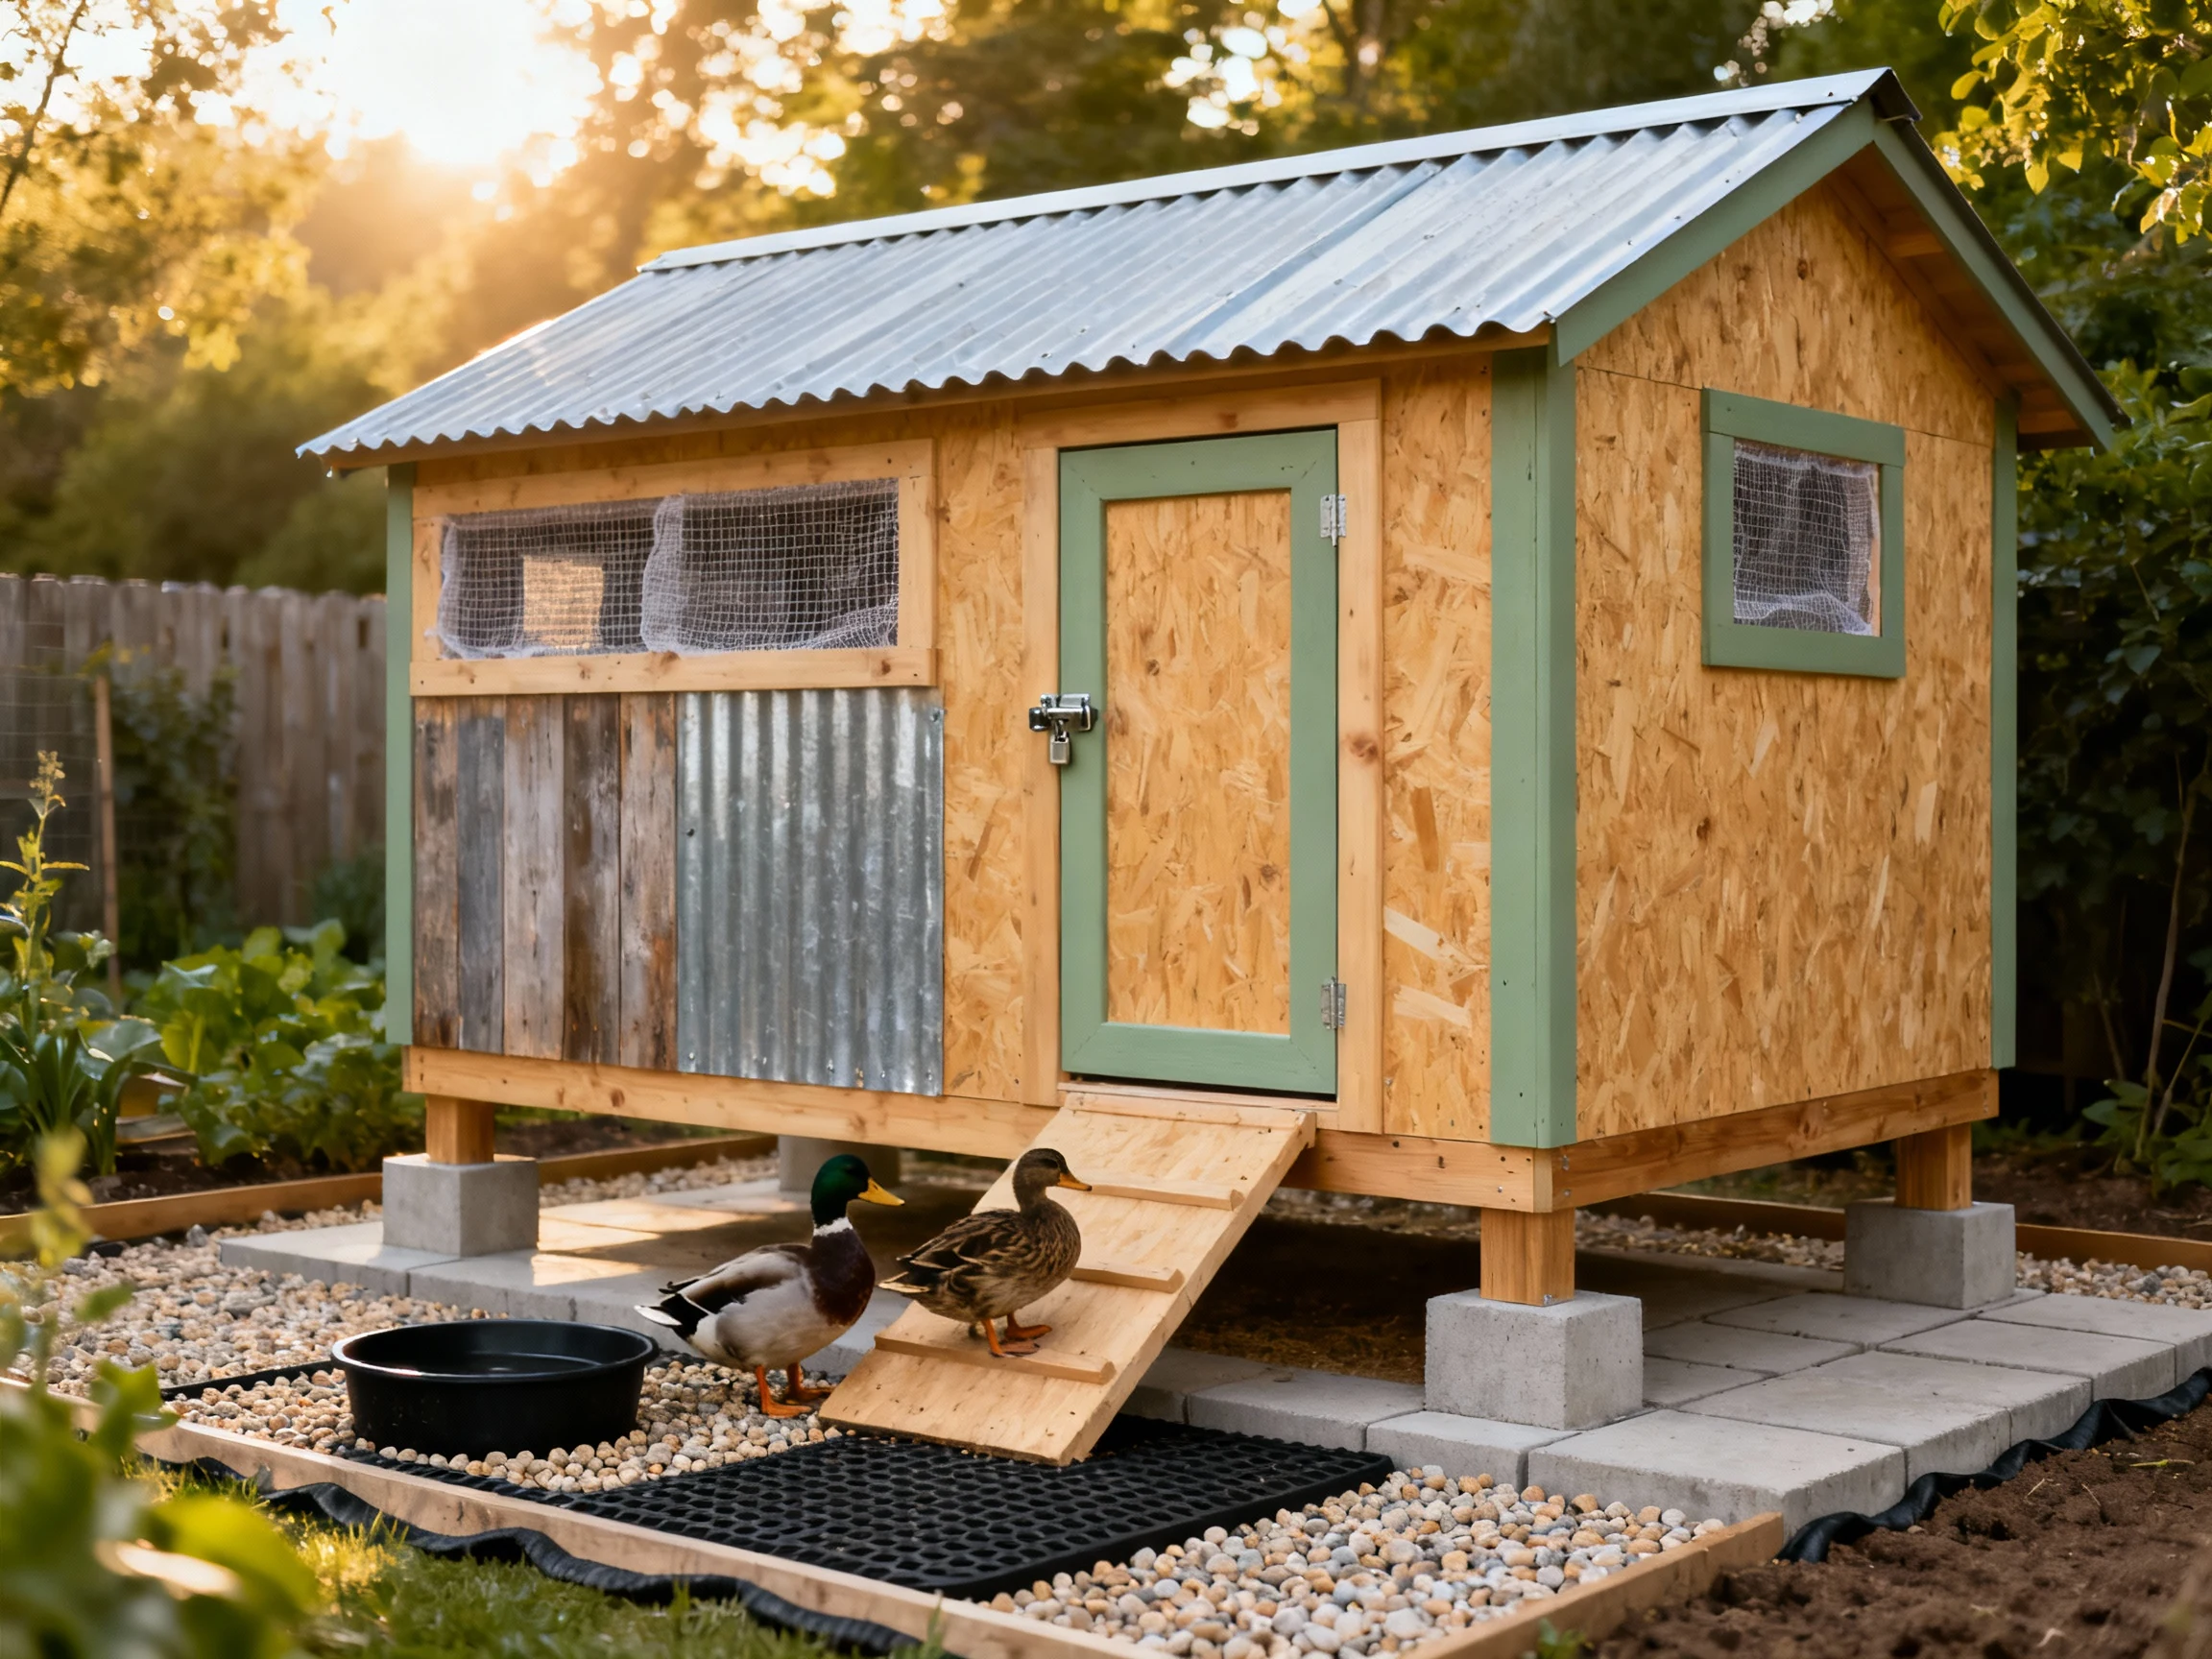
Let’s keep this compact, simple, and effective. Picture a small raised box with a sloped roof, a people door on the front, a duck door low on one side, and big screened vents up high.
Dimensions you can trust
Aim for a 4×6 footprint with a 2.5–3 foot height at the front and a slight slope to the back. That height gives ducks room to move while keeping material costs low. Elevate the coop on pavers or blocks 4–6 inches off the ground to dodge wet soil.
Floor and frame
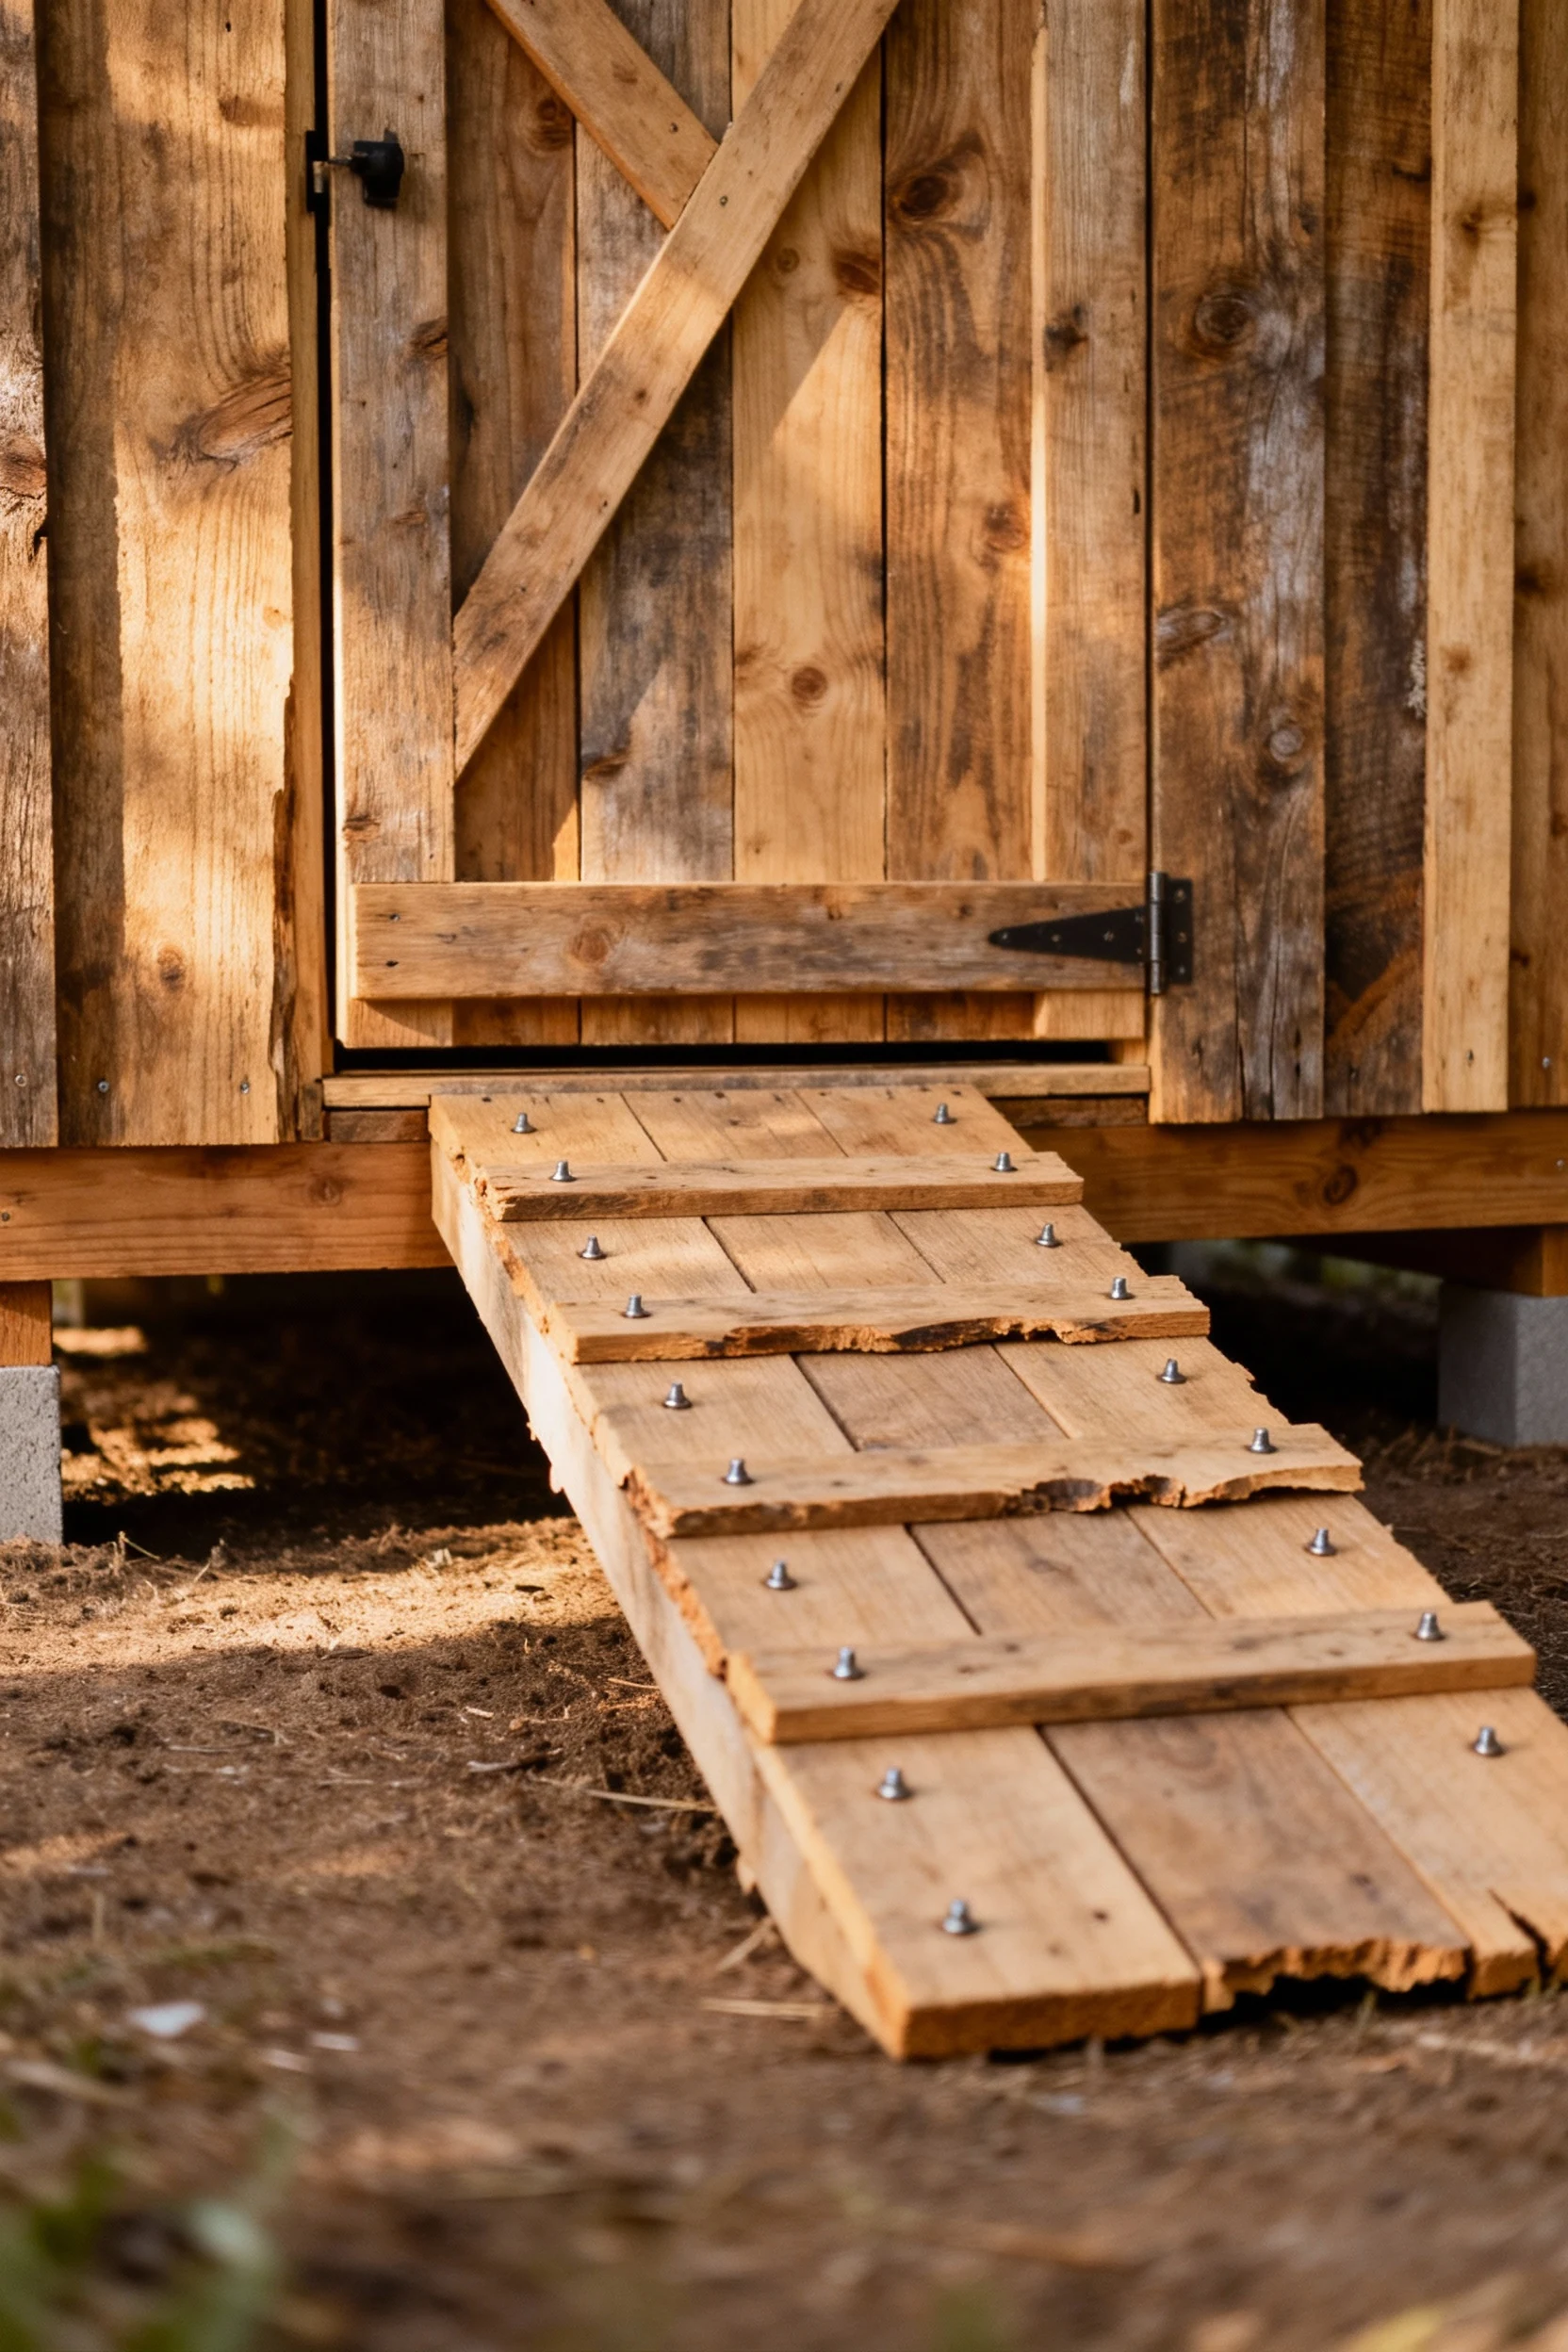
Run a simple rectangle: 2×3 studs for the base, studs upright at corners, and a top frame. Lay plywood over the base and cover it with vinyl flooring or a heavy tarp for easy cleaning. Add a short ramp to the duck door (12–18 inches long, low incline).
Roof and ventilation
Slope the roof to shed rain. Add continuous vent strips along the top of the long sides, covered with hardware cloth. You’ll move moist air out without chilling ducks. Keep vents up high and the door low for draft control.
Doors
Install a full-height people door for easy access. Cut a low duck door about 10×12 inches. Use a simple slide or hinged flap with a latch. Keep it snug, not airtight. Ducks breathe. You breathe. Everyone wins.
Build: Step-by-Step (Weekend Warrior Edition)
You can knock this out in a day if you measure twice and cut once. Or measure once and shrug. I won’t judge. But accurate cuts help.
- Set your foundation. Place 4–6 pavers or blocks in a rectangle. Check level. Adjust with sand or gravel if needed. Elevate the coop 4–6 inches to keep the floor dry.
- Build the base frame. Assemble a 4×6 rectangle with 2×3 studs. Screw joints tight. Add one center cross-member for floor support.
- Lay the floor. Attach plywood to the frame. Seal edges with exterior caulk if you have some. Cover the floor with vinyl or a tarp. Staple it tight. Overlap the edges slightly to block moisture.
- Raise the walls. Cut studs to 30 inches for the front and 24–26 inches for the back to create a slope. Screw corner posts to the base. Add top plates. Frame simple window openings for vents near the roofline.
- Sheath the walls. Attach plywood or OSB panels to the frame. Leave vent cutouts near the roof. Cut the duck door near the ground on one side. Cut the people door on the front.
- Give it a roof. Screw down corrugated panels or nail shingles over roof sheathing. Let the roof overhang 2–3 inches on all sides. Add drip edge if you have scraps. Water runs off, not in.
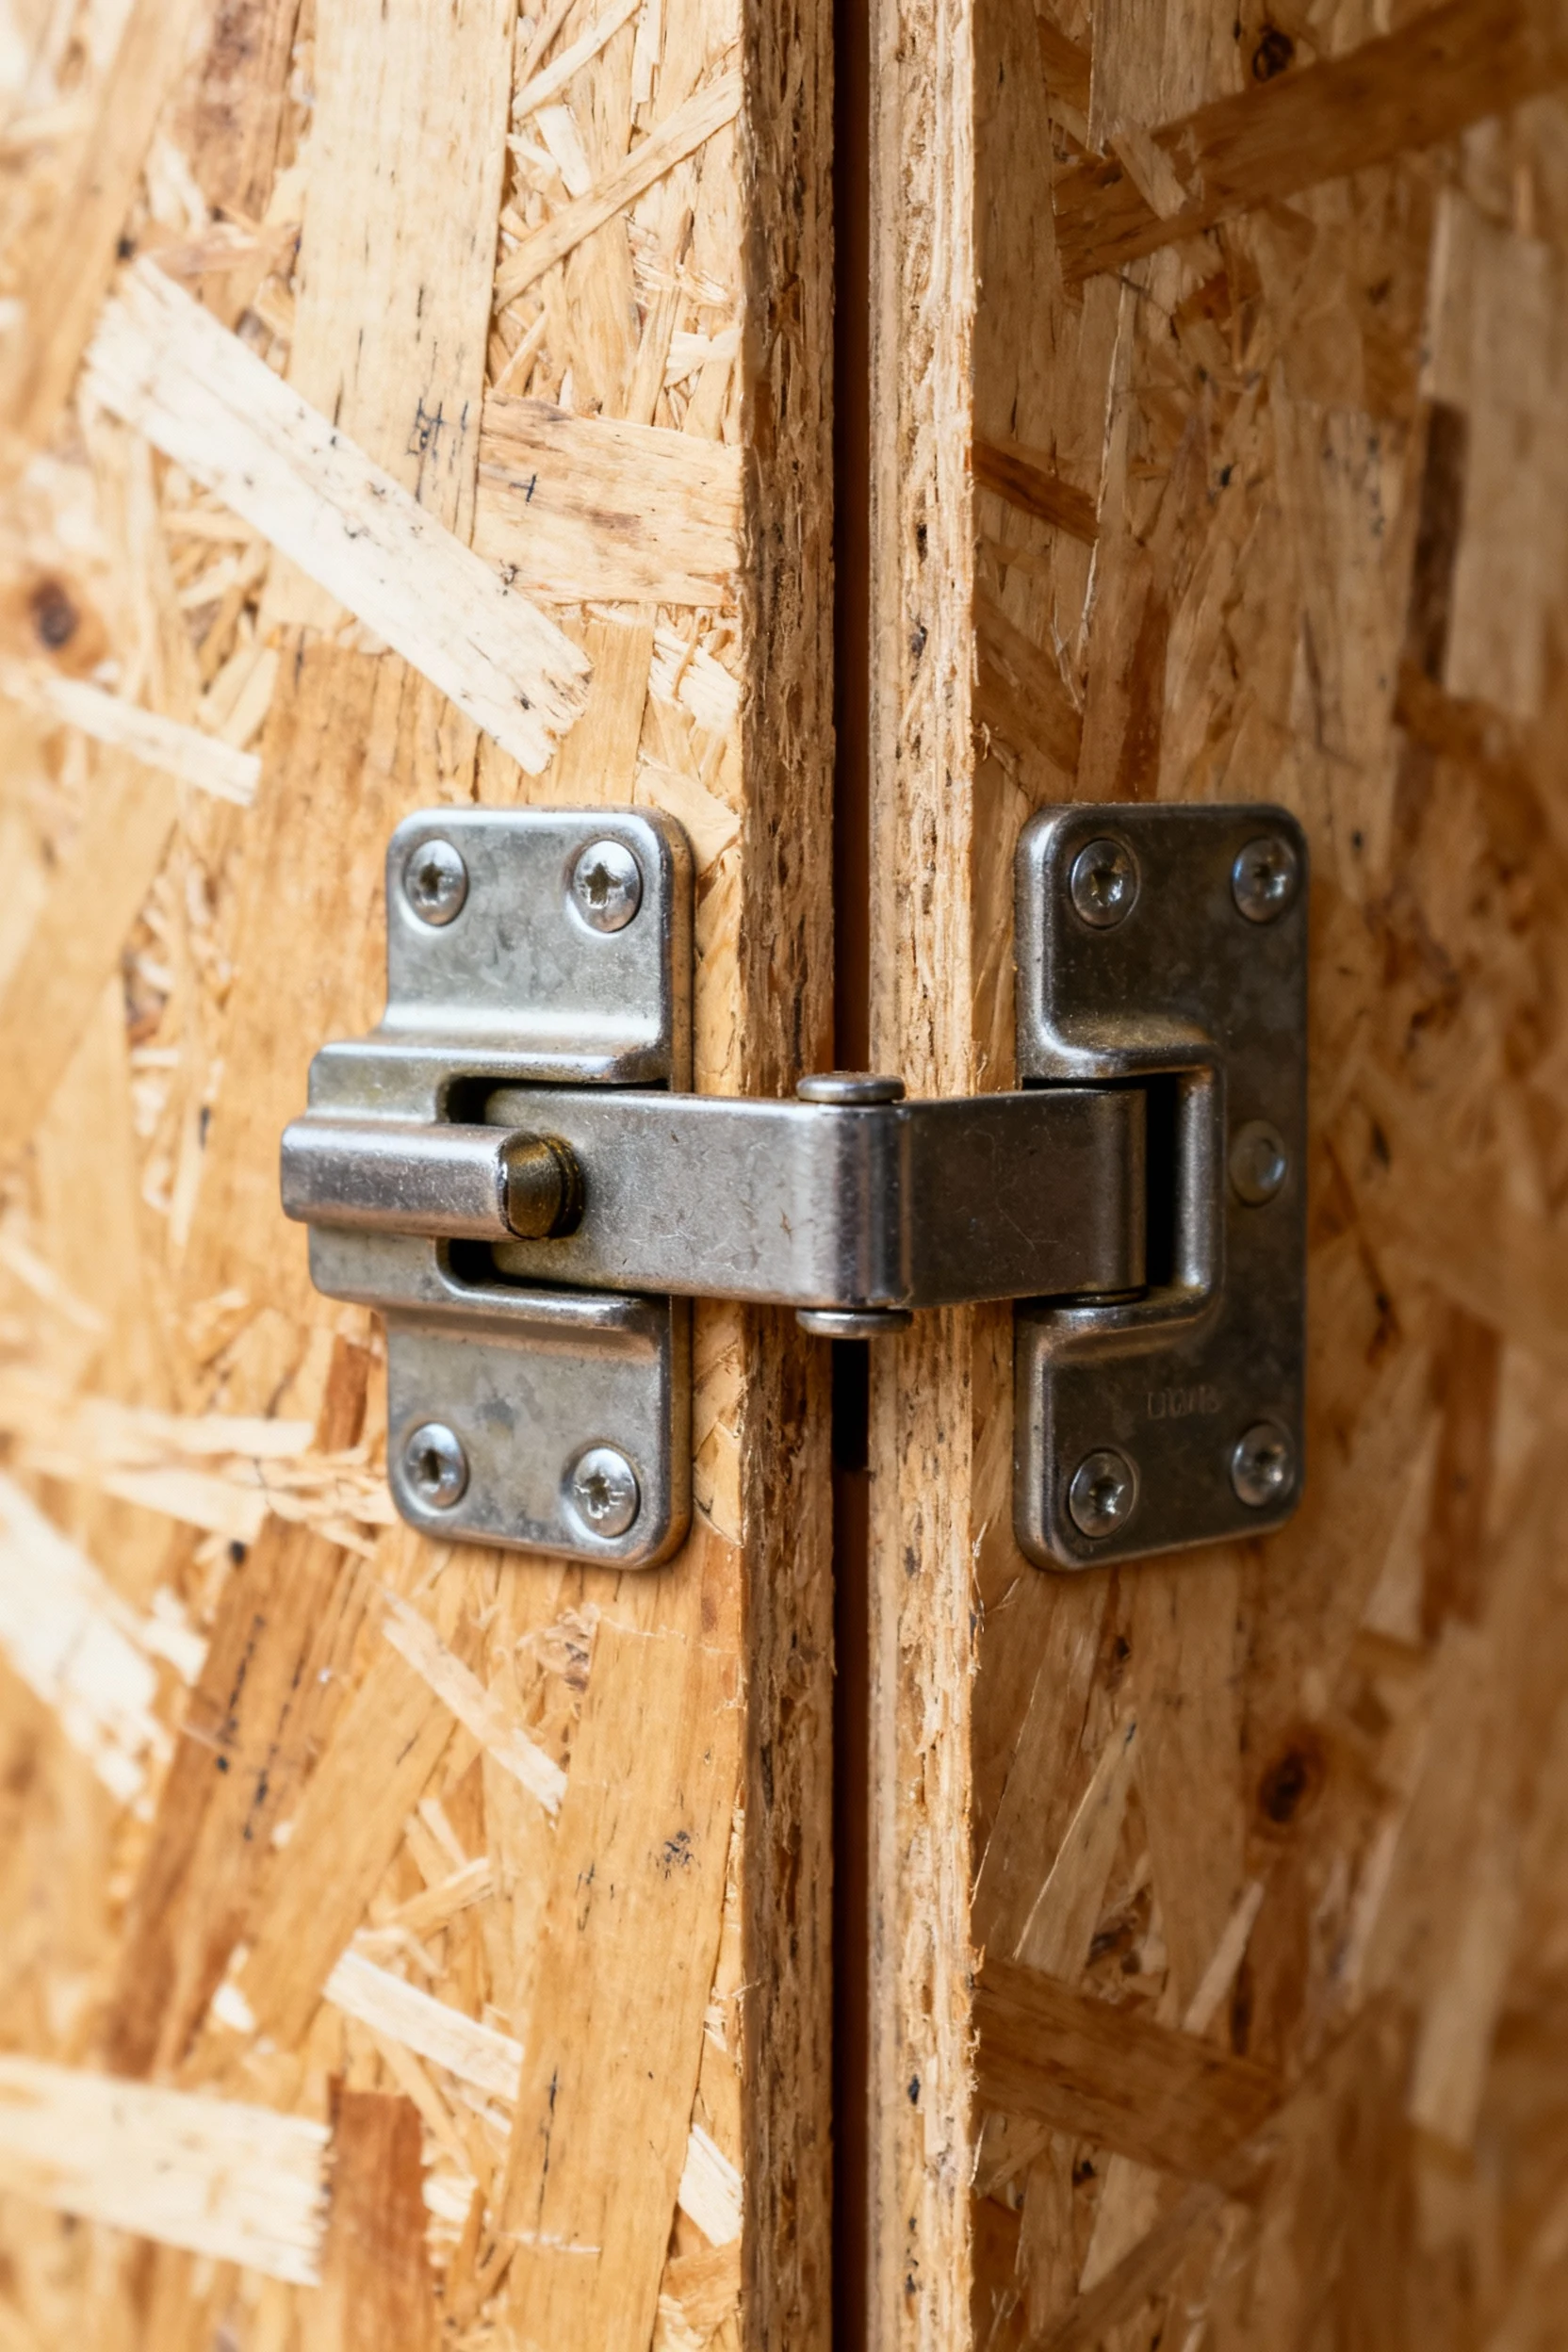
- Install doors and hardware. Build a simple people door from a plywood panel with a 2×3 frame. Hang it on two hinges. Add a latch you can lock. Attach a small duck door with a hinge or sliding track. Keep the duck ramp shallow and secure it with screws.
- Vent with hardware cloth. Staple 1/2 inch hardware cloth over the vent openings. Frame the edges with scrap boards so staples don’t sit exposed. You block predators while you move humid air out.
- Protect the perimeter. Lay a 12-inch hardware cloth apron around the coop, extending out flat on the ground. Pin it down with landscape staples and cover it with soil or gravel. Predators give up when they hit that apron.
- Finish the interior. Toss in 3–4 inches of straw, pine shavings, or chopped hay. Add two shallow bins or trays for feed and water. Keep the water outside the sleeping space if you can, or use a no-spill setup.
- Paint or seal. Use leftover exterior paint or stain. Focus on edges and exposed faces. Don’t worry about perfection. Aim for protection.
Want to add a small attached run? Absolutely. Frame a simple 4×8 rectangle with 2x3s and wrap it with hardware cloth. Connect it to the duck door with a short tunnel. Keep it under budget by using what’s on hand.
Comfort and Cleanliness
Ducks reward you with calm vibes and messy water habits. Set the coop up to handle both with minimal effort.
Ventilation and dryness
Run vents along the top edges and keep the floor sealed. You move moist air out without chilling the flock. If the air smells damp, open more vents. Don’t trap humidity. Ducks hate damp bedding more than you do.
Bedding choices
I favor straw for ducks because it mats lightly and stays warmer. Pine shavings also work and smell great. Lay bedding 3–4 inches deep and spot-clean daily. Refresh weekly or run a managed deep-litter system if you monitor moisture.
Water setup that doesn’t flood everything
Place the main waterer in the run, not inside the sleeping area. Use a low rubber feed pan or a gravity-style poultry waterer. Set it on a small platform with a drain bed (pea gravel or a perforated mat) so splashes don’t turn the run into a swamp. Ducks splash. You control where the splash goes.
Pro tip: Keep a dedicated “splash zone.” Line it with gravel, rubber mats, or a cheap boot tray. You’ll clean faster and curse less.
FAQ
Can I really build this for under $200?
Yes. You hit that number when you buy studs and plywood on sale, keep the roof simple, and use hardware cloth strategically. You save more when you scavenge paint, pallet boards, or old fence panels. IMO, the only line item you never downgrade is predator-proof mesh.
Do ducks need nest boxes like chickens?
Not really. Ducks nest on the floor. You can add a low, open-front box if you want cleaner eggs, but you don’t need fancy boxes. Give them a quiet corner with extra straw and they’ll sort it out.
How do I predator-proof without spending a fortune?
Focus on the weak points. Use a locking latch on the people door, cover vents with hardware cloth, and lay a 12-inch ground apron around the coop. Skip chicken wire for security. You keep costs down when you defend edges and doors first.
What’s the best bedding for ducks?
Straw wins for most folks. It insulates, it handles moisture, and it composts well. Pine shavings smell great and clean up bright, but they scatter more when ducks party. Try both and see what you prefer. FYI: avoid cedar shavings because they can irritate respiratory systems.
How often should I clean the coop?
Spot-clean daily. Scoop wet spots and clumpy straw. Refresh the bedding weekly or biweekly depending on how splashy your crew gets. Deep-litter works when you manage airflow and add dry material consistently. If it smells funky, you need more ventilation and cleaner bedding.
Where should I keep the water?
Keep the main waterer in the run on a splash-friendly base. Ducks drink overnight sometimes, so you can add a small inside waterer if you use a no-spill setup. Focus on drainage and airflow so you don’t trap moisture. Your nose will tell you when you get it right.
Conclusion
You don’t need a boutique barn to keep ducks happy. You need dry floors, solid airflow, tight doors, and materials that don’t flinch when weather hits. This plan stays under $200, and it gives your flock a safe home that feels calm and easy to maintain.
Start small. Build smart. Upgrade later. Ducks won’t grade your carpentry. They’ll judge your water management, though, so nail that part. FYI: a good splash zone saves your sanity. Now go build it, then sit back and enjoy the quacks.