gravel border ideas
You want crisp edges, clean lines, and a garden that looks finished without constant fussing? Gravel borders deliver. They frame beds, tidy up walkways, and solve drainage headaches—without blowing your budget. Plus, you can install them in a weekend. Ready to turn your garden edges from “meh” to “nailed it”?
Why Gravel Borders Work (and Look So Good)
Gravel borders punch above their weight. They define spaces, guide foot traffic, and make everything feel intentional. They also handle tough jobs like mud control and tricky slopes.
Here’s why gardeners swear by them:
- Low maintenance, high impact: Gravel borders keep edges clean and bed mulch contained.
- Drainage wins: They soak up rain, reduce puddles, and keep paths usable.
- Budget-friendly: Gravel costs less than poured concrete or elaborate pavers.
- Flexible design: Curve them, straighten them, widen them—gravel doesn’t judge.
- Plant-friendly: Roots breathe, water flows, and your plants stop drowning after storms.
Want a quick upgrade that looks intentional but doesn’t require a contractor? Gravel borders do that, IMO.
Choosing the Right Gravel
Not all gravel works the same. Some looks polished, some locks together better underfoot, and some screams “driveway.” Pick with intention so your border actually does its job.
Pea Gravel vs. Crushed Stone
Pea gravel feels smooth and rounded. It looks soft, handles walking well, and brings a beachy vibe. But it rolls more than crushed gravel, so it escapes lightly used edges unless you contain it.
Crushed stone (like 3/8″ or 1/2″ angular gravel) interlocks. It stays put, compacts better, and gives crisp modern lines. Use it near paths, driveways, or anywhere you want a stable edge.
FYI, anything over 3/4″ gets chunky fast and looks heavy along small beds. Save big rock for dry creek beds or feature areas.
Color Palette and Texture
Match your gravel to your home and plants. Cool gray granite flatters modern architecture and blue-green foliage. Warm buff or tan complements brick, stucco, and Mediterranean vibes.
Black basalt looks insanely sharp with white siding and ornamental grasses. Mixed river rock adds speckled interest and hides leaf litter like a champ. Choose one color for cohesion, or intentionally mix two sizes for texture—just keep your palette tight.
Sourcing and Sustainability
Local stone blends into your landscape and costs less to transport. Recycled crushed concrete saves money and diverts waste. It gives a modern, gritty texture—perfect for urban gardens.
Ask suppliers for washed product. Unwashed gravel brings dust that coats plants and makes the first rain look like a mud party. Always check size consistency so your border doesn’t look patchy.
Smart Edging Options That Keep Gravel in Line
Gravel borders look best with some kind of edge. You don’t always need it, but it helps keep stones from wandering into lawns or beds. Think of edging like the frame on a great photo—it finishes the look.
- Steel or aluminum edging: Slim, crisp, and subtle. It bends into curves and disappears visually. Great for modern gardens.
- Pavers or bricks: Classic, weighty, and tidy. Lay them flat or on edge for more height. Perfect for cottage or formal styles.
- Composite/bender board: Flexible and budget-friendly. It curves easily and handles wavy borders.
- Timber sleepers: Chunky and warm. Use rot-resistant wood (cedar, redwood) or treated sleepers for longevity.
- Living edging (low groundcovers): Thyme, ajuga, or dwarf mondo grass softens hard lines. Use with caution if you want zero spread.
Curves vs. Straight Lines
Curves feel organic and forgiving. They lead the eye, soften fences, and make small spaces feel bigger. Straight lines shout “modern” and create visual calm—awesome for minimal, structured gardens.
Pick one language and stick with it. Don’t mix a zigzag of mini curves with sharp angles. If you curve, commit. If you go straight, keep it crisp.
Height Matters
Keep edging low for a subtle, seamless look. Raise it an inch or two if you need to trap gravel on slopes or next to lawns. For heavy-use areas, set edging flush with a mower strip so you skip string trimming. Your future self will thank you.
Design Ideas and Layouts That Actually Work
Gravel borders look good almost anywhere. Target spots that feel messy or unfinished. Or use them to solve problems: mud, erosion, or awkward transitions.
- Along garden beds: A 6–12″ gravel strip creates a clean line and keeps mulch off your patio.
- Flanking paths: Run gravel ribbons along stepping stones. Go wider near corners to add breathing room.
- Driveway edges: Add a gravel shoulder to catch runoff and protect lawn edges from tires.
- Tree rings: Swap plastic tree rings for a gravel halo with steel edging. It looks grown-up and handles watering overflow.
- Dry creek vibe: Use mixed gravel sizes in a shallow swale to direct water and fake a natural streambed.
- Modern perimeter band: Wrap a home foundation with a narrow gravel band. It looks sharp and keeps splashback off walls.
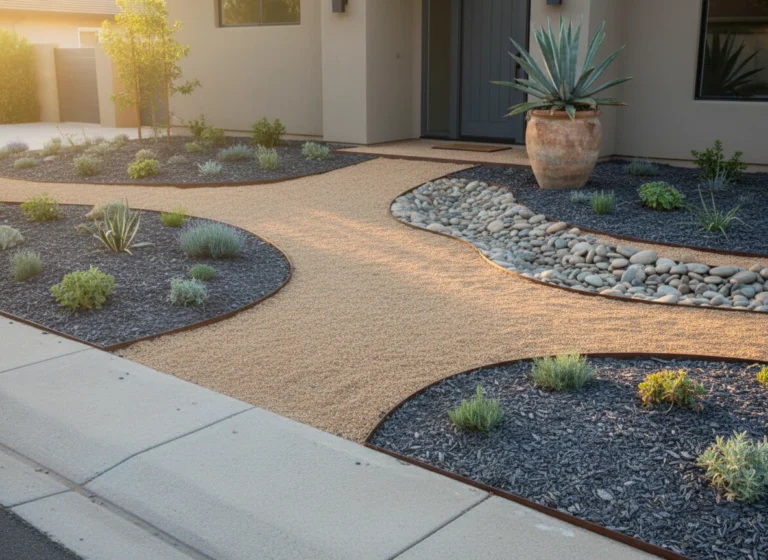
Front Yard Curb Appeal
Create a gravel border between the sidewalk and lawn for a crisp public-facing edge. Tie it into your driveway with the same stone so everything feels intentional. Add a few boulders or a cluster of grasses for texture and height.
Want instant points? Repeat materials from your entry path or porch. That repetition makes your design look planned, not pieced together.
Slopes and Drainage Swales
Run gravel along the base of a slope to catch sediment and slow water. Use angular stone for traction. For larger flows, carve a shallow swale and line it with mixed sizes—bigger rock in the center, smaller along the edge for a clean border.
Add stepping stones across the swale for access. It looks intentional and stops your feet from sinking.
How to Install a Gravel Border (Step-by-Step)
You can knock this out with basic tools. Work in sections so you don’t burn out and start hating shovels.
- Plan the line: Lay out a hose or string to test the shape. Widen tight bends so they don’t look pinched.
- Mark and cut: Spray paint along the layout. Then cut the edge with a spade for a crisp line.
- Excavate: Dig 3–4″ deep for most borders. Go 5–6″ if you want a super-stable edge or you expect heavy foot traffic.
- Compact the base: Tamp the soil. Add 1–2″ of compactable base (decomposed granite or road base) if you need extra stability.
- Set edging: Install steel, aluminum, or pavers along the line. Stake metal edging every 2–3 feet, more on curves.
- Lay fabric (optional): Use heavy-duty landscape fabric only if you want maximum weed suppression and clean gravel. Overlap seams 6–8″.
- Pour gravel: Spread 2–3″ of gravel. Rake it level. Compact lightly with a hand tamper for angular stone.
- Finish clean-up: Brush stray stones off lawns and pavers. Water lightly to settle dust.
Tools and Materials Checklist
- Flat spade, rake, hand tamper
- Wheelbarrow, shovel, gloves (save your knuckles)
- Edging (steel/aluminum/composite/pavers)
- Landscape fabric and pins (if using)
- Gravel (order 5–10% extra for settlement and topping up)
- Base material (optional for stability)
Pro Tips
- Keep the gravel just below adjacent surfaces so it doesn’t spill onto lawns or patios.
- Order washed stone to reduce dust and keep nearby plants clean.
- Use angular 3/8″ crushed stone for borders that must stay put.
- Curve around tree roots gently. Don’t smother the root flare with gravel.
Common Mistakes
- Digging too shallow and ending up with gravel all over your lawn after the first rain.
- Skipping edging on slopes. Spoiler: the gravel will wander.
- Going too narrow. Anything under 6″ looks skimpy unless you aim for a hairline accent.
- Using round pea gravel where you need traction. It slides like marbles.
Maintenance Made Easy
Good news: gravel borders need very little babysitting. A little raking and the occasional top-up keeps them fresh for years.
- Weed control: Hand-pull strays after rain, or spot-treat carefully. Use fabric if you want maximum suppression.
- Rake and refresh: Rake smooth every month or two. Add a couple of bags yearly to top up high-traffic sections.
- Edge care: Tap stakes back down if frost heaves them. Reset a sunken paver here and there.
- Debris control: Blow leaves off with a low setting so you don’t blast stones into your neighbor’s yard.
Winter and Storm Considerations
Snow shovels and gravel don’t always vibe. Use a broom or a leaf blower on powdery snow, or shovel just above the surface to avoid scraping. Choose angular stone if heavy rains hit often—it interlocks and resists washing out.
If you notice erosion channels, add more base under that spot and reset the edging. Problem solved.
Budget, Sourcing, and Eco Angles
You control the price with width, depth, and material choices. You can go luxe or you can keep it practical and still look sharp.
- Cost ranges: Most gravel runs budget-friendly per bag or bulk. Add edging and base if you want a longer-lasting border. You still spend less than most hardscapes.
- DIY vs. pro: Install yourself if you have a weekend and a wheelbarrow. Hire a crew for long runs, steep slopes, or when your back says “nope.”
- Eco choices: Pick local stone, recycled aggregates, and permeable designs. Permeable borders reduce runoff and nourish surrounding plantings.
- Order smart: Bulk delivery beats endless bag schleps. Measure carefully and add 10% for settling and spillover.
Lighting, Plants, and Accents
Gravel borders offer a stage for simple details that elevate everything. A little lighting, a few plants, and a tasteful accent turn “nice” into “wow.”
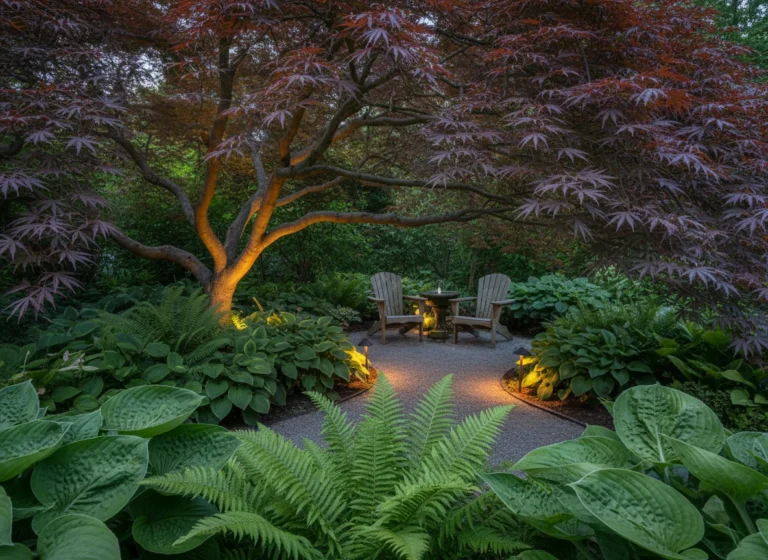
- Lighting: Stake low path lights just outside the border or tuck in tiny bollards. Aim warm light across the gravel for sparkle.
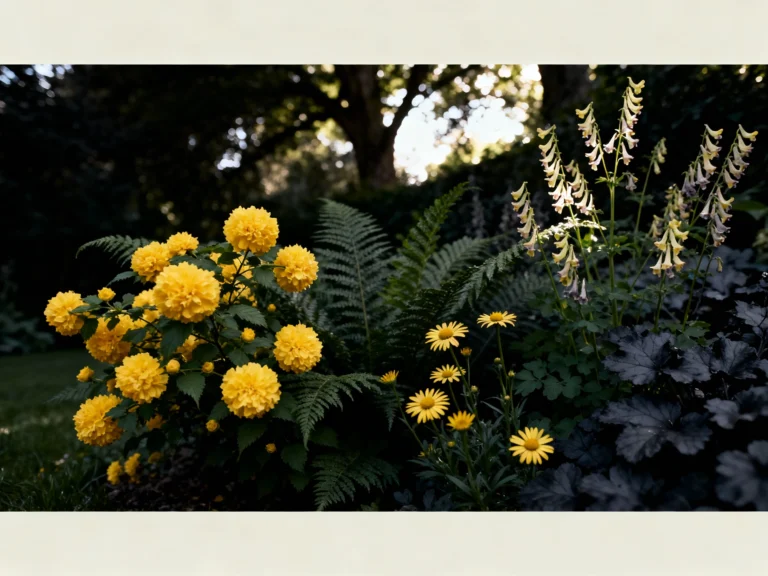
- Plants: Pair fine textures with angular stone—think feather grass, lavender, heuchera, dwarf mondo, or thyme. Keep plants slightly back so gravel doesn’t bury crowns.
- Accents: Drop in a basalt column, sculptural pot, or a flat boulder. Repeat materials for cohesion with house trim or paving.
Pet- and Kid-Friendly Touches
Go with rounded pea gravel where kids sit or pets nap. It feels better on paws and hands. For running zones, use angular gravel and set it firm so sneakers get traction.
You can also mix pea gravel in a small “play pad” while keeping angular stone in traffic lanes. Function meets sanity.
Sound and Sensory
Crushed gravel crunches underfoot—in a good way. That sound signals arrival at entries and helps deter sneaky raccoons. Pair with fragrant herbs like thyme along the border. Every step releases scent. Fancy, right?
FAQ: Gravel Border Questions
Do I need landscape fabric under a gravel border?
You don’t need it every time. Use fabric if you want cleaner gravel and fewer weeds, especially under trees that shed like crazy. Skip it if you prefer maximum drainage and you don’t mind the occasional weed. IMO, fabric helps most in narrow strips next to lawns or patios.
How deep should the gravel be?
Aim for 2–3″. Go 3″ if you want extra stability or you expect foot traffic. Keep the final surface just below adjacent lawn or paving so stones don’t migrate. Deeper doesn’t equal better—it just eats your budget.
How do I stop gravel from spreading into the lawn or bed?
Install edging and keep the gravel slightly lower than the grass or mulch. Use angular stone so it interlocks instead of rolling. Rake the edge regularly, and trim lawn so you don’t launch stones with the mower. A narrow paver mow strip works wonders.
What gravel works best for drainage?
Angular crushed stone drains fast and locks together, so it stays in place during storms. Choose 3/8″ to 1/2″ size for borders. Use larger sizes only in swales or dry creek beds where you want water to move through quickly without shifting material.
Can I mix gravel sizes or colors?
Yes, but do it intentionally. Mix two sizes of the same color for texture, like 3/8″ and 3/4″ crushed granite. If you mix colors, keep them within one palette (all cool or all warm) so it doesn’t look busy. Test a small patch before you commit.
Will snow removal destroy my gravel border?
Not if you go gently. Shovel just above the gravel, or switch to a broom or blower for light snow. If you use a snowblower, set skids high and take it slow. Spring touch-ups take minutes—top up thin spots and rake smooth.
Conclusion
Gravel borders give you clean lines, better drainage, and a dialed-in look—without a big spend or a contractor circus. Pick the right stone, frame it with smart edging, and follow a simple install plan. You’ll solve messy edges, guide the eye, and make everything feel intentional. Ready to grab a rake and make your garden look finished by the weekend? FYI: you’ve got this.