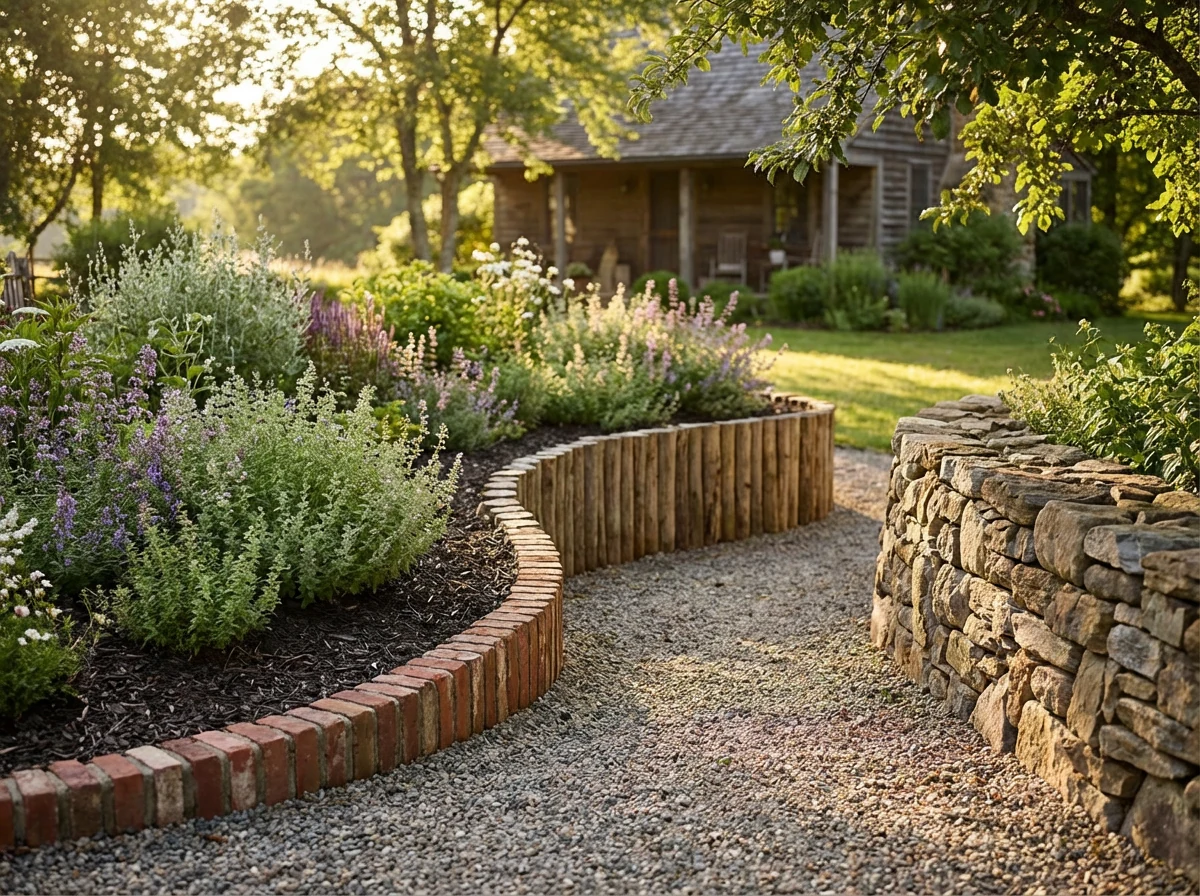
Rustic Cottage Edging: DIY Brick, Log, and Stone Flower Bed Border Ideas
You want that cozy, storybook garden look without spending a fortune or convincing a stone mason to move in? Perfect. Rustic cottage edging hits that sweet spot: it’s charming, practical, and totally DIY-friendly. Brick, log, and stone borders deliver character while they keep mulch in line and weeds in check. Let’s build something that looks like it grew there on purpose.
Why Cottage-Style Edging Just Works
Cottage edging adds instant personality. It frames your flower beds, it makes your paths look intentional, and it keeps yard chaos from swallowing your plants. You get form and function with a dose of “did you hire someone?” vibes.
It also helps with maintenance. Borders stop mulch drift, discourage creeping grass, and make mowing less annoying. You spend less time fixing messy edges and more time sniffing roses like a garden cliché.
Cottage style doesn’t demand perfect symmetry. You can lean into curves, mix textures, and use reclaimed materials. If you love a relaxed, lived-in look, this style says “same” and invites you to play.
Pick Your Border: Brick vs. Log vs. Stone
Each material brings a different mood, and honestly, they all look great. Choose based on your garden’s personality and your patience level.
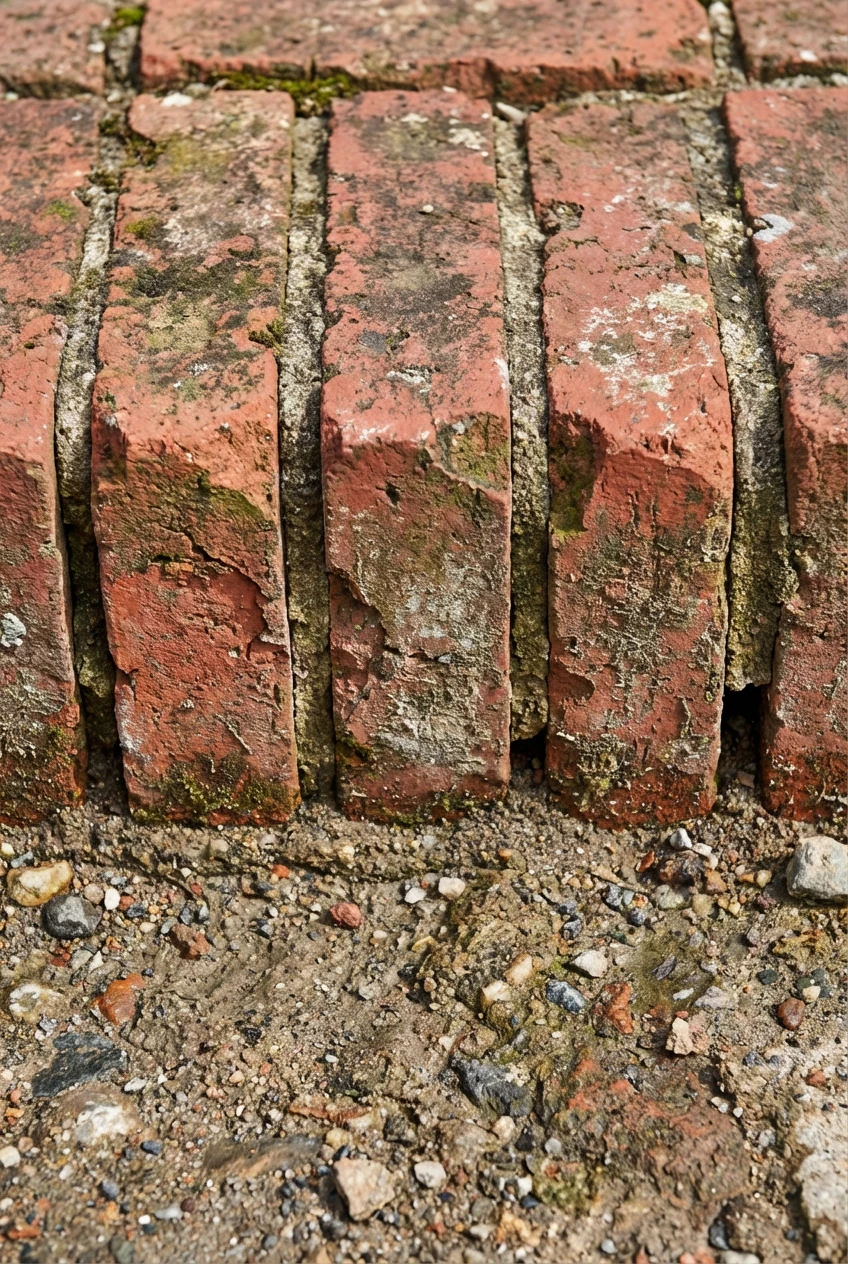
Brick: Classic, tidy, and curve-friendly
Brick edging looks polished without feeling stiff. It bends around beds, pairs with cottage flowers, and cleans up easily. You can lay bricks dry for a quick install or mortar them for a permanent line.
- Pros: Long-lasting, easy to shape curves, tons of pattern options
- Cons: Requires a good base, can look formal if you go too straight or shiny
Log: Cozy, woodland, and budget-friendly
Logs shout “forest path,” which your cottage garden appreciates. They bring warmth and texture. Use rot-resistant wood, and your border will age beautifully.
- Pros: Affordable, easy to install, perfect for informal beds
- Cons: Needs occasional TLC, attracts fungi (but in a cute way)
Stone: Organic, rugged, and hella charming
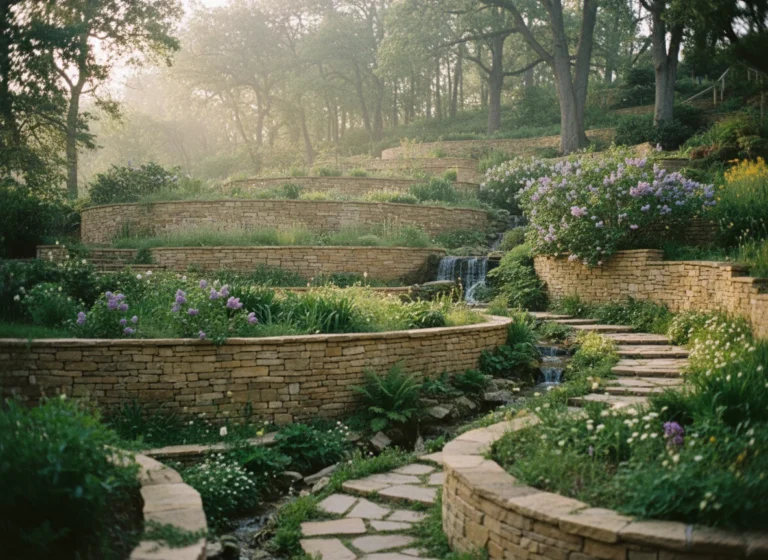
Fieldstone, flagstone, and river rock deliver that old-world vibe. Stone edges look natural and blend with plants. Use dry-stack techniques and you’ll get a border that feels timeless.
- Pros: Durable, low maintenance, looks good in every season
- Cons: Heavy, pricier unless you source locally, trickier for perfect curves
IMO: Brick offers the easiest beginner win. Stone wins on longevity and drama. Logs win on budget and warmth. You can’t lose here.
Plan, Prep, and Tools (Skip the Guesswork)
Strong borders live or die by prep. You’ll set yourself up for success when you measure, mark, and lay a proper base. Skip shortcuts and your edging stays put through rain, roots, and the occasional rogue soccer ball.
Sketch, measure, and mark
Use a garden hose to sketch fluid lines. Step back and squint until the curves feel right. Mark edges with paint or flour so you don’t wander during digging.
- Measure the length and plan materials with 10% extra for cuts and curve adjustments.
- Mark both sides of the border width so your trench stays consistent.
- Check grades with a straight board and level so water doesn’t pool.
Dig the trench and build the base
You need a flat, compact base. Dig 4–6 inches deep for logs and stones, and 6–8 inches for brick. Level it, then add a base layer.
- Base options: compacted gravel (crusher fines) for drainage, then an inch of sand for leveling
- Tamp every layer. Don’t guess. Make it solid.
- Keep the bed side slightly higher than the path side so water rolls away from plants.
Curves, slopes, and roots
Curves look best when they flow. Use shorter bricks or smaller stones to bend smoothly. On slopes, step the border like shallow stairs rather than forcing a tilt.
Avoid cutting big roots if you can. Reroute the border or raise it over them. FYI: Cutting major roots invites tree drama you don’t want.
Tools you’ll actually use: spade, hand tamper, level, mallet, string line, landscape rake, wheelbarrow, angle grinder (for brick cuts), loppers (for stray roots), gloves.
DIY Brick Edging Ideas That Don’t Feel Like a Sidewalk
Brick can look cottage-y when you break up the straight-laced patterns. Go for texture, angle, and slight height variation. Imperfect = charming. We’re not building a courthouse here.
Soldier course (upright bricks)
Stand bricks vertically with 1/3 buried. This creates a clean line with enough height to hold mulch. It also handles gentle curves without drama.
- Dig a trench about 6–8 inches deep and just wider than your brick width.
- Lay 4–5 inches of compacted gravel, 1 inch of sand, and set bricks upright.
- Tap to level the tops and keep the faces aligned. Backfill both sides for support.
Diagonal/45° set (for movement)
Angle bricks at 45° to add motion. This works magic along winding paths and around round beds. It looks custom without requiring fancy tools.
- Use a tamped base, set bricks diagonally, and alternate angles for curves.
- Leave tiny joints and fill with fines for stability.
Rowlock/stretcher course (flat lay)
Lay bricks flat, end-to-end, for a low-profile edge. It reads like a soft line instead of a hard barrier. Keep this flush with the lawn for easy mowing.
- Pro tip: Sink the bricks so the top sits just below blade height.
- Add a second row staggered for wider borders that feel balanced.
Wavy path for curves
Use shorter bricks or cut halves to follow tight bends. Place the interior joints closer than the outer joints to avoid gaps. Take your time and dry-fit before you set.
Brick tips that save sanity:
- Tumble or salvage bricks for instant patina.
- Keep a rubber mallet handy and level often. Small tweaks beat big corrections.
- Use edging spikes or hidden paver restraint if soil shifts.
- Seal only if you want shine. Most cottage gardens prefer a soft, matte finish.
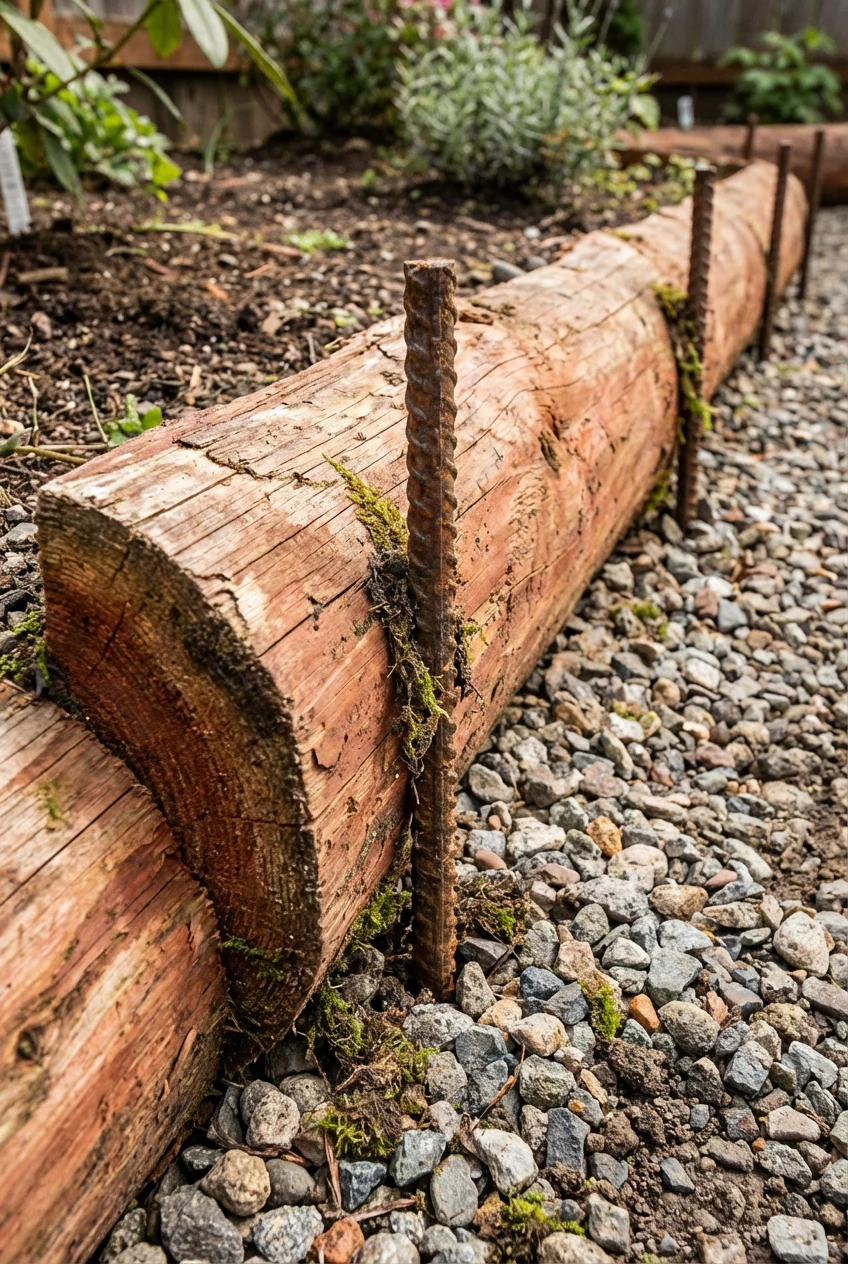
Log Borders: Cozy, Woodland, and Surprisingly Durable
Log edges feel like they wandered out of the woods and decided to stay. Choose hardy wood, set it on a draining base, and your border will hold up for years.
Half-log edging
Split logs lengthwise and lay the flat side down for stability. This gives you a chunky, warm line that hugs flower beds.
- Choose rot-resistant species: cedar, redwood, white oak, black locust.
- Dig a 4–6 inch trench, add 2 inches of gravel for drainage.
- Set half-logs and stake with rebar or hardwood pins every 2–3 feet.
Vertical palisade (short rounds)
Cut logs into short rounds (8–12 inches tall) and stand them upright. This looks adorable around cottage roses and herb beds.
- Mix diameters for texture. Keep tops level across the run.
- Seat each round into compacted gravel. Backfill with soil and tamp firmly.
Wattle weave (twiggy charm)
Drive small posts along the bed and weave flexible branches between them. This feels very “English cottage” and pairs beautifully with wildflowers.
- Use hazel, willow, or dogwood cuttings.
- Weave tight and low. Reinforce posts if soil feels soft.
Make logs last:
- Keep wood off soggy soil. Use gravel under and behind.
- Seal ends with boiled linseed oil or an eco-friendly wood preservative.
- Avoid direct sprinkler hits. Logs prefer gentle rain and shade.
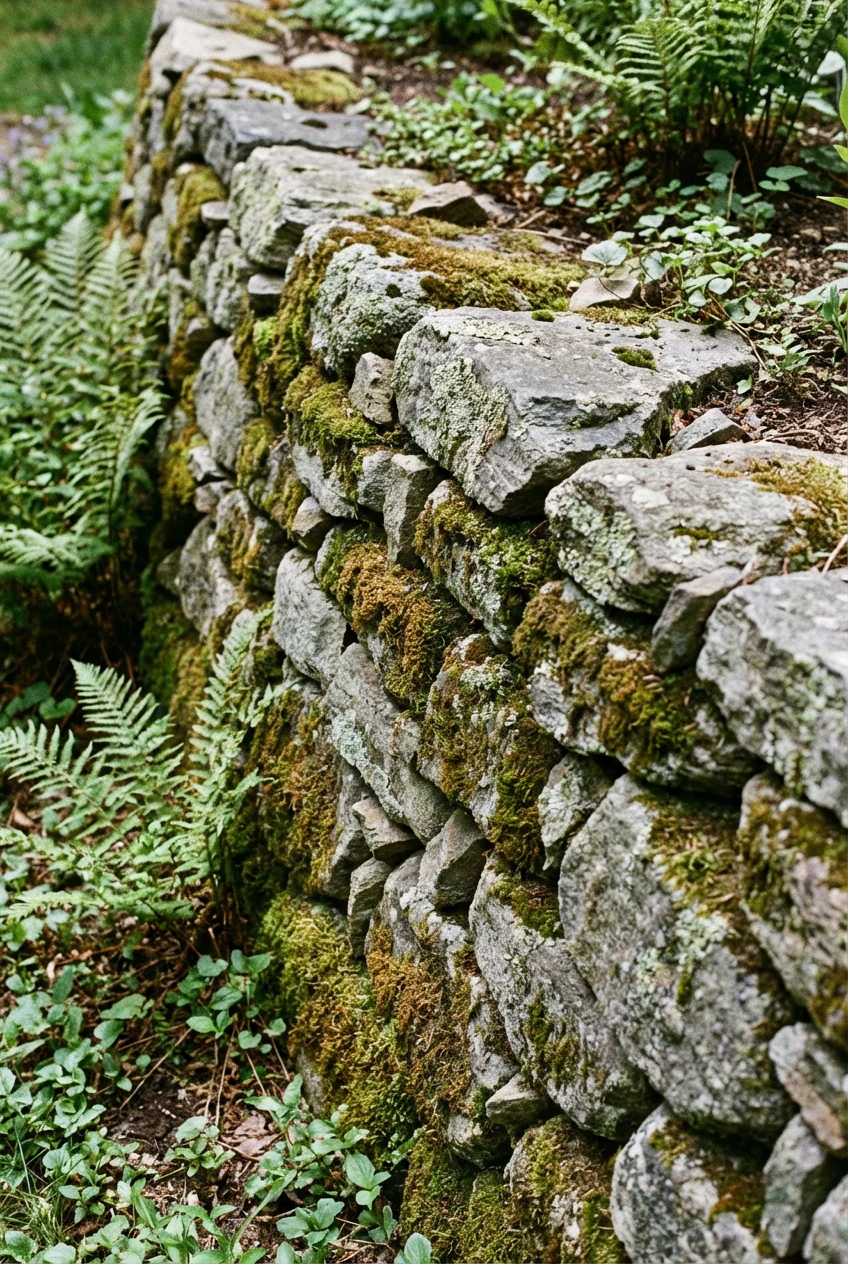
Stone Edging: Fieldstone, Flagstone, and Gravel Bands
Stone delivers that “built over time” look, which cottage gardens adore. Lean into irregular shapes and color variation. You’ll get texture and shadow that plants love to spill over.
Dry-stack fieldstone
Stack flattish stones in a single course or two for a natural ribbon. Use the fattest stones at the base and tuck smaller ones as wedges.
- Excavate to 6 inches and lay 4 inches of compacted fines.
- Set the largest stones slightly buried for grip.
- Shingle stones forward (toward the bed) so soil presses them tighter over time.
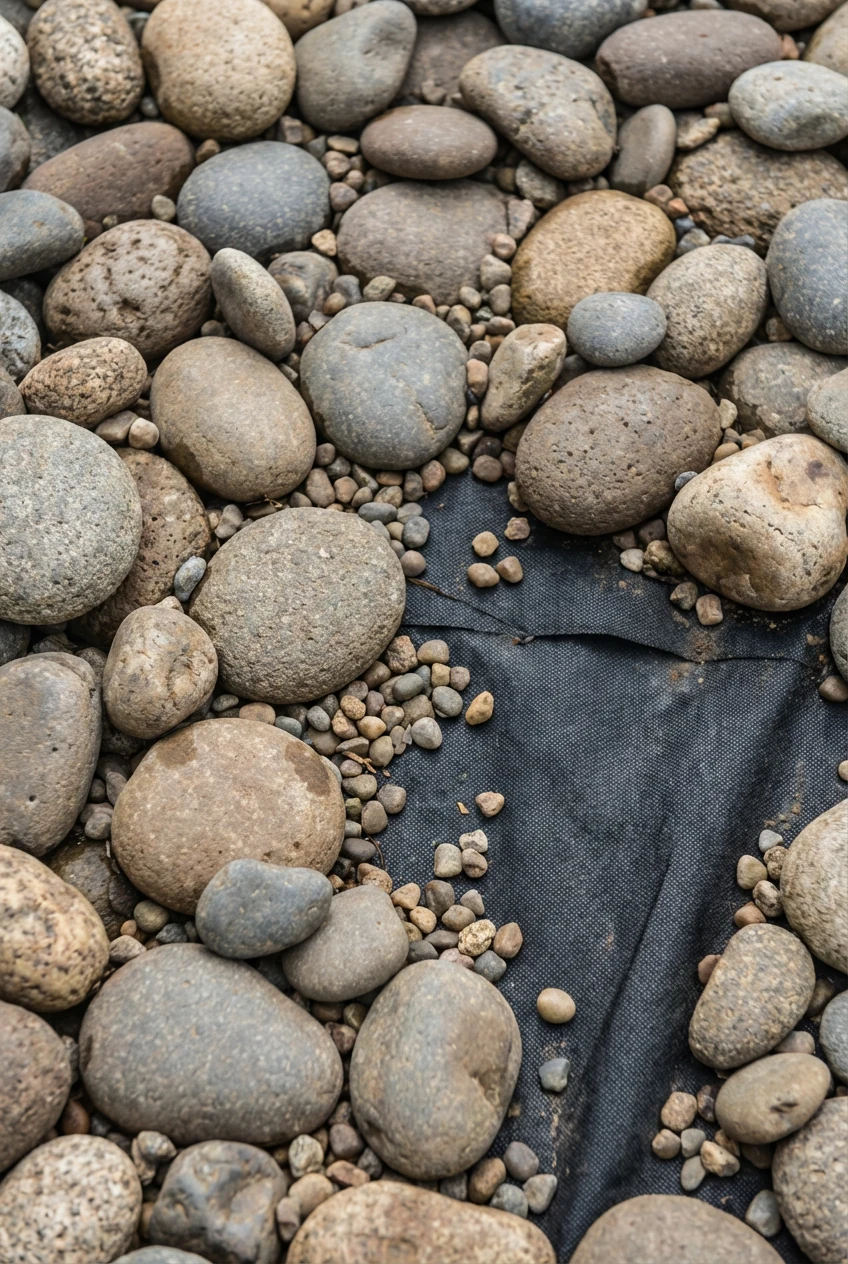
River rock ribbon
Create a gentle curve with rounded stones. This looks soft and pairs beautifully with grasses and lavender.
- Use a shallow trench and geotextile fabric to keep rocks from sinking.
- Mix sizes for a natural look, and lock gaps with pea gravel.
Flagstone slices
Cut or buy narrow strips and set them edge-on for a thin profile. This gives a refined line with a rustic face.
- Seat each slice into sand over compacted base.
- Tamp and check level every 3–4 feet so the line doesn’t wander.
Stone smarts:
- Source local stone for color harmony and better pricing.
- Avoid mortar if you want flexibility and cottage charm.
- Hide small stabilizing stones behind larger faces. Let the pretty ones show.
FAQ: Quick Answers
How deep should I dig the trench?
Dig 6–8 inches for brick, 4–6 inches for logs and stones. You need enough depth for a compacted base plus room to seat the material. If frost hits your area hard, go a touch deeper and compact carefully.
Do I need landscape fabric under my edging?
Use fabric only where you have aggressive grass or soft soils. Fabric helps stop migration and keeps gravel bases cleaner. Skip it under dry-stack stone if you need drainage and soil contact for stability.
Can I mix materials in one border?
Absolutely. Pair brick along the path side with a small river rock band on the bed side for drainage and texture. Or flank a log edge with scattered fieldstone to anchor curves. Keep colors related so it looks intentional.
What about frost heave?
Compaction beats frost. Build a solid base with crusher fines, crown the edge slightly, and let water move away. Taller borders benefit from deeper burial and backfill support.
How do I edge around tree roots without drama?
Curve the border wider and raise it slightly with extra base. Use shorter materials to weave around small roots. Leave major roots alone and reroute—trees cherish those, and you don’t want a grumpy oak.
Will logs rot fast?
They’ll last for years if you choose durable species and keep them on drainage. Seal end grain and avoid constant sprinkler spray. Expect a mellow patina; embrace it—it’s cottage charm, not furniture polish.
Conclusion
Rustic cottage edging doesn’t chase perfection. It celebrates texture, curves, and materials that age gracefully. Pick brick for tidy charm, logs for warmth, or stone for timeless character—and mix if your garden asks for it. Build a proper base, keep lines fluid, and you’ll land that “old garden, new love” look without breaking the bank.