Modern Yard Walkway Ideas Using Large Concrete Pavers
Big, clean, modern: that’s the vibe large concrete pavers bring to any yard walkway. They create instant order, invite you to stroll, and cut down on yard chaos (aka random footpaths through the lawn). If your garden feels all over the place, oversized slabs line things up fast. Let’s talk smart ideas, slick layouts, and how to build a walkway that actually stays flat and good-looking.
Why Big Concrete Pavers Make Yards Look Instantly Fresh
Large-format pavers deliver that “architect designed this” look without requiring an actual architect. They stretch the eye, reduce visual noise, and make your yard feel intentional. You also gain a smooth, stable surface that works for everything from morning coffee walks to rolling out the trash bin without drama.
Here’s why these slabs win:
- Clean lines and fewer joints make the space feel bigger and calmer.
- Consistent color and texture simplify your plant palette and architecture.
- Lower maintenance than tiny pavers that invite weeds in every seam.
- Cost-effective compared to natural stone in similar sizes.
Size and Thickness Guide
Go big, but not ridiculous. For walkways, you’ll see:
- Sizes: 24×24, 24×36, 24×48, 30×30, 36×36 inches. Larger pieces read more modern.
- Thickness: 2 to 2.5 inches for pedestrian paths. Heavier or freeze-prone areas do best with 2.5 inches.
- Weight check: Two people can move most slabs with carry straps. Save your back and your friendships.
Finish and Color Choices
You want texture that grips but still looks sharp. Consider:
- Finishes: light broom, honed, or sandblasted for traction; exposed aggregate for extra character.
- Colors: charcoal, mid-gray, or pale cement. Charcoal hides stains; light gray stays cooler in sun.
- Sealer: penetrating sealers protect without shine. Film-forming sealers can look plastic-y. Choose wisely.
Layout Ideas That Nail the Modern Look
Think in “big moves” and negative space. Large pavers love straight runs, long lines, and repetitive rhythm. You can soften the vibe with planting, but keep the geometry tight.
Try these ideas:
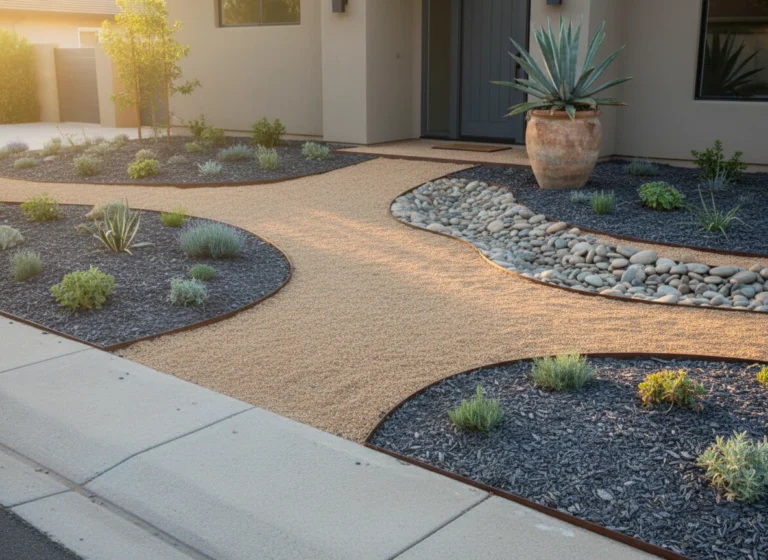
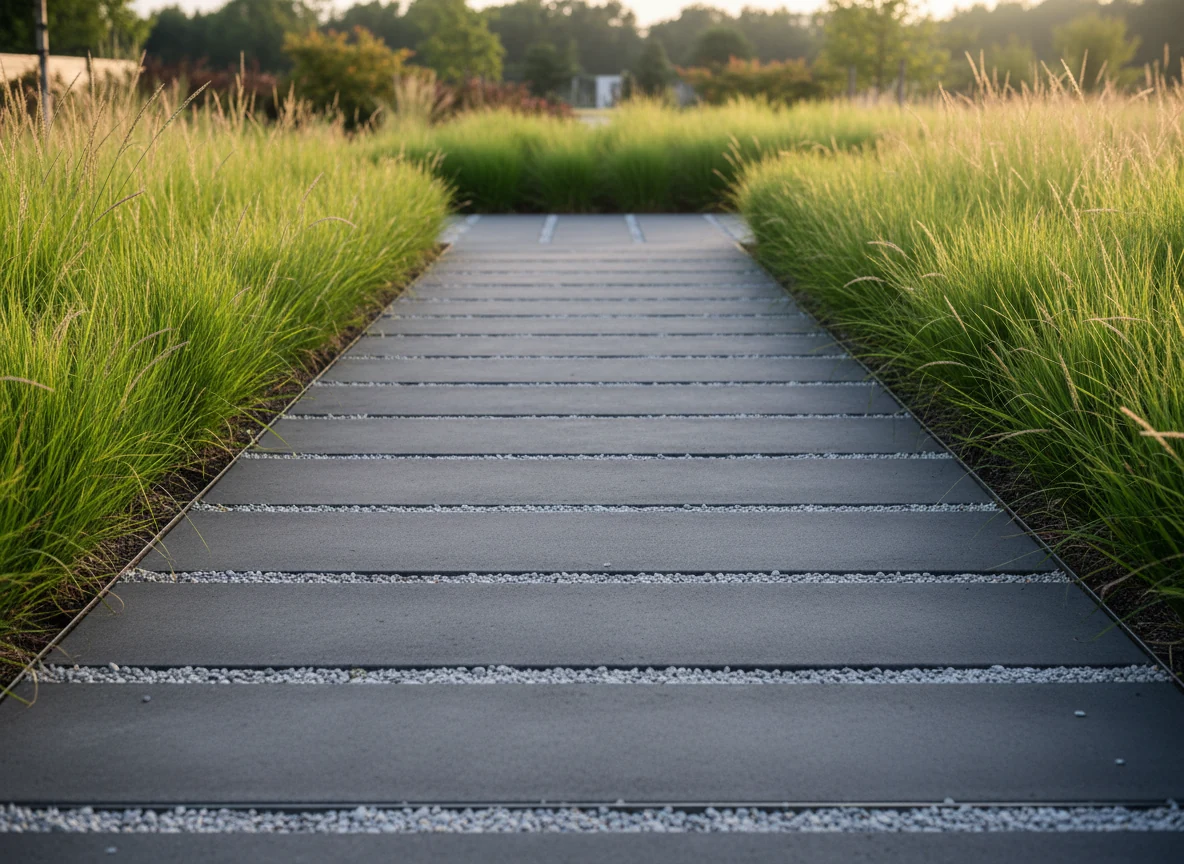
- Floating grid: evenly spaced squares set in gravel or turf. Clean, graphic, and forgiving on drainage.
- Offset run: rectangular slabs set in a stagger. You get motion without chaos.
- Diagonal path: turn squares 45 degrees for a dynamic axis. Your yard suddenly feels designer-y.
- Courtyard carpet: a dense grid with 1/2-inch joints near a patio. Great for dining areas and entries.
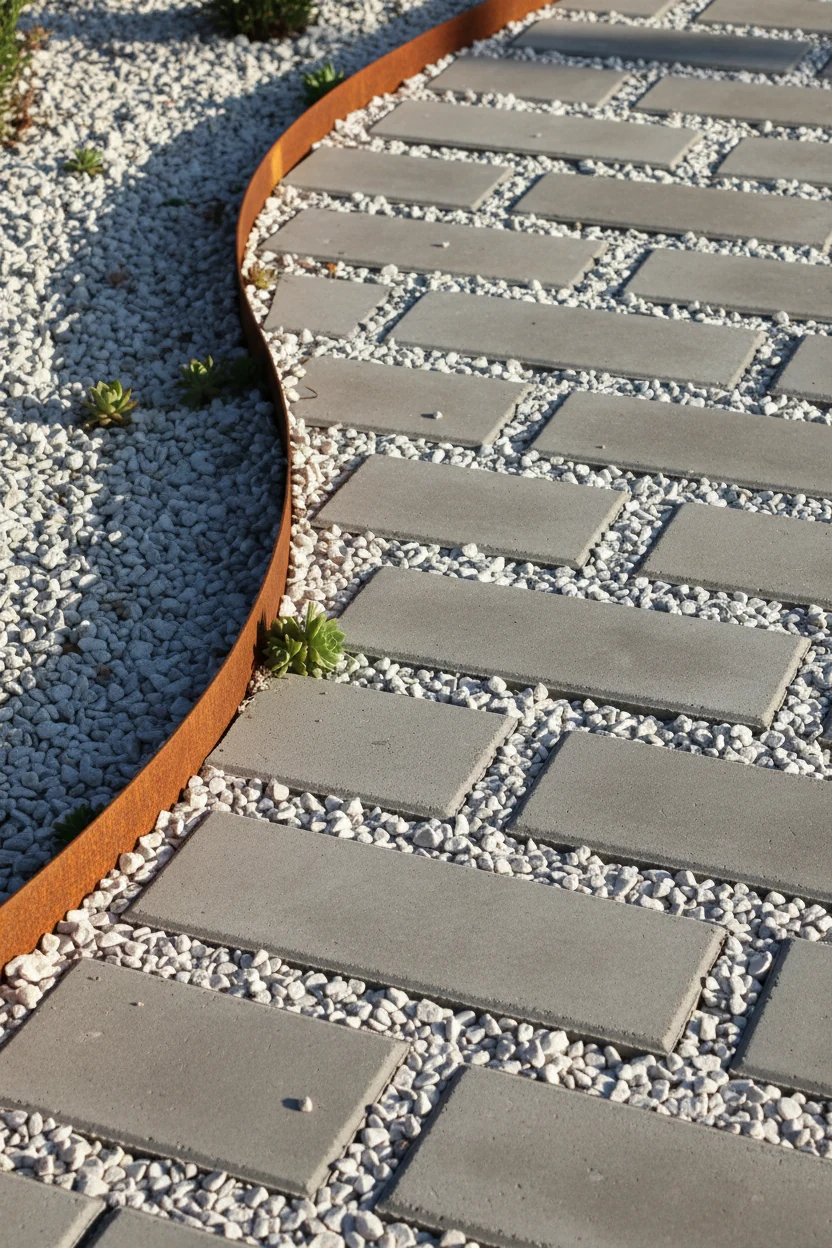
- Relaxed curve: gentle arcs with rectangular pavers placed tangent to the curve. Modern, but approachable.
Joint Options: Grass, Gravel, and DG
Joints set the vibe. They also handle drainage and maintenance.
- Tight joints (3/16–1/2 inch): crisp look, polymeric sand, minimal weeds.
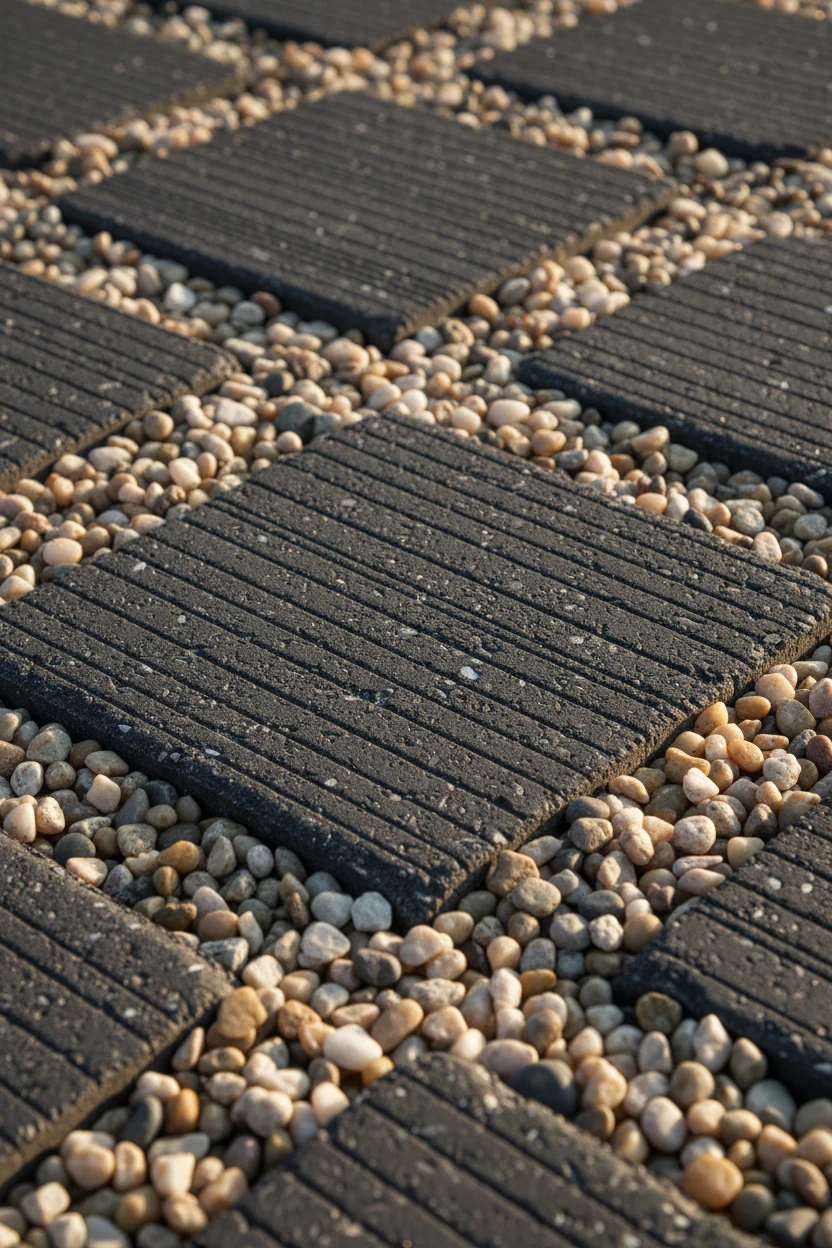
- Gravel joints (1–3 inches): use 3/8-inch pea gravel or granite fines for contrast and drainage.
- Decomposed granite (DG): compacted fines give a soft look; add a stabilizer for fewer ruts.
- Living joints (2–6 inches): turf or low groundcovers for that modern grid everyone pins.
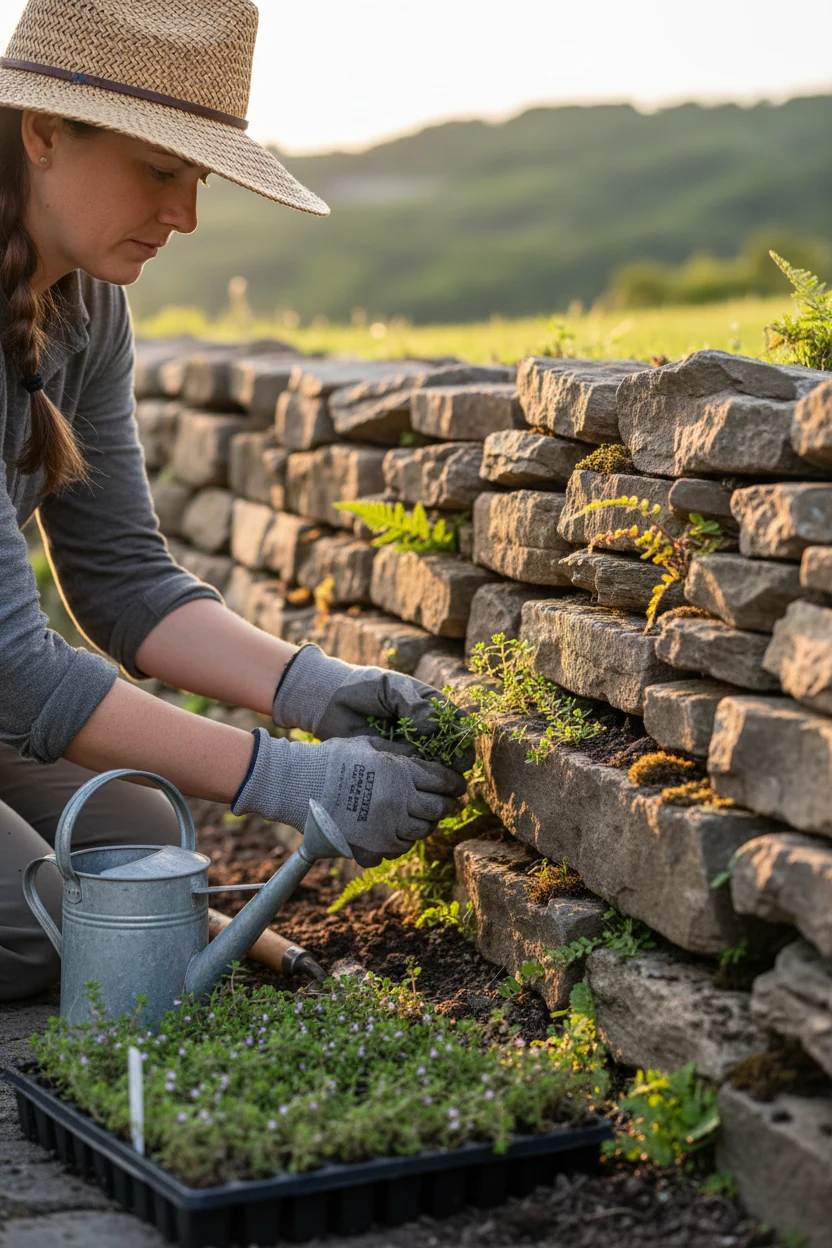
Plant Picks for Living Joints
You want tidy plants that tolerate foot traffic and shallow roots:
- Elfin thyme / woolly thyme for sun, fragrant, low, and cute.
- Dwarf mondo grass for shade and a tailored vibe.
- Blue star creeper for a soft carpet look.
- Sedum ‘Angelina’ for sunny, dry spots and a chartreuse pop.
Build It Right: Base, Drainage, and Edges
Design sells the look; the base keeps it from becoming a wobbly regret. You need drainage, proper layers, and real compaction. FYI, target a 1–2% slope away from structures so water leaves politely.
Basic process:
- Plan and mark: paint your path and measure twice. Order 10% extra pavers for cuts and “oops.”
- Excavate: remove soil to allow for 4–6 inches of compacted base + 1 inch bedding + paver thickness.
- Fabric: lay geotextile over the subgrade to separate soil and base. No mushy base allowed.
- Base layer: add 3/4-inch minus crushed rock in lifts (2 inches at a time), compact each lift until firm.
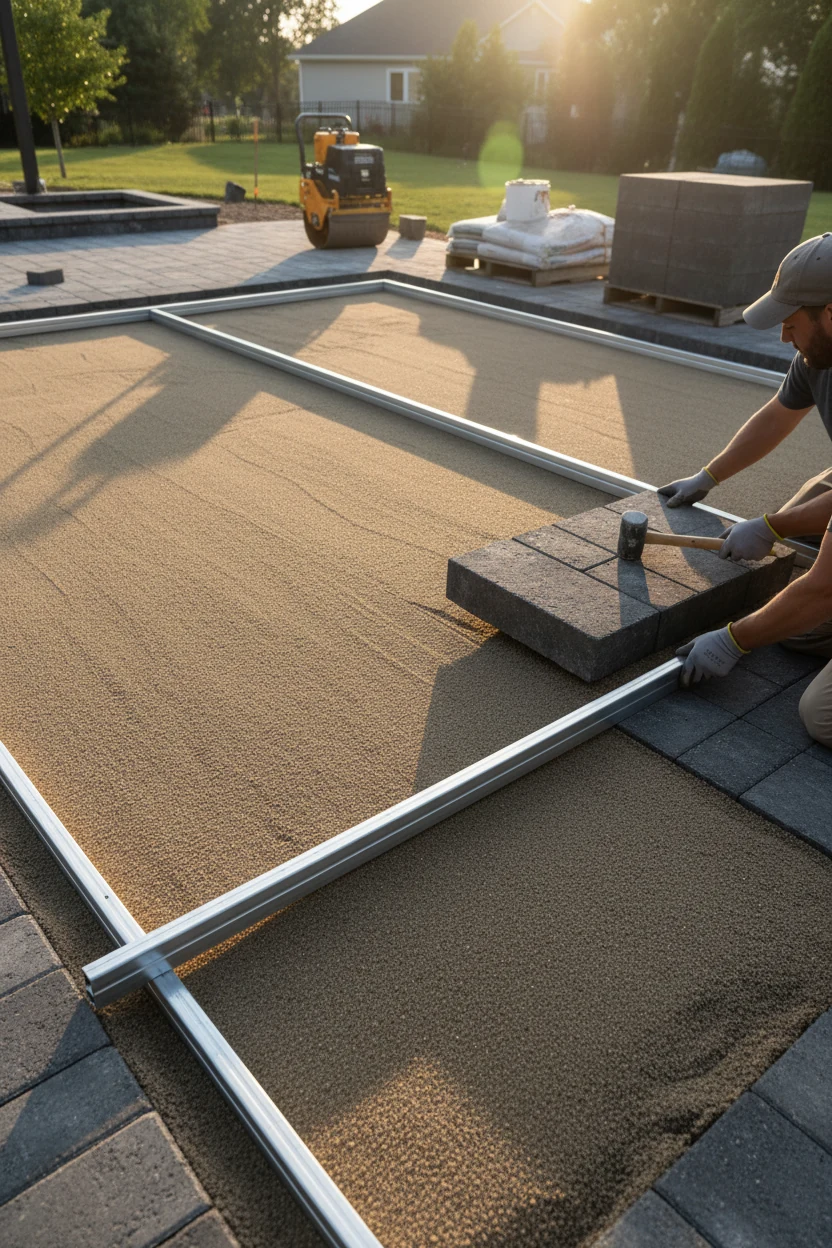
- Bedding layer: screed 1 inch of concrete sand or fine granite. Keep it smooth and level with your slope.
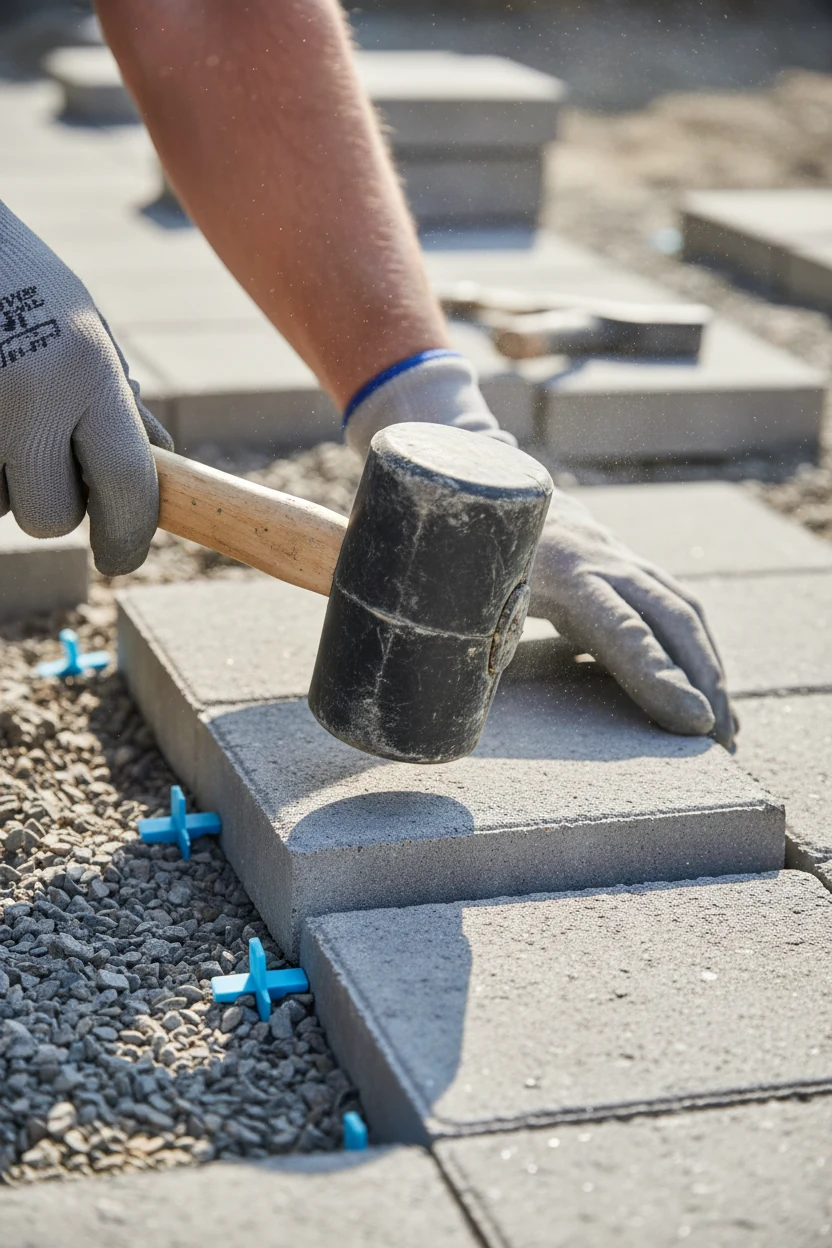
- Set pavers: place slabs with spacers, check level, and tap with a rubber mallet. Don’t surf the paver while you set it.
- Edge restraints: install steel edging, concealed concrete haunch, or tight borders to lock it in.
- Fill joints: add polymeric sand, gravel, DG, or plants depending on your plan.
Base Layers, Explained
Think of the base like a mattress layered for strength:
- Subgrade: native soil, shaped to slope and compacted.
- Geotextile: separates soil from base; improves longevity.
- Crushed stone base: 4–6 inches compacted; more if you have clay soil or freeze–thaw cycles.
- Bedding sand: 1 inch for final leveling. Don’t make it thicker or the pavers will settle unevenly.
Permeable Approach
Want fewer puddles and happier plants? Build a permeable version:
- Swap bedding sand for washed chip stone.
- Use open-graded base (e.g., 3/4-inch clean) with a geotextile wrap.
- Fill joints with #8 or #9 stone or DG without polymer binders.
- Direct overflow toward a rain garden or planting bed.
Smart Details: Lighting, Borders, and Transitions
Details make your walkway look custom, not cookie-cutter. Plan them early so you don’t trench through your shiny new path later. Think safety, scale, and neat edges.
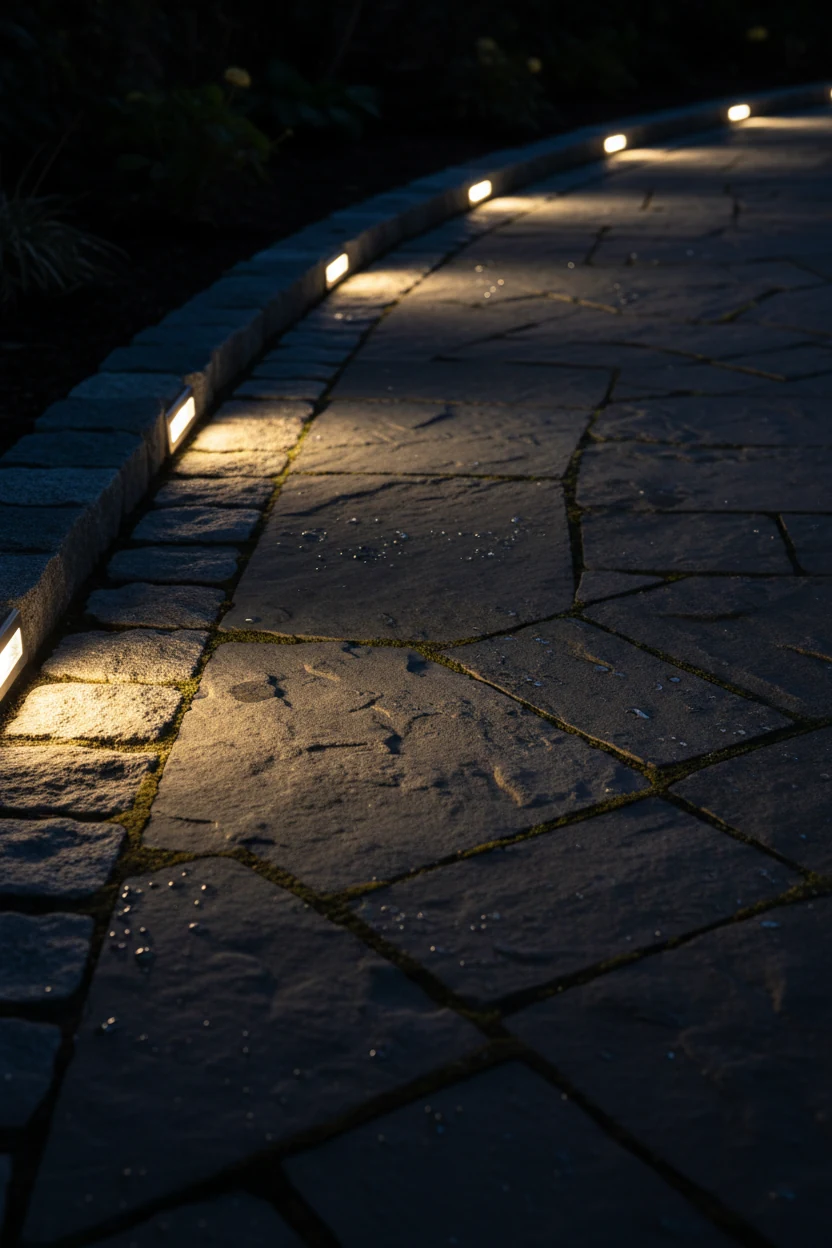
Lighting Ideas That Don’t Trip You
Skip the runway lights. You want soft, low, and glare-free:
- Paver-edge lights: low-profile fixtures that wash light across the path.
- Bollards: slim posts at turns or intersections for visual cues.
- Step lights: mandatory for level changes; no one enjoys surprise gravity tests.
- Smart transformers: schedule lights and dim them for mood.
Mix Materials Like a Pro
Pair concrete with warm textures so the design doesn’t feel cold:
- Steel edging (raw or corten) for razor-sharp lines.
- River rock or black lava rock bands to catch runoff and add contrast.
- Wood or composite steps next to the path for warmth.
- Gravel “moats” around trees to protect roots and keep the grid intact.
Also, size the path to the use. 36 inches clears one person comfortably, while 48 inches lets two walk side by side. Widen near patios and doors for a mini “landing.”
Budget, DIY vs Pro, and Avoidable Mistakes
Large pavers can cost more per piece, but you buy fewer pieces and spend less time on fiddly cuts. A straight path with smart spacing can save real money. Aggressive curves and tiny infill cuts do the opposite.
Quick Cost Math
Sample pedestrian path, 3×20 feet (60 sq ft):
- Pavers: $6–$18/sq ft depending on brand/finish = $360–$1,080.
- Base + bedding: $2–$4/sq ft = $120–$240.
- Edging + geotextile + odds: $150–$350.
- Lighting (optional): $200–$600.
- DIY tool rentals (plate compactor, saw): $100–$200/day.
Pro install usually lands at $18–$40/sq ft depending on access, soil, and finish complexity.
DIY Checklist
You can DIY this if you prep well and respect the base:
- Tools: plate compactor, hand tamper, level, screed rails, rubber mallet, diamond blade saw, wheelbarrow, string lines, stakes.
- Materials: pavers, crushed stone, bedding sand or chips, geotextile, edge restraint, joint fill, spacers.
- Must-dos: compact in lifts, maintain slope, keep bedding at 1 inch, set edges tight, and check level constantly.
Common mistakes to dodge:
- Skipping compaction and hoping for the best. The best won’t happen.
- No slope toward drains or landscape beds. Water will tell on you.
- Fat bedding sand that lets slabs settle unevenly.
- Tiny sliver cuts at borders. Adjust spacing or paver size to avoid them.
- Edge neglect. Without restraints, pavers walk away over time.
Maintenance That Keeps It Looking Crisp
Concrete wants love, not smothering. You can keep things tidy with a simple routine. Set reminders and you’ll avoid big headaches later.
What to do:
- Blow or sweep weekly to keep grit off and joints clear.
- Spot clean stains fast: use a paver-safe degreaser for oil, scrub, rinse. Don’t let it bake in.
- Replenish joints yearly if you used gravel or DG.
- Seal with a penetrating sealer every 2–4 years if you want extra stain resistance.
Winter tips:
- Use calcium magnesium acetate or pet-safe de-icers; skip rock salt on concrete.
- Shovel with a plastic blade to avoid scratches.
- In freeze zones, check for heave in spring and re-level one slab at a time.
IMO, a light penetrating sealer strikes the best balance between protection and a natural look.
Design Inspo: Styles Worth Stealing
You don’t need to reinvent the wheel. Borrow smart ideas, tweak them, and pretend you planned it all along.
- Scandi Calm: pale gray 24×36 slabs with 2-inch gravel joints, steel edging, and grasses (festuca, pennisetum). Quiet, chic, zero fuss.
- Mid-Century Grid: 24x24s with 3–4-inch turf joints, a breezeblock screen nearby, and citrus in pots. Palm Springs, but with fewer martinis.
- Japanese-Influenced: larger rectangles floating in compacted DG, mossy plantings tucked in pockets, and a low black-stained fence. Minimal with soul.
- Industrial Edge: charcoal slabs, corten steel borders, black lava rock bands, and uplights on architectural plants.
- Coastal Bright: light concrete, shell or white gravel joints, windswept grasses, and a soft curve toward the front door.
Small Yard Cheats
You can fake more space with a few tricks:
- Fewer, larger slabs read as calm and upscale.
- Run the grid parallel to the longest yard dimension to visually stretch it.
- Keep 2–3 materials max so the eye doesn’t ping-pong everywhere.
- Use light-to-mid grays to reflect light and brighten shady spots.
FAQ
How wide should a modern walkway be?
Aim for 36 inches minimum for a single-person path. Go to 42–48 inches if you expect two people to walk side by side. Widen near doors and patios to create a “pause” zone that feels intentional.
Can I lay large pavers over grass?
You can, but you won’t love the result for long. Grass decays, pavers sink, and the surface turns wobbly. Strip the sod, build a compacted base, and your walkway will actually stay flat and classy.
Do I need to seal concrete pavers?
You don’t need to, but sealing helps a lot with stains and freeze–thaw durability. Use a penetrating, breathable sealer if you want a natural finish. Reapply every few years, and test in a corner first to make sure you like the look.
What spacing looks modern between big pavers?
For a crisp patio or entry, use 3/16–1/2 inch with polymeric sand. For a graphic grid in the landscape, go 2–6 inches and fill with gravel, DG, or low groundcovers. Keep spacing consistent so the design reads as deliberate.
Will large pavers crack in winter?
They can if you skip drainage and compaction. Build on a well-compacted base, maintain slope, and avoid puddles. In freeze zones, go slightly thicker (2.5 inches), use clean stone in the base, and keep de-icers concrete-safe.
Should I choose precast slabs or pour in place?
Precast slabs deliver consistency and speed. Pour-in-place gives you custom sizes and seamless borders but demands forms, rebar, and curing time. For most DIYers, precast wins. For complex curves or monolithic steps, pour in place shines.
Conclusion
Large concrete pavers turn a meh yard into a modern, walkable space with a few bold moves. Focus on layout, nail the base, and choose joints that match your maintenance mood. Keep the palette tight, add smart lighting, and your walkway will look designer on day one and year five. Go big, keep it simple, and let the lines do the heavy lifting.