Small Backyard Paver Patio Ideas: 15 Smart Layouts for Tight Spaces
You don’t need a sprawling yard to build a patio that makes your neighbors jealous. You just need smart layouts, a few clever tricks, and the right pavers. Tight spaces force strong choices, which honestly makes design easier. Let’s sketch small, work clean, and get you a patio that punches way above its square footage.
The small-patio mindset
Small backyards reward clarity. Decide what you want first: morning coffee nook, two-chair dining spot, or chill zone for you and a friend. Choose one primary use and design around that like you mean it.
Avoid furniture that bullies the space. Slim chairs, armless loveseats, folding tables, and side tables beat bulky sofas every time. Want more seats? Use lightweight chairs you can stash neatly when you need room.
Treat lines like magic. Curves soften tight footprints; diagonals trick your eye and stretch the space visually. I also lean into borders, because they clean up edges and make small patios look finished without feeling cramped.
Measure, plan, and prep like a pro
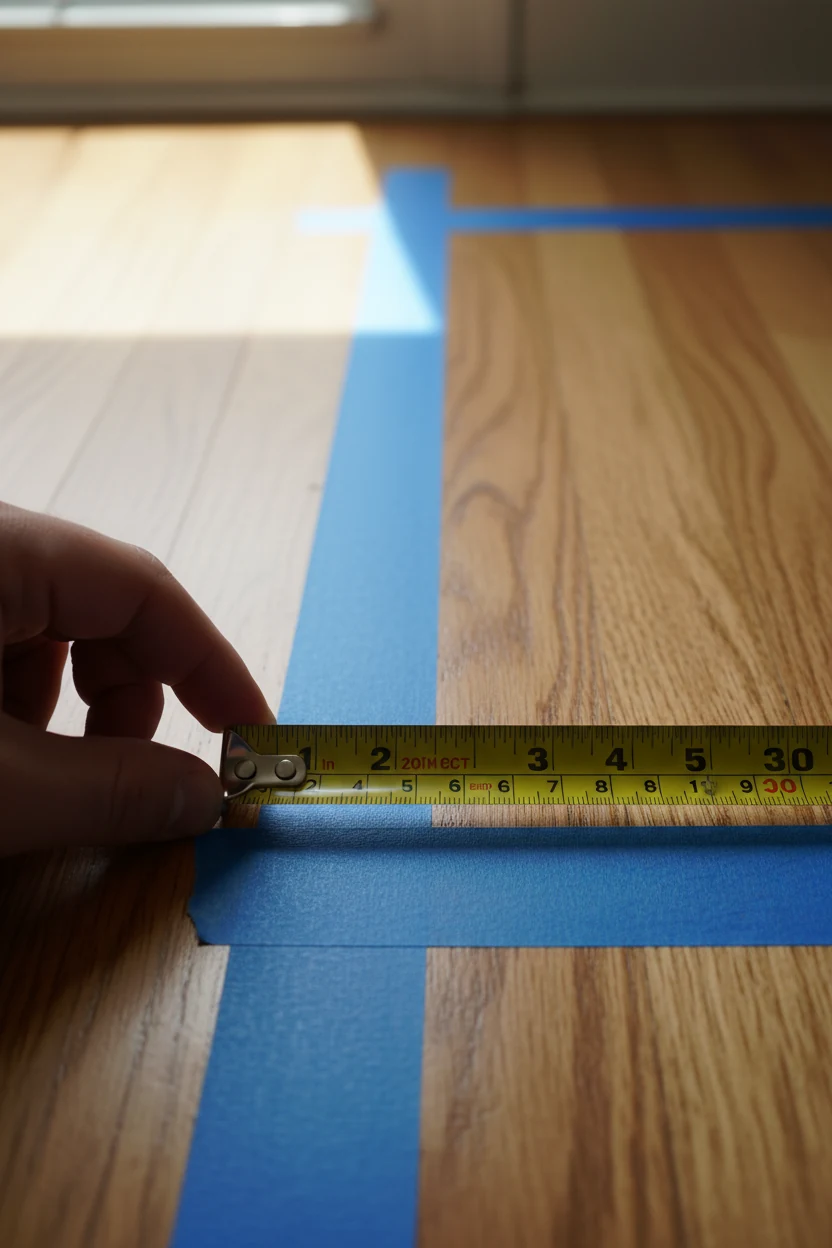
You can’t fudge measurements in a small yard. Grab a tape, painter’s tape, and a couple chairs, then mock up your layout. Move pieces around until you nail legroom and walking lanes.
Small-patio sizing cheat sheet

- Bistro circle (2 chairs): 6–8 ft diameter
- Conversation square (4 chairs): 8×8 ft minimum
- Loveseat + chair lounge: 8×10 ft
- Fire pit pad (portable): 7–9 ft diameter
- Walk lane width: 30–36 inches
- Table clearance: 24 inches around, 30 inches feels luxe
Base and drainage basics
You build comfort into the ground, not just the surface. Compact a solid base and your chairs won’t wobble and your pavers won’t shift.
- Excavation depth: 6–8 inches for most small patios
- Slope: 1/8–1/4 inch per foot away from the house
- Base layers: 4 inches crushed stone, 1 inch sand screed
- Edge restraint: Paver edging with spikes or a poured border
- Weed control: Landscape fabric under the base, not right under the pavers
Check your utilities so you don’t dig into something spicy. Pull a string line to set slope, then compact like you mean it. Your future self will thank you when you don’t re-level chairs every Saturday.
Pavers, patterns, and edges that shrink visually
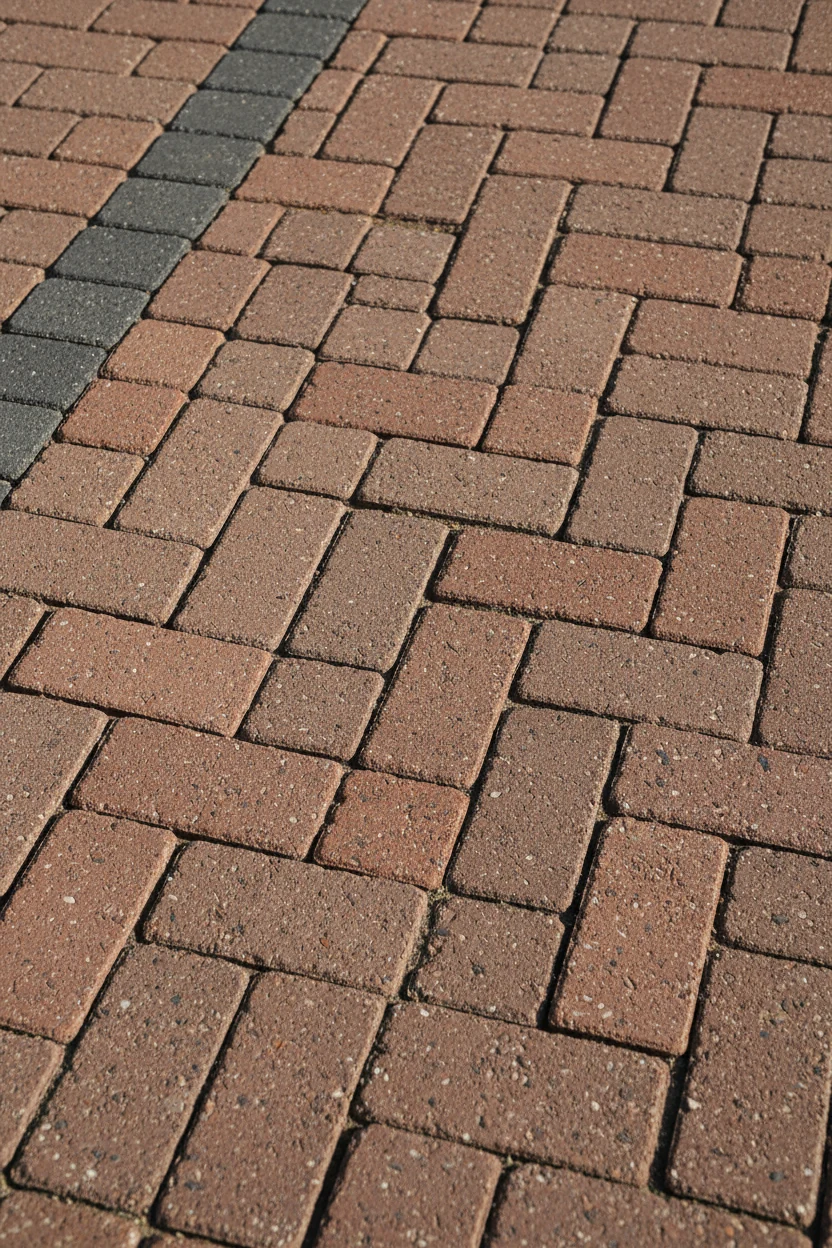
Small-format pavers make small patios look intentional. Think 4×8 bricks, 6×9 cobbles, or slim rectangles. Large slabs can work too, but keep grout lines tight and patterns simple.
Pattern picks for tight spaces
- Herringbone: Best for strength and visual energy; rotate 45° to stretch the space
- Running bond: Clean, modern, and easy to cut around edges
- Basketweave: Classic with small bricks; great for bistro pads
- Modular mix: Two or three sizes for a custom look with fewer cuts
Border rules that make it pop
- Soldier course: A single, contrasting row that frames the patio
- Picture frame: Same color border around the whole pad for clean edges
- Curves: Use circle kits or pie-cut pieces for clean arcs
- Color strategy: Shade the border darker to anchor the patio IMO
Pro tip: Place the pattern diagonally if the patio lines up with a fence. Diagonals pull the eye across, which makes tight yards feel less boxy.
15 smart layouts for tight spaces
Let’s get to the good stuff. You can tweak dimensions and patterns, but stick to the core idea and you’ll stay on track.
Bistro and dining micro-patios
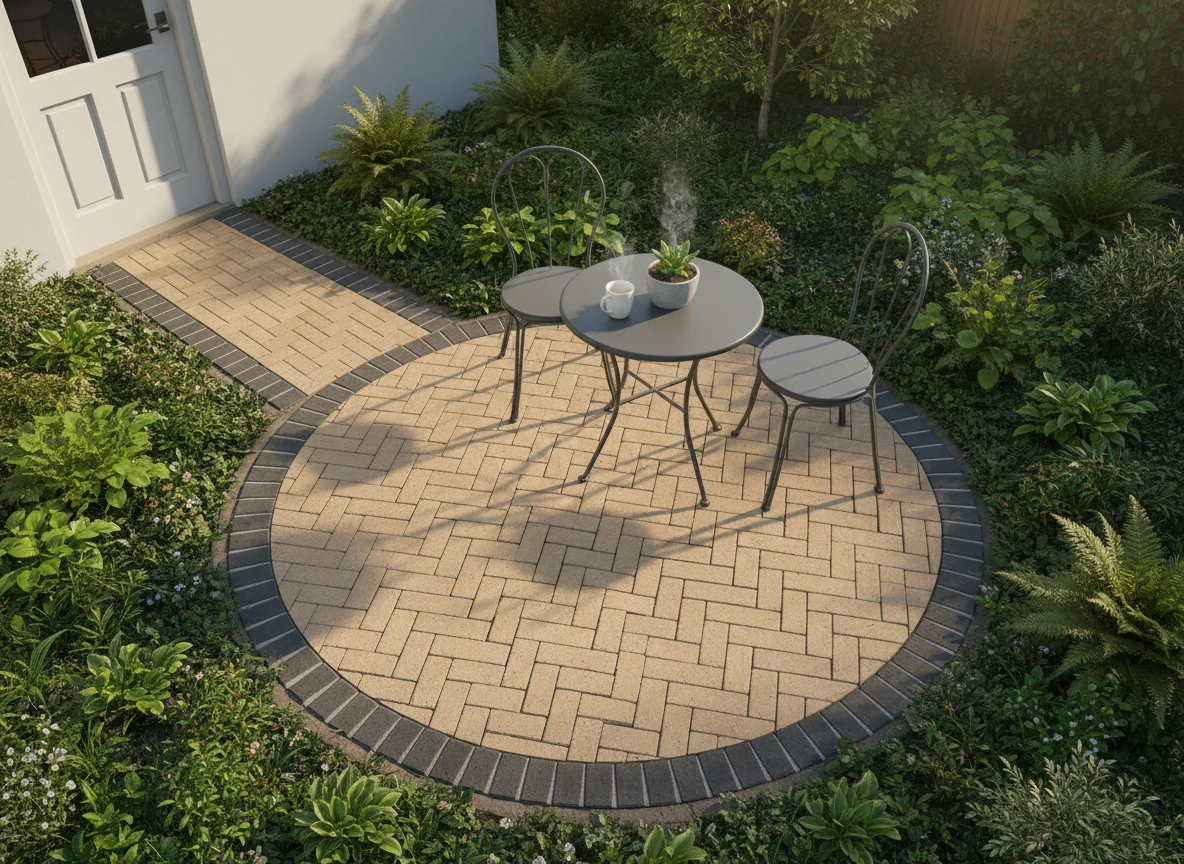
- Two-chair bistro button: Lay a 6–8 ft diameter circle right off the back door. Use a basketweave or running bond for quick work. Add a slim round table and two café chairs, then plant around the curve.
- Café circle with offset path: Build a 7 ft circle, then connect a 2.5 ft path at a slight angle. Run the circle in herringbone, the path in running bond for contrast. This layout solves awkward door swings and keeps the seating tidy.
- L-shaped diner against a fence: Create an 8×10 L that hugs two sides. Park a rectangular bistro table in the nook and leave a clear 30-inch lane behind chairs. Use a border to outline the L and it looks custom, not cramped.
Lounging and conversation pads
- Corner lounge with chaise footprint: Carve an 8×8 triangle with a curved face. Angle your lounge chair and side table, then tuck a planter behind. The rounded front makes the corner feel bigger without stealing lawn.
- Conversation square for four: Build a clean 8×8 square in herringbone. Drop four slim chairs and one low table. Keep furniture off the border so the square reads crisp.
- Sunken nook with one step down: Lower the finished surface by 4–6 inches and add a single step. The grade change wraps you in coziness. Use darker pavers on the floor and a lighter border so the step pops.
- Crescent patio with a seating wall: Shape a 9–10 ft arc and stack a short seat wall along the curve. Two chairs fit comfortably, and the wall doubles as overflow seating. This layout nails small-space hosting IMO.
Path-plus-pad combos
- L-shaped path-to-pad: Run a 30-inch path from the door to an 8×10 rectangle. Keep the path in running bond and turn the rectangle to 45° herringbone. The angle shift instantly makes the pad feel bigger.
- Diagonal runner into a triangle pad: Point a 3 ft wide diagonal path toward a 9 ft triangular patio in the far corner. Use a border on the triangle and plant low groundcover along the long side. It looks intentional and steals dead space.
- Grid patio with gravel infill: Set pavers in a 2×2 or 3×3 grid with 2–3 inches of decorative gravel between. You move fast, you reduce cuts, and you let water drain like a champ. Place a café set in the center and call it a day.
- Stepping-stone patio field: Pop oversized stepping stones (18–24 inches) into a tight pattern with compacted gravel around them. Rotate stones slightly so seams look organic. This is the quickest way to claim a nook without heavy demo.
Space hacks and specialty shapes
- Curved-edge micro patio: Set a small 7×9 pad with one curved side that hugs a planting bed. The curve breaks up the rectangle and makes room for a chair to swing out. Add a bold border around the straight sides so the curve steals the show.
- Raised platform over tricky roots: Frame a low platform (think 6–8 inches) with composite edging, then lay pavers or porcelain deck tiles on top. You bridge gnarly roots and keep good airflow. Use a sleek, modern palette so it reads intentional.
- Modular kit rectangle: Grab a 10×10 paver kit with pre-cut pieces and follow the map. Kits shine in tight spaces because the layout keeps cuts minimal. Add a darker soldier course and you’ll fool everyone into thinking custom build.
- Nook between planter and fence: Slot a 6×9 rectangle between a raised bed and the fence. Place two chairs facing the planter and a narrow console along the fence. It becomes a secret coffee spot you’ll use constantly.
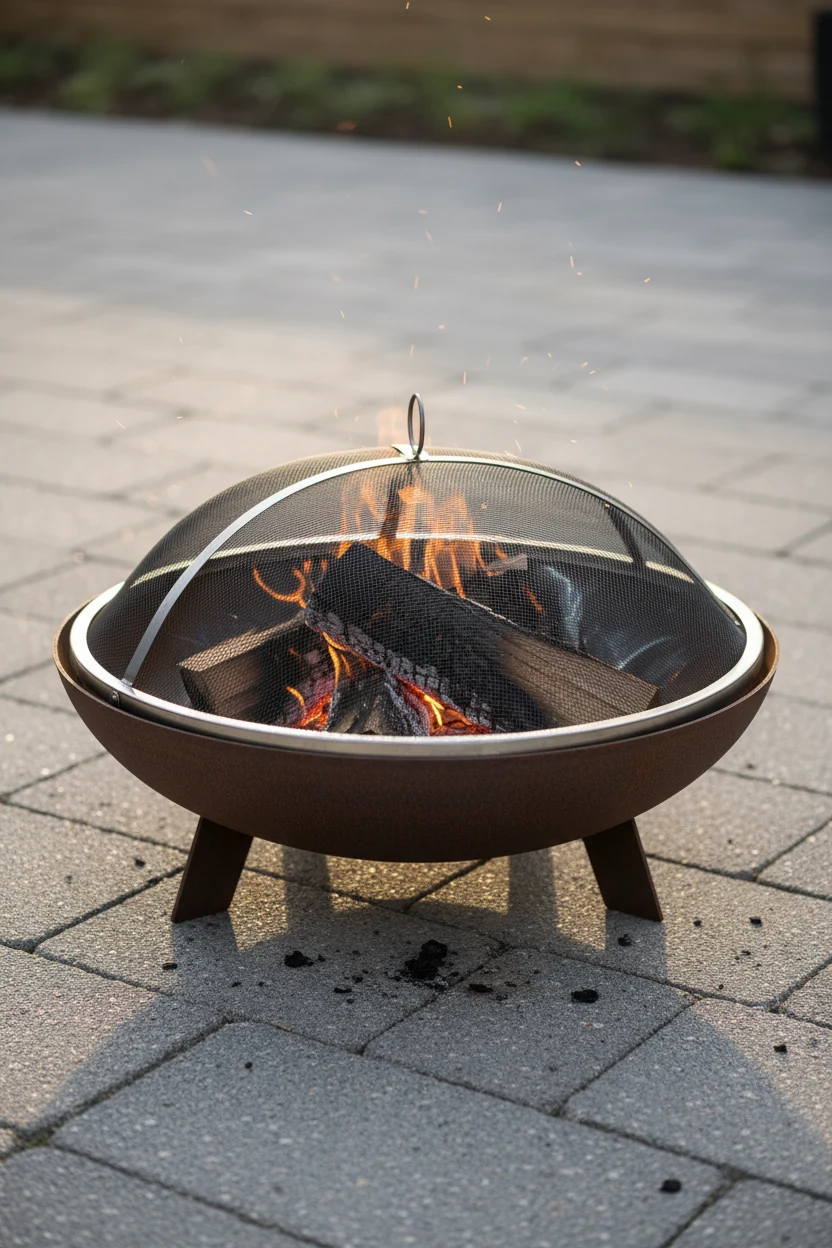
- Mini fire pit pad: Drop a 7–9 ft circle with a small portable fire bowl. Angle two chairs, keep a 24-inch clear ring around the pit, and stash a spark screen. Use heat-resistant pavers and skip combustible borders, FYI.
Furniture tip: Choose pieces with thin legs and open bases. Heavy boxy furniture eats visual space, and you don’t need that stress.
Budget, timeline, and DIY tips
Small patios move fast if you plan materials and cuts. You can build most of these in a single weekend with a friend, a plate compactor, and a decent playlist.
- Cost (DIY): $6–12 per sq ft for pavers, base, edging, and gravel
- Cost (pro install): $18–30 per sq ft depending on access and pattern
- Tools: Shovel, rake, hand tamper or plate compactor, level, screed, rubber mallet, masonry saw (or rent), edging spikes
- Material math: Base stone equals roughly 0.5 cubic yard per 100 sq ft per 2 inches of depth
Weekend-friendly workflow
- Day 1: Demo, rough grade, install and compact base layers, set slope
- Day 2: Screed sand, lay pavers, cut edges, install border and sweep in joint sand
- Day 3 (if needed): Seal pavers, stage furniture, plant around the edges
Common mistakes to avoid
- Skipping compaction: You’ll chase wobbly chairs forever if you skimp here
- Flat grade: Water needs a tiny slope; give it an exit
- Oversized furniture: Test fit with painter’s tape before you buy
- Too many patterns: One field + one border looks sharp; three patterns looks chaotic
- No edge restraint: Pavers migrate without it, and you will feel that pain
FAQ
What’s the smallest size that still feels usable?
For a true sit-and-sip nook, go 6–8 ft in diameter. For a conversation spot, 8×8 ft hits the sweet spot. You can squeeze tighter, but legroom matters more than you think.
Do I need a concrete base for a small patio?
Nope. A compacted crushed-stone base with a well-screeded sand layer works great for pavers. Keep the slope consistent and install edge restraint, and the patio will stay solid for years.
Which paver pattern hides small imperfections best?
Herringbone forgives tiny height differences and looks crisp. Running bond with a diagonal orientation also hides seams nicely. If you hate cuts, choose a modular kit and enjoy the easy fit.
How do I handle drainage near the house?
Slope the patio away from the house at 1/8–1/4 inch per foot. Maintain a gap below the siding and avoid burying weep holes. Route water to a lawn or a gravel strip, not toward the foundation.
Can I mix pavers with gravel to cut costs?
Absolutely. Use pavers for the main footprints and fill gaps with decorative gravel. You save money, speed up install, and get great drainage with a modern vibe.
Do I need to seal my patio?
Sealing helps with stain resistance and color pop, especially on concrete pavers. Wait until the patio settles and dries, then apply a breathable sealer. If you love a natural look, you can skip it IMO.
Conclusion
Small backyards don’t limit you; they sharpen the design. Pick one main use, frame it with the right pattern and border, then lean into curves or diagonals for visual stretch. Build a tight base, keep furniture slim, and flex these layouts until the space clicks. You’ll lounge out there way more than you expect—coffee in the morning, chill vibes at night, and zero square-footage envy.