15 Small Garden Patio Paving Ideas on a Budget (You Can DIY)
Small patio, tiny budget, big ideas. Perfect combo. I’ve got 15 cheap, stylish paving tricks you can pull off yourself, and you won’t need a contractor or a second mortgage. Grab a shovel, some grit, and a weekend—your small garden will look fancy by Monday.
Plan Smart, Spend Less: Groundwork That Saves Money

You set the tone with planning. You skip mistakes, buy fewer materials, and finish faster. That’s the trifecta.
Measure your space, then sketch a simple plan. Keep shapes compact and clean—squares, rectangles, or a small curve that doesn’t eat your wallet. You use grids and modules to reduce cutting and waste.
Pro tip: Aim for modular sizes that match common pavers—12×12, 16×16, 24×24. You avoid fiddly cuts and random offcuts.
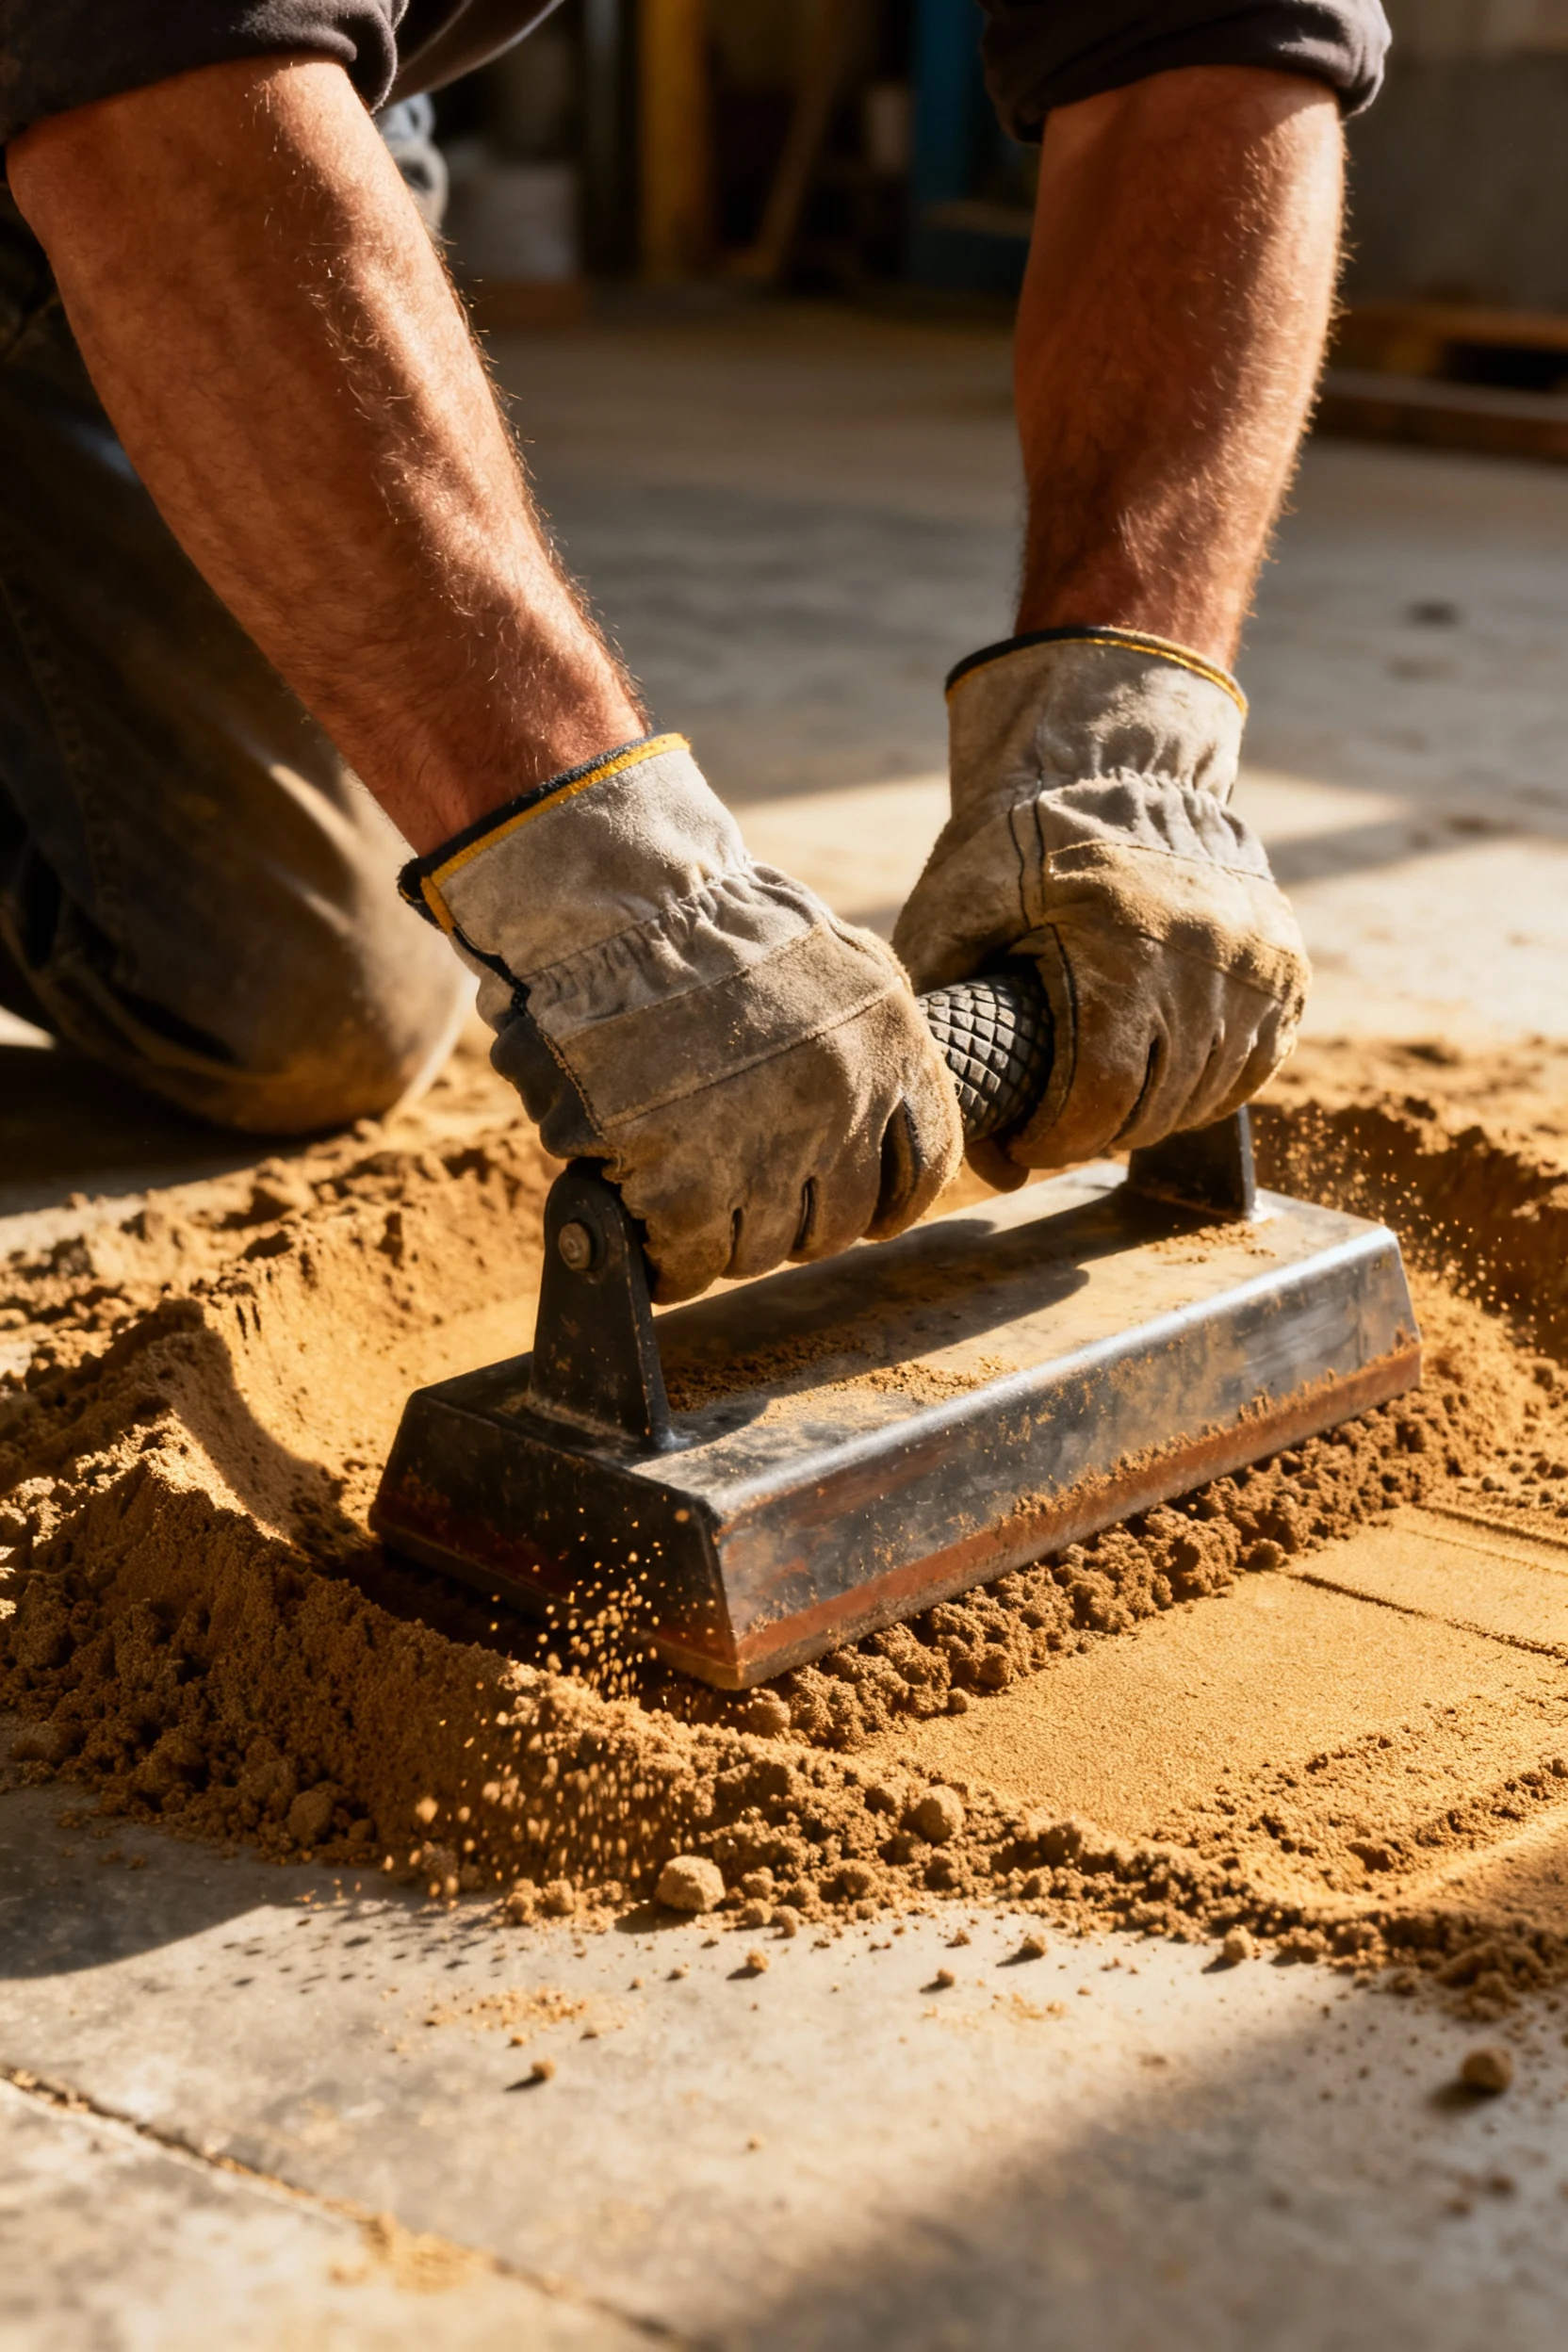
The Budget Base: Sub-base and Sand
Your base keeps everything solid. You build it right, and your patio stays flat and lovely for years.
– Dig down 4–6 inches for small patios (more if your soil stays soggy).
– Add 3–4 inches of compacted crushed stone (a.k.a. MOT Type 1 or road base).
– Screed 1 inch of sharp sand on top to bed the pavers.
Compact each layer thoroughly. You borrow or rent a plate compactor if your soil feels soft. You use a hand tamper for tiny spaces if you want to save cash.
Drainage Without Drama
You hate puddles. Me too. Slope the patio away from the house at about 1/4 inch per foot. You keep water off the surface with permeable joints (gravel or polymeric sand), and you leave a small gap under fences or along borders for runoff. FYI: You avoid pointing water straight at your neighbor’s yard unless you love awkward conversations.
15 Budget-Friendly Paving Ideas You Can DIY
Here’s the main event. You don’t need fancy stone or a truckload of cash. You need smart choices and a little sweat.
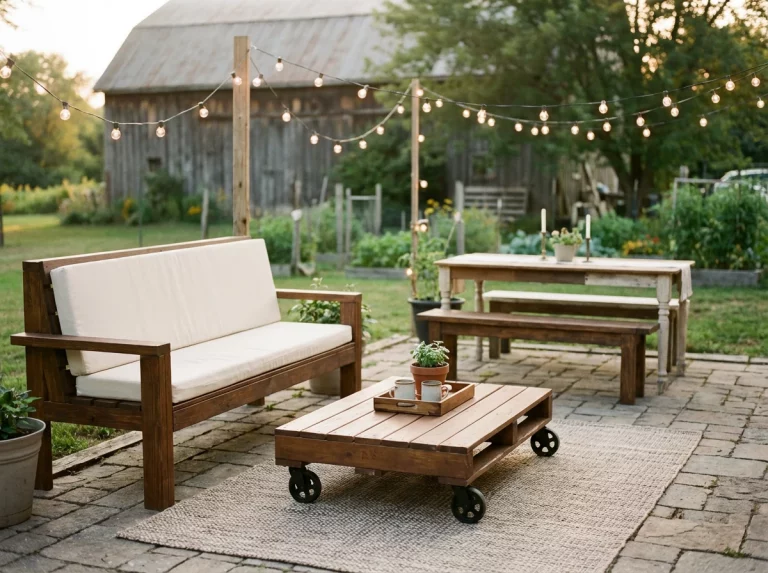
- Reclaimed brick in a herringbone pad — Salvaged brick costs way less than new, and herringbone screams “classic.” Keep the pad small—say 6×8 feet—to control cost and time. You edge it with a simple plastic restraint and sweep in sand.
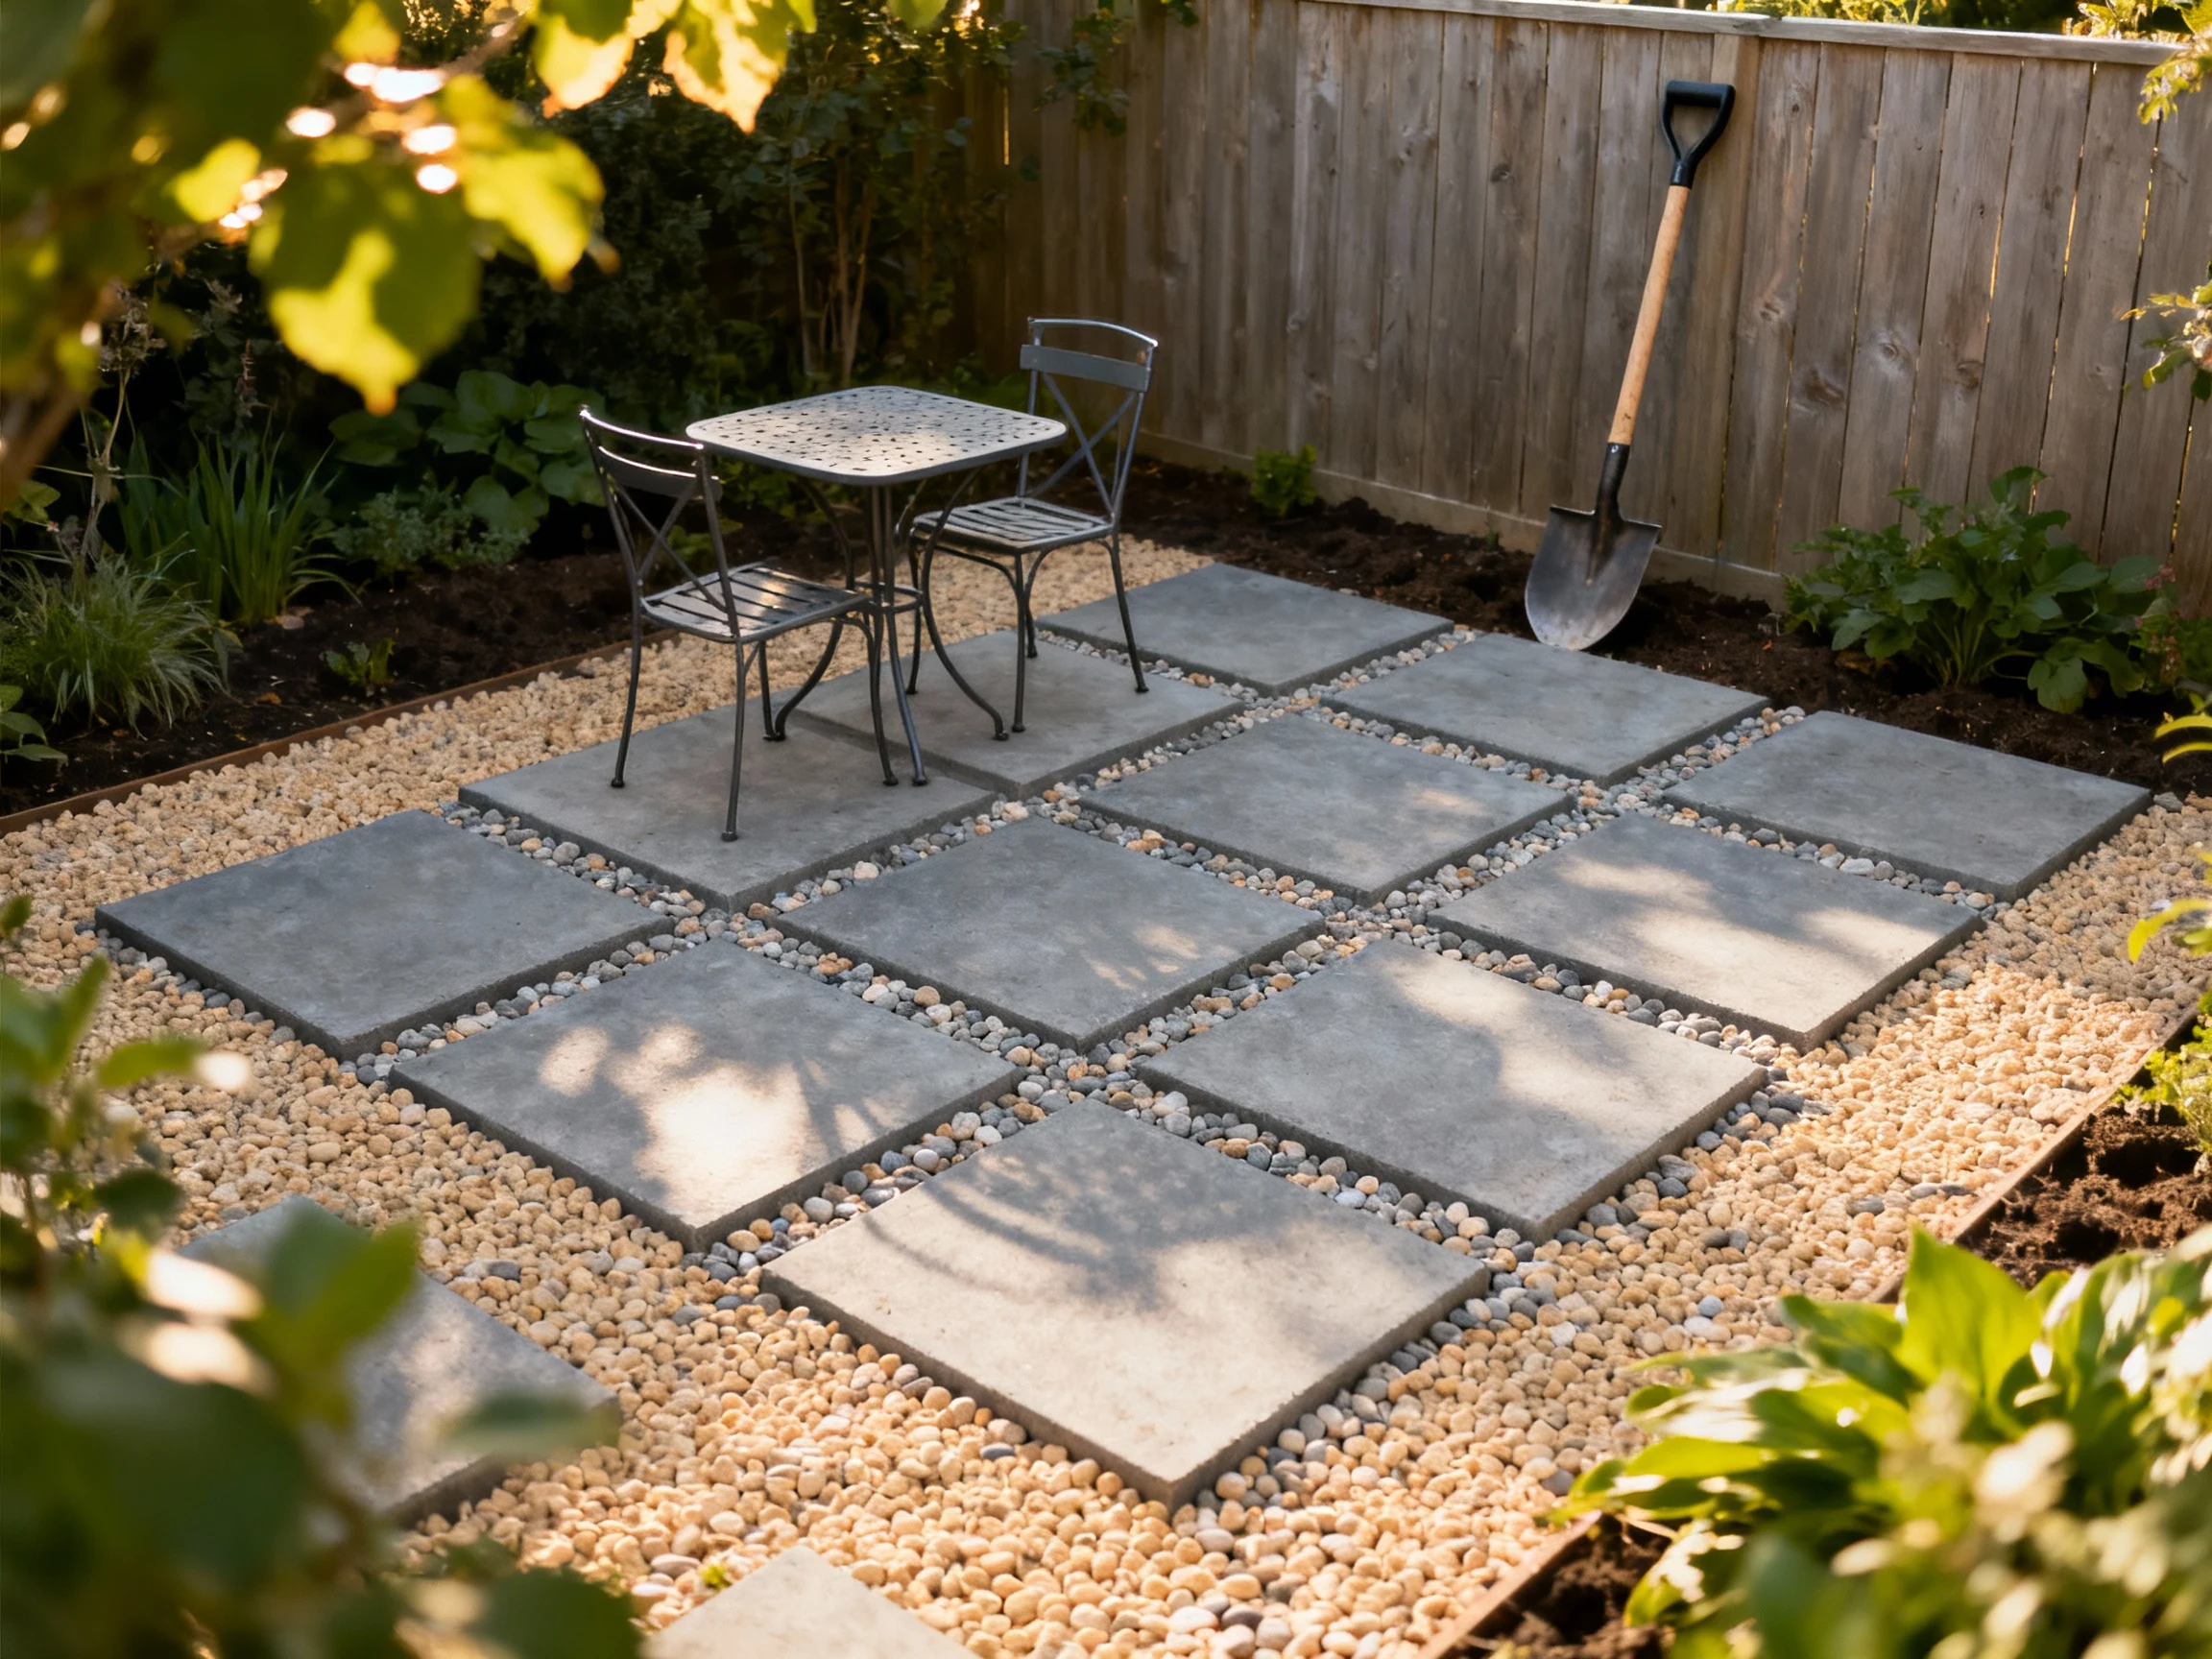
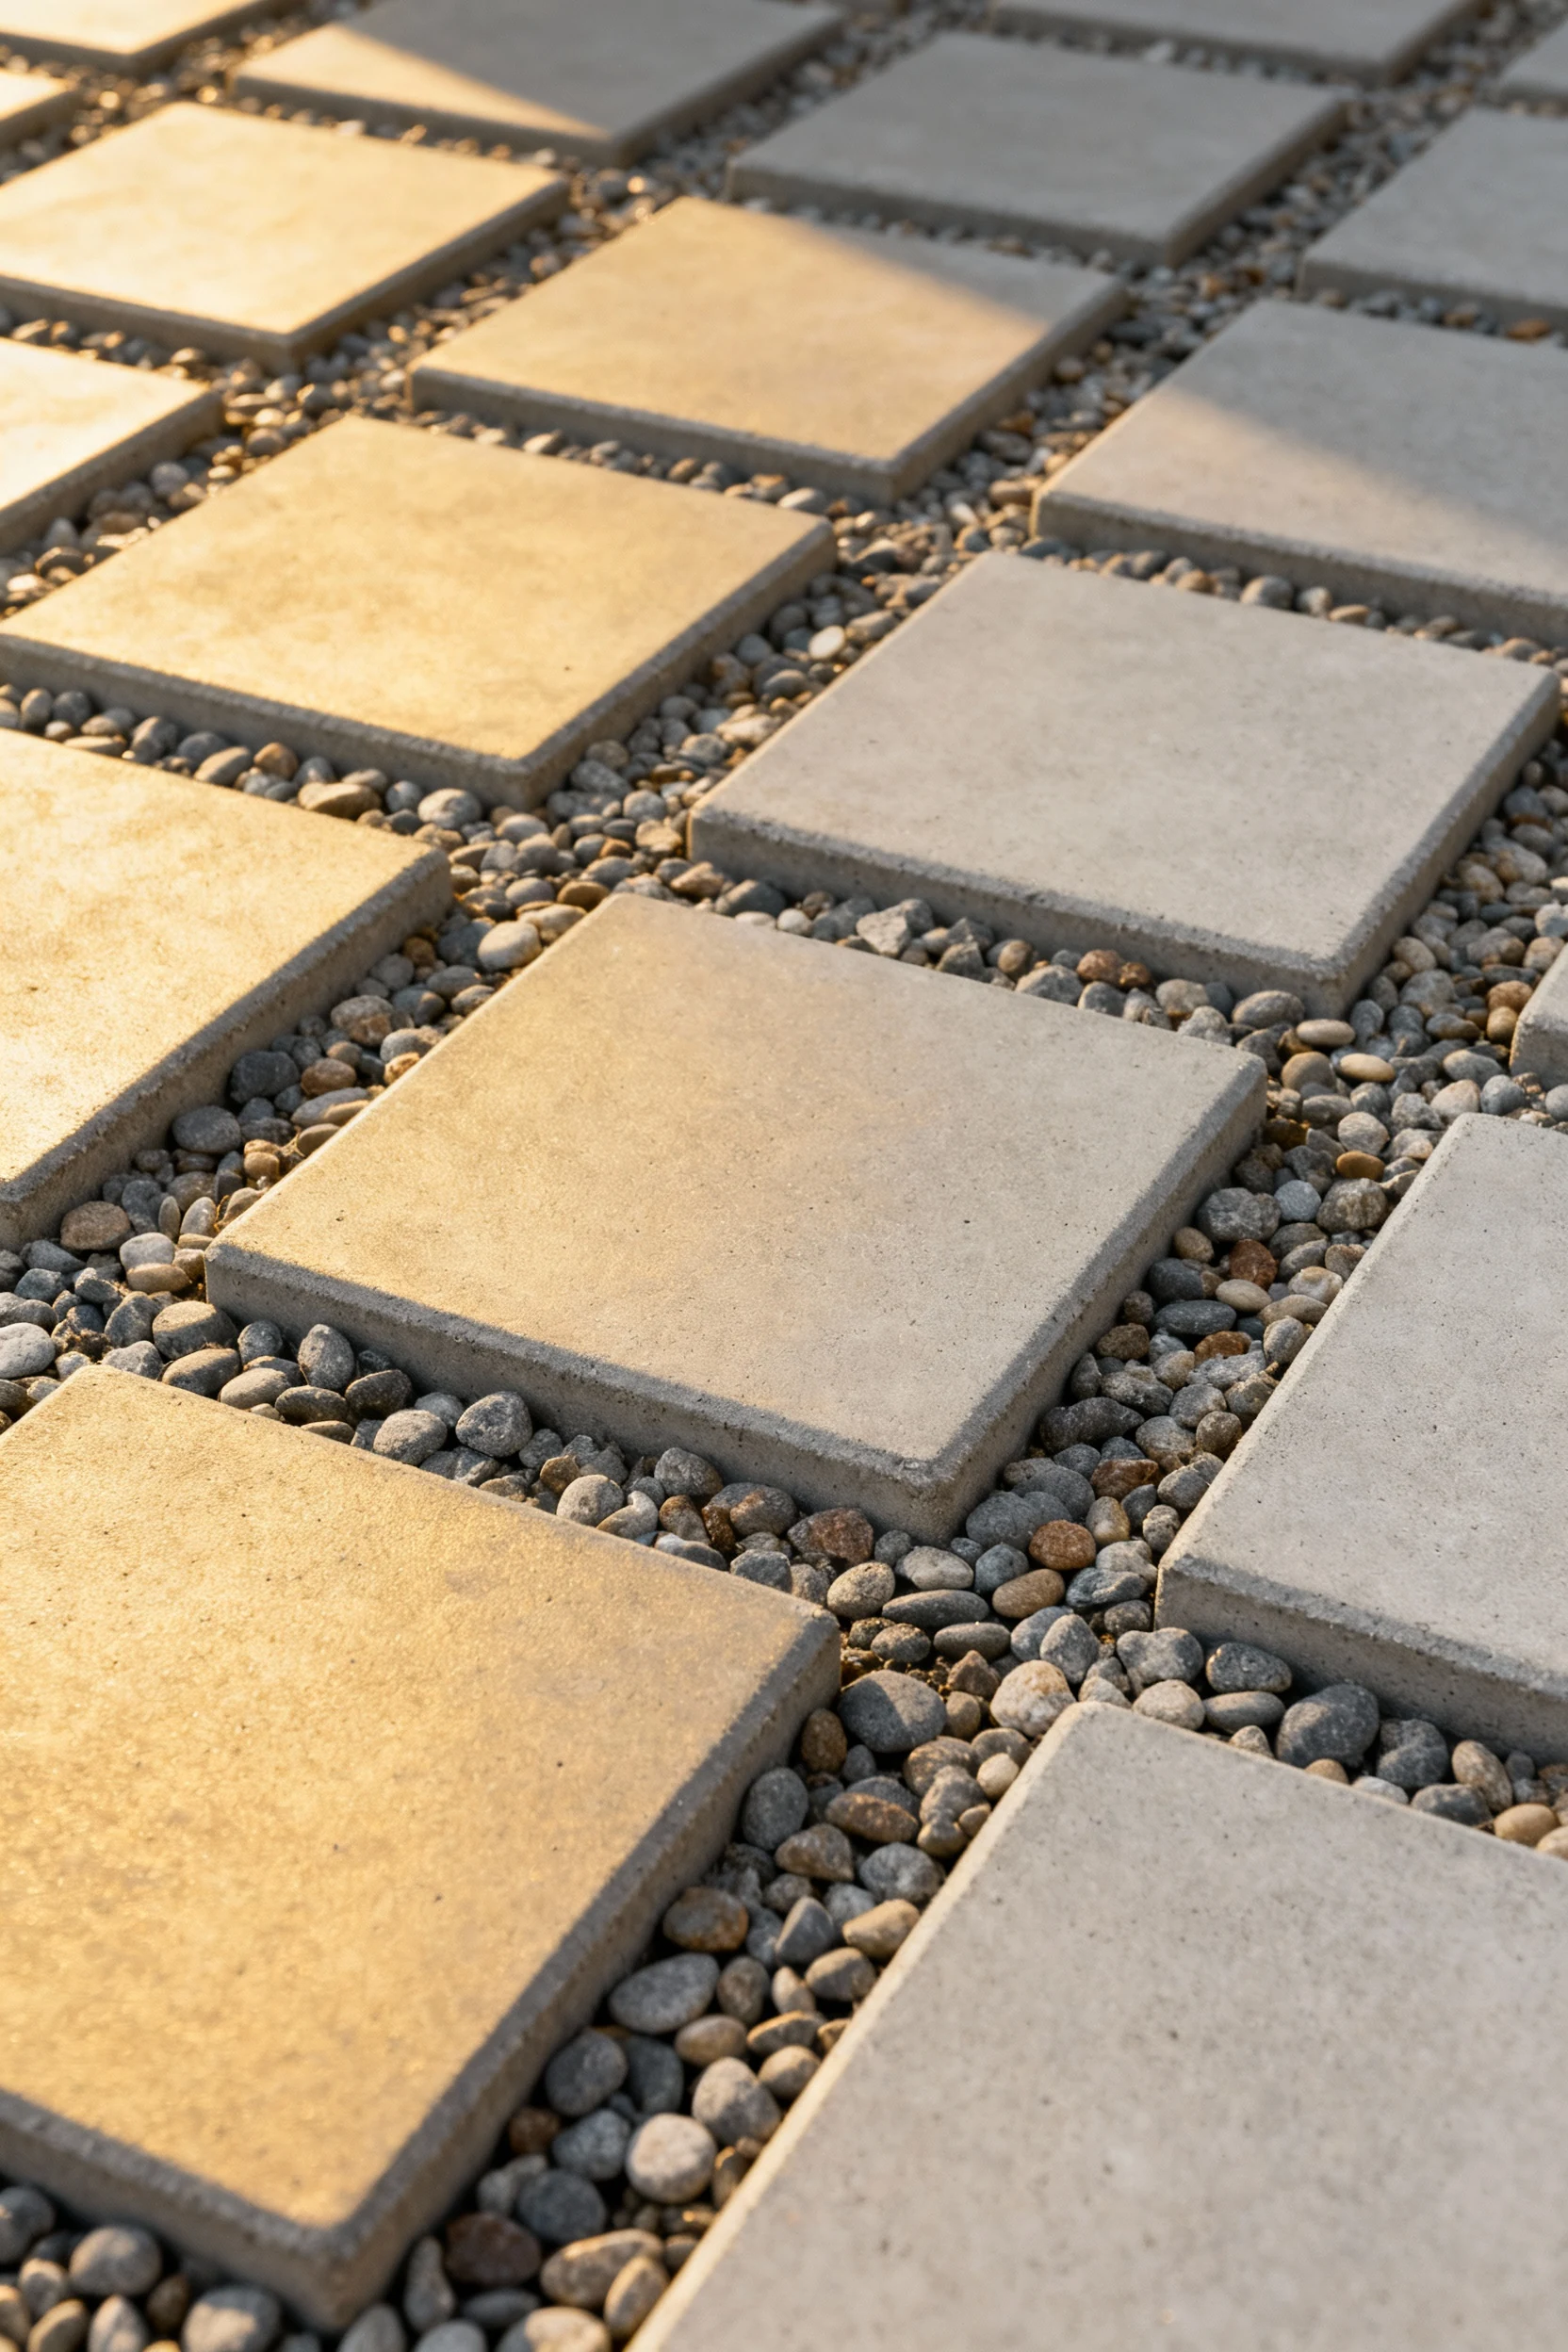
- Oversized concrete stepping pads with gravel joints — Lay 24×24 or 18×18 concrete pavers as a grid and fill spaces with pea gravel. It looks modern, drains well, and you buy fewer pavers. You love the minimal cutting.
- Crazy paving with broken slabs (a.k.a. “urbanite”) — Break old concrete or reclaimed slabs and fit the pieces like a jigsaw. You save a ton, and the organic look suits cottage gardens. Keep joints tight and use a chunky sand base.
- Gravel patio with inset paver stepping stones — Set a handful of pavers flush within a pea gravel field to make stable seating spots. You install fast, and gravel costs peanuts. You rake it occasionally to keep it fresh.
- Interlocking deck tiles over compacted sand — Snap-together wood or composite tiles lay fast on a level base. You cut only the edges. Treat or seal wood tiles annually to keep them handsome.
- DIY poured pavers using reusable molds — Pour concrete into molds for consistent tiles. You tint the mix for a custom vibe. Cure well, then lay on sand like standard pavers.
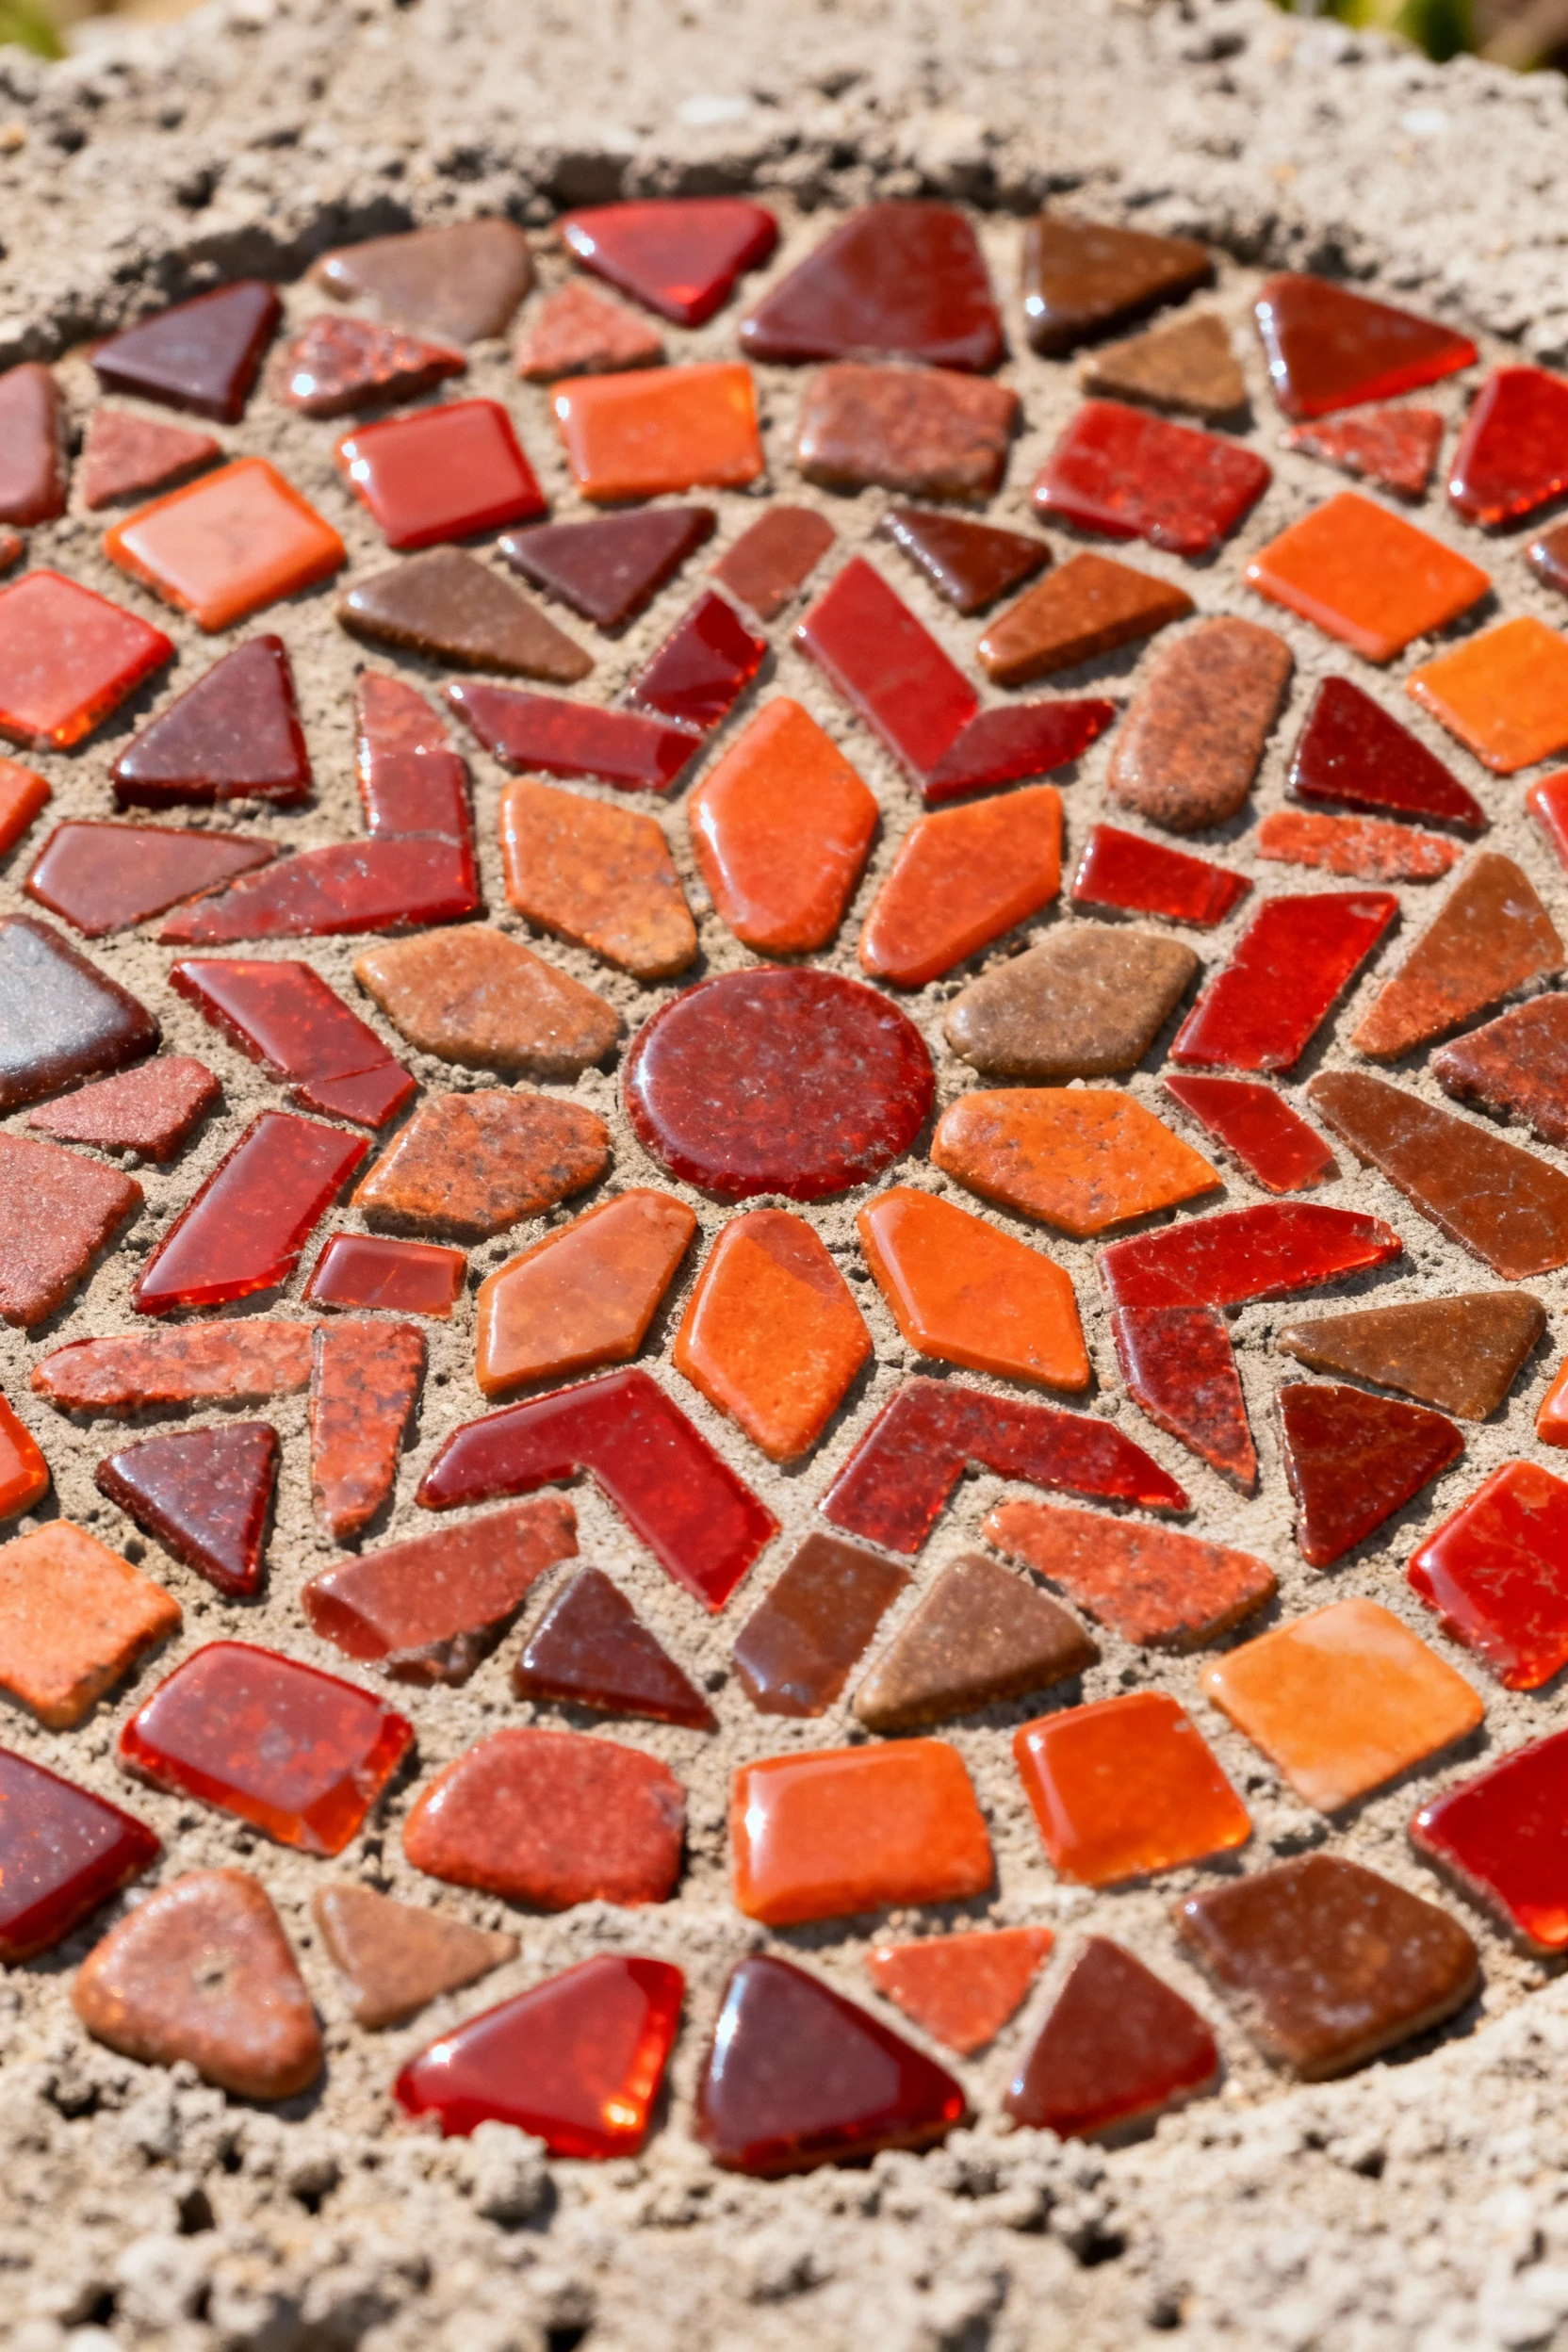
- Pebble mosaic medallions — Press polished pebbles into mortar or concrete to make round accents. You drop one or two into a gravel or paver patio for serious charm. Keep designs simple unless you enjoy squinting.
- Checkerboard pavers with groundcover — Alternate square pavers with low creepers like thyme or Irish moss. You get softness and structure. Water and trim until the plants fill in.
- Stencil-and-stain rescue on an existing slab — Clean the slab, fix cracks, and stencil a geometric motif with concrete stain. You spend way less than replacing it. Seal for longevity and easy cleaning.
- Flagstone look using irregular budget slabs — Mix irregular stepping stones for a natural patio pad. You tuck small pieces in gaps to tighten the layout. Keep edges curved to soften a tiny garden.
- Brick edge with decomposed granite infill — Lay bricks as a neat border and fill the middle with decomposed granite (DG). You get a tidy look without heavy materials. Wet and compact DG for a firm surface.
- Mixed-size “ashlar” pattern with basic concrete pavers — Use three sizes of cheap pavers and repeat a simple layout. It looks custom, but you buy standard stock. You avoid cuts by planning the sequence ahead.
- Mini dining pad plus pathway combo — Lay a small circular or square pad for a bistro set, then connect it with a short paver path. You avoid paving the whole yard. You guide traffic and create purpose.
- Curved patio with small cobbles or blocks — Use small-format pavers to follow gentle curves without cuts. Curves trick the eye and make tiny spaces feel relaxed. Edge with flexible restraints for clean lines.
- Two-level micro terrace — Build a 4–6 inch step with a simple brick riser and paver tops. You add depth without a big footprint. Make levels just large enough for a chair and a plant stand.
Want my top three for speed? Go with the oversized stepping pads, the gravel field with inset stones, or the stencil-and-stain rescue. You finish in a weekend, and your wallet breathes easy.
Patterns and Layout Tricks That Stretch Your Budget
Small patios love bold patterns. You draw the eye, and you hide the “smallness” under rhythm and texture. You don’t need pricey stone to look high-end.
– Herringbone adds energy and disguises uneven cuts. Pair with reclaimed brick for instant character.
– Grid with negative space (pavers plus gravel) screams modern and saves on material.
– Curves soften borders and feel luxurious, especially with small cobbles.
– Diagonal layouts visually widen narrow spaces. You rotate simple squares 45 degrees and call it a day.
Choose the Right Module
You match your paver size to your patio scale. Large pads on a small patio look clean and expensive. Smaller bricks suit winding paths and curved edges.
Color + Texture
You keep colors tight—two tones max. Greys feel modern; warm reds and tans feel cozy. Mix smooth with rough for contrast that pops on a small footprint.
Weekend-Friendly DIY Steps (Without the Headaches)
You want a clear, repeatable process. Here’s the quick blueprint.
- Mark and measure — Paint your outline and confirm square or curve. You check access for materials.
- Excavate — Remove turf and soil to your target depth. You keep the slope consistent.
- Lay sub-base — Add crushed stone and compact in thin lifts. You check level and slope after each pass.
- Add bedding layer — Screed sharp sand to about 1 inch. You avoid walking on screeded areas.
- Lay pavers — Start from a straight edge or center line. You maintain even joints with spacers if needed.
- Edge it — Install plastic or metal edge restraints and stake them tight. You lock the layout before jointing.
- Jointing — Sweep in sand or polymeric sand; for gravel joints, rake and level. You mist polymeric sand lightly to set it.
- Clean and seal (optional) — Rinse, dry, then seal if you want easy maintenance. You choose a matte sealer for a natural look.
Tools You Actually Need
You keep it simple and cheap.
– Shovel, rake, and hand tamper (or a rented plate compactor)
– Straight board and level for screeding
– Rubber mallet for seating pavers
– Angle grinder with diamond blade for occasional cuts (optional)
– Broom, hose, gloves, knee pads (save your knees, seriously)
Budget hack: You borrow what you can, rent what you must, and buy only consumables.
Edging, Accents, and Finishing Touches
Details sell the look. You dress the patio just enough to feel finished.
– Edge restraints keep everything tight. Plastic edging costs little and bends for curves.
– Gravel joints create drainage and vibe. Use pea gravel or 6–10mm chippings.
– Banding courses add contrast—one row of darker pavers around the edge looks custom.
– Mosaic inserts lift a plain patio—one circle of pebbles or different bricks feels boutique.
– Planter integration defines edges. You tuck pots along borders to frame the space.
– Lighting changes everything. Solar spikes or string lights turn “budget” into “romantic.”
Comfort on the Cheap
You anchor with a small rug, a compact table, and two chairs. You add a foldable bench if you host. You use vertical elements—trellis, wall planters—to draw the eye up and make the patio feel bigger.
Maintenance That Doesn’t Eat Your Weekend
You keep it simple, because you want to relax on your patio, not serve it.
– Weeds — Use polymeric sand or gravel joints; spot-treat with vinegar or pull early.
– Settling — Top up joints and re-tamp edges yearly if needed. Small patios make fixes quick.
– Stains — Seal concrete and brick; scrub with mild detergent. Avoid harsh chemicals around plants.
– Moss — Let it grow in shady cottage vibes or brush it off if you want clean lines. IMO, a little moss looks charming.
FAQ
How much does a small DIY patio cost?
You can build a 6×8 to 8×10 foot patio for a few hundred dollars with budget pavers or gravel. Reclaimed materials trim that even more. You spend more on base materials than you think, but you get durability that pays off.
Do I need a plate compactor?
You don’t strictly need one for tiny patios, but you speed up the job and get a firmer base if you rent one. A hand tamper works for very small pads and paths. If your soil stays soft, you rent—no debate.
How deep should I dig?
You aim for 4–6 inches below final grade for small patios. That covers 3–4 inches of sub-base and 1 inch of sand, plus the paver thickness. You adjust if you use gravel instead of pavers.
Can I lay pavers over an existing slab?
Yes, if the slab sits level and drains. You use a thin bedding layer or place pavers with adhesive rated for exterior use. Stencil-and-stain gives a cheaper refresh if the slab stays structurally sound.
How do I stop weeds between pavers?
You build a solid base, use polymeric sand, and keep edges tight. You sweep and rinse occasionally to remove debris that invites seeds. For gravel joints, you rake and top up as needed.
What’s the easiest weekend project for beginners?
You start with a gravel patio plus inset stepping stones. It lays quickly, drains well, and forgives small mistakes. Oversized stepping pads with gravel joints tie for first place, FYI.
Conclusion
You don’t need a giant budget or a giant yard to build a patio you love. You need smart planning, a solid base, and one of these 15 ideas that fits your space and vibe. Pick your favorite, prep well, and lay like you mean it—your small garden will look bigger, better, and a lot more “you” by the end of the weekend.